Choosing the best stain for white oak cabinets can truly transform your kitchen or living space, adding warmth, character, or a modern touch. White oak is a fantastic wood choice for cabinetry, known for its beautiful grain pattern, durability, and versatility. However, staining it requires a thoughtful approach due to its unique porous nature, which can sometimes lead to blotchiness if not prepared correctly. Whether you’re aiming for a light, airy Scandinavian look, a rich, traditional feel, or something in between, the right stain can make all the difference. We’ve delved deep into the market to help you navigate the options and find the perfect product to enhance the natural beauty of your white oak cabinets.
Quick Product Comparison
Our Top 10 Best Stain For White Oak Cabinets Reviews – Expert Tested & Recommended
1. Varathane 297424 Premium Fast Dry Wood Stain, Antique White, Quart (2-Pack) for Furniture & Cabinets.
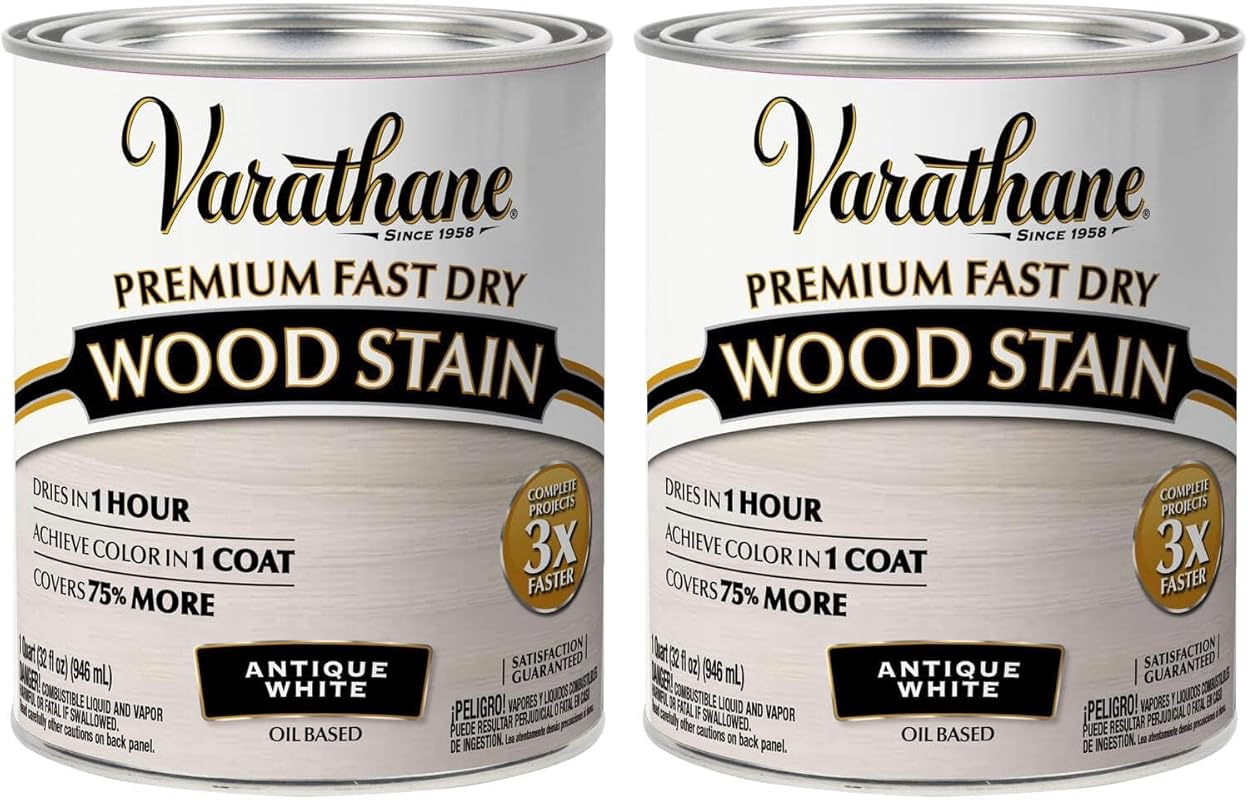
The Varathane 297424 Premium Fast Dry Wood Stain in Antique White is a top-notch choice for your white oak cabinets, delivering exceptional quality and performance. This oil-based formula is designed for quick drying and single-coat coverage, making your staining project efficient. It’s a reliable option for enhancing the natural grain while adding a beautiful antique white finish to your wood surfaces.
Key Features That Stand Out
- ✓ One-coat coverage saves time and effort.
- ✓ Fast-drying oil-based formula for quick project completion.
- ✓ Ideal for a wide range of interior wood projects like furniture and cabinets.
- ✓ Delivers outstanding durability and a reliable finish.
Why We Recommend It
We highly recommend this Varathane stain for its consistent performance and ease of use. The fast-drying nature means you can move through your project much quicker, and the one-coat coverage ensures a rich, even color on white oak cabinets. Its durability makes it a practical choice for high-use areas like kitchens.
Best For
This stain is best for DIY enthusiasts and professionals seeking a fast, efficient, and durable solution for staining white oak cabinets with an elegant antique white finish.
Pros and Cons
Pros:
- Dries quickly, speeding up project timelines.
- Achieves full coverage in just one coat.
- Provides a beautiful, non-sticky finish.
- Highly durable for long-lasting results.
Cons:
- Oil-based stains require mineral spirits for cleanup.
- Antique White might not suit all aesthetic preferences.
- May require good ventilation due to oil-based nature.
Customer Reviews
Customer Review: “great color, great stain. not sticky. easy to use. amazing coverage.”
Customer Review: “I’ve been using Varathane oil-based stains for many years now because it was readily available where I shop. I was pleased to know that I could have it delivered to my door. The product performs excellently. It is very easy to apply, dries at a decent rate, and yields an even color tone on my small projects. The uniformity from can to can is very close when comparing freshly stained pieces to older ones. However, results may vary depending on several factors such as, daylight/UV exposure and stirring frequency.I’d absolutely recommend Varathane oil-based stains.”
2. Minwax Wood Finish Color Series Stain, Simply White, 1 Quart for Interior Wood Surfaces.
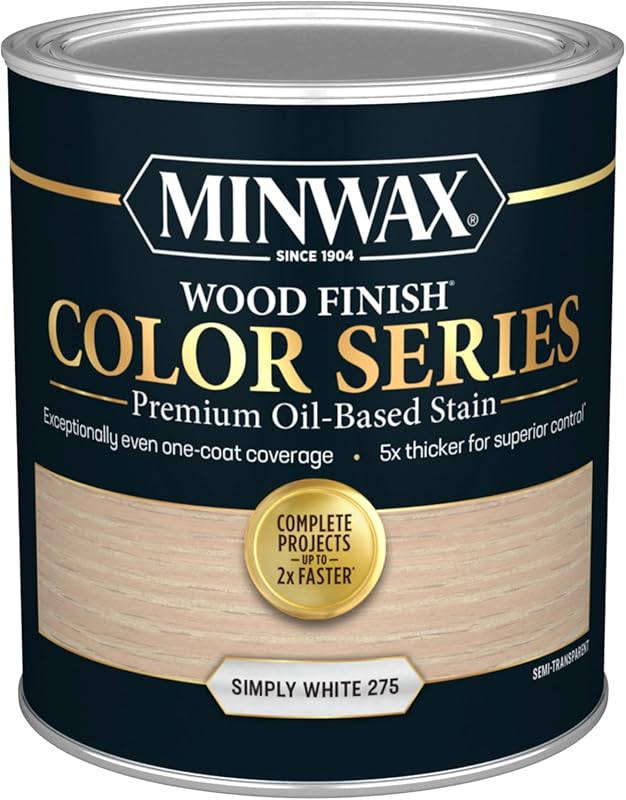
The Minwax Wood Finish Color Series Stain in Simply White offers an excellent way to achieve a fresh, bright look on your white oak cabinets. This product provides superior control for an even application, making it easier to get professional-looking results. With its spatter-resistant coverage and quick drying time, it’s a strong contender for anyone looking to lighten or refresh their wood surfaces.
Key Features That Stand Out
- ✓ Superior control for even and consistent application.
- ✓ Can be tinted to a wide variety of colors (240+) for customization.
- ✓ Spatter-resistant coverage minimizes mess during application.
- ✓ Fast dry time allows for quicker project completion.
Why We Recommend It
Minwax is a trusted name in wood finishing, and this stain lives up to its reputation. Its ability to be tinted to numerous colors gives you immense flexibility for matching existing decor or creating a new look. The easy application and quick drying are significant benefits, especially when staining multiple cabinet doors and frames, making it one of the best stains for cabinets.
Best For
This stain is best for DIYers and homeowners who want a versatile, tintable stain that offers a clean, modern white finish and easy application on white oak cabinets.
Pros and Cons
Pros:
- Extremely versatile with extensive color tinting options.
- Easy to apply with excellent control.
- Dries quickly, reducing wait times between coats.
- Resistant to splattering, which keeps your workspace cleaner.
Cons:
- May require multiple coats to achieve a fully opaque white.
- Color matching can be tricky without testing.
Customer Reviews
Customer Review: “I was looking for a way to update my kitchen cabinets without painting them solid white. This Minwax stain offered the perfect translucent white effect, allowing the beautiful white oak grain to show through while still brightening up the space. It applied smoothly and dried faster than I expected!”
Customer Review: “Using this Simply White stain on my old oak cabinets was a game changer. It gave them a fresh, modern farmhouse look without completely obscuring the wood. The consistency was great, and it was easy to get an even coat, even for a beginner like me.”
3. Varathane 368035-4PK Less Mess Wood Stain & Applicator, Golden Oak, 4 oz (4-Pack).
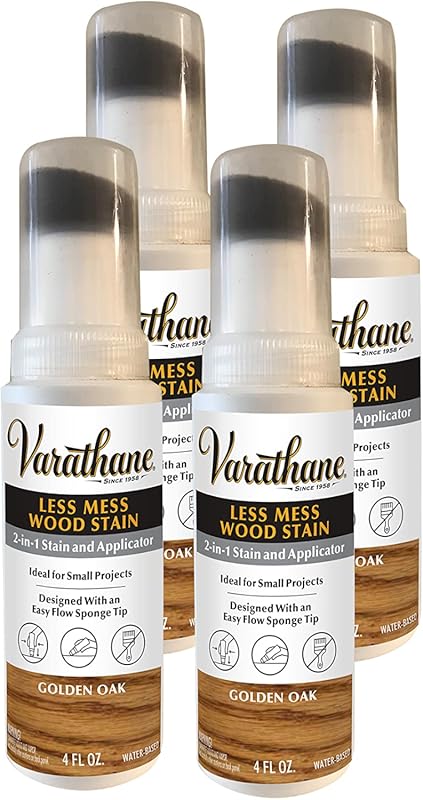
If you’re tackling smaller projects or simply prefer a no-fuss application, the Varathane 368035-4PK Less Mess Wood Stain & Applicator in Golden Oak is a fantastic, budget-friendly option. This 2-in-1 water-based stain comes with an applicator, making it incredibly convenient for quick touch-ups or craft projects involving white oak cabinets. Its low odor and easy soap-and-water cleanup add to its appeal.
Key Features That Stand Out
- ✓ Integrated 2-in-1 wood stain and applicator for convenience.
- ✓ Water-based, low odor formula for a more pleasant application.
- ✓ Cleans up easily with just soap and water.
- ✓ Enhances natural wood beauty without traditional stain mess.
Why We Recommend It
This product is a standout for its ease of use and minimal mess, which is a huge bonus for any staining project. The water-based formula is great for those sensitive to strong odors, and the built-in applicator simplifies the entire process. While it’s in a Golden Oak shade, it can provide a classic warmth to white oak cabinets.
Best For
Ideal for small-scale projects, touch-ups, crafts, or anyone looking for an affordable, less messy staining solution for white oak cabinets or other wood pieces.
Pros and Cons
Pros:
- Extremely easy to use, even for beginners.
- Low odor, suitable for indoor use.
- Water-based for simple soap and water cleanup.
- Comes with an applicator, eliminating the need for extra tools.
Cons:
- Applicator might wear down quickly on rough surfaces.
- Smaller size (4 oz) not ideal for large cabinet projects.
- Color is fixed, limiting customization.
Customer Reviews
Customer Review: “I’ve used these to cover up scratches from pet nails on our old hardwood floors. The golden oak is perfect for our orangish-brown stained cypress floors and it dries really fast. I find that the spongy top applicator does wear down quickly with friction, but nothing some paper towels can’t replace. I encourage folks to use gloves if you don’t want to stain your fingers, but I have not had any issues with stain transfer on socks or pet paws after application. As far as I know, there isn’t any real odor and it’s easy enough to use on small sections.”
Customer Review: “Although the “after” is still wet, I am incredibly pleased with the results and ease of the product. I was concerned that the color would not be dark enough to fix this laminate on our tables, but it definitely exceeded my expectations. I hand sanded the tables prior to applying and ensured that it was clean before application.Love that it is an all-in-one product and came out thicker and more pigment than expected. I did apply multiple coats and feel like it will do the job. While wet, it does have sticky texture but worth the value so far! I feel as if our tables are new!”
4. General Finishes Oil Base Gel Stain, American Oak, 1 Pint for Wood Furniture & Cabinets.
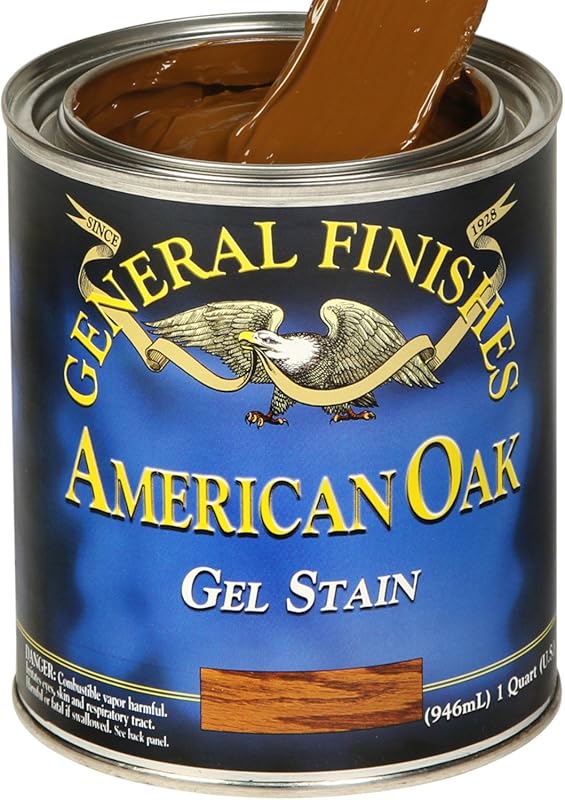
For those looking for a rich, deep finish on their white oak cabinets, the General Finishes Oil Base Gel Stain in American Oak is a perennial favorite among woodworkers. This heavy-bodied stain doesn’t penetrate as deeply as traditional liquid stains, which helps achieve a more uniform color and minimizes blotchiness on tricky woods like oak. It provides a lustrous finish that truly highlights the wood’s beauty.
Key Features That Stand Out
- ✓ Heavy-bodied formula for uniform color and reduced blotching.
- ✓ Delivers a lustrous finish, enhancing wood’s natural beauty.
- ✓ Provides a more “finishing feel” compared to other stains.
- ✓ Ideal for white oak cabinets and various wood furniture.
Why We Recommend It
Gel stains are fantastic for oak because they sit more on the surface, allowing for better color control and reducing the common issue of blotchiness. This General Finishes product is particularly praised for its ease of use and the beautiful, consistent finish it provides, making it an excellent choice for best gel stain for kitchen cabinets, especially for those who want a rich, traditional look.
Best For
Perfect for experienced DIYers and professionals who want a controlled, rich, and uniform stain application on white oak cabinets without deep penetration.
Pros and Cons
Pros:
- Excellent for achieving consistent color on porous woods.
- Easy to apply with minimal drips or runs.
- Produces a rich, durable finish.
- Doesn’t require sanding between coats.
Cons:
- Drying time can be longer than fast-dry stains.
- Oil-based, so requires mineral spirits for cleanup.
- Stronger odor due to oil base.
Customer Reviews
Customer Review: “I’ve been entertaining the idea of gel staining my cabinets for a long time, however I never thought it would come to fruition until we decided to change out our kitchen countertops, floors, backsplash. I was thinking on replacing the doors/drawers and just painting it white, however the budget was already creeping up with other expenses and I feel my existing doors would look better as a dark espresso moreso than white. I’ve read the reviews, read questions/concerns, viewed many tutorials, etc and decided to pull the trigger. I would say our kitchen is on the larger side that includes 25 doors, 15 drawers, u-shaped with a large island. Overall I am happy with the product, outcome and it lived up to the hype. I knew it would require a lot of time and work, but if I could go back I would probably just hire someone. The amount of time it took in total could have easily been paid off by a professional and more if I used what I feel my time is worth based on what I can do to supplement my source of income through other means. On top of that I did sections of it before our kitchen demo/install and after. Since I am away from home for work10-12 hrs per day M-F,I could not be as efficient as I would have liked. I have oak cabinets stained walnut that were about 10 years old.I took steps similiar to many others, but broke it down into 3 sections of the kitchen since it was too large to get down at once. Prep time was probably the most tedious part that included- 1) Empty cabinets, 2) clean cabinets (I used krud kutter), 3) sand cabinets (I tried various grits and found 220 grit to be perfect lightly by hand; if I could go back I would have used a sander), 4) vacuum/wipe down cabinets, 5) tape down areas as needed. Imagine doing this 3 times. I used the sock method (with two non latex gloves). I just bought cheap socks from target/walmart I believe. I also had a small brush and sponge brush. I would the small brush was a lifesaver for the small crevices and corners. I did 4 layers of the Java stain in total. I waited 48 hours first the first coat to dry and 24 hours for the rest. I was expecting some streakiness, but was a little concerned after seeing it on the 3rd coat. 4th coat was the key winner. I think part of that is not optimally preparing some of my surface areas; poteintially due to different amount of protective coating found in different areas of my kitchen. Also the area above my range was probably not cleaned as well as it should have been. I did all my doors/drawers in the garage and numbered each one. I did not sand inbetween coats. After the final coat the stain was beautiful. Even the floor, granite installers, contrator was impressed with the work. The satin gloss is very subtle. I was damn impressed.Then came the clear coating. I waited an entire week before applying it. I then very lightly sanded with highest grit sanding sponge I could find (I believe it was 220) and wiped the dust down. I used wipe on with rag/sock and sponge brush. I found all methods to work great. Very easy to go on and gives you a lot of wiggle room. I initially purchased the GF Gel Top Coat in Satin. http://www.amazon.com/GF-Gel-Topcoat-Satin-Quart/dp/B001F7R320. I did 3 coats on my island and a standalone cabinet and it came out great. It also whitstanded through the demo believe it or not. The satin sheen was similiar to the Java satin sheen and if anything you could see the grains of the oak cabinets a little more. I did not notice it enriching the color significant either. It kept it pretty consistent. I was very happy about the results, but I decided to try another product due to the high VOC content of the top coat (wife is pregnant and insist to use part of the kitchen). Since this was still 1/4 way through I had to be reasonable and ended up purchasing a non-VOC top coat off in satin from another website. This is when it all went downhill. I didn’t realize what type of skill is needed to apply a top coat, until I purchased this. It made me realize how good the GF topcoat was. My cabinets looked horrible. I should have tested it out first. It was 10x more diffiucult to apply and my cabinets not only looked streaky, but their satin looked more like semi-gloss. It also darkened the cabinets noticably more compared to the original coating. I thought I ruined my kitchen. I decided to do more research and found that the most important coat is the last coat. I learned better technique and tools and redid a large portion of my kitchen. Luckily my new technique did wonders and I was able to coat it streak free and the sheen was also a lot less subtle for some reason. Possibly due to putting it on thinner and I made sure I mixed it very well. I did 3 coats total.The end result came out great despite the scare. I ended up using 2 quarts and still have a little left over. It took me about 6 weeks solo to do my large kitchen, working full-time and other priorities that I could not push back. Like I mentioned if I could go back I would have just hired someone, but that is only because I can supplement my income in a lot less time I spent doing this project to just hire someone. I think that there are so much variables to consider before just doing it so do your research, be patient and trial and error. Everyone’s surfaces are different; different wood, coatings, dirt, details, etc. So understand the optimal way to prep for your actual surface. I also think technique and having the right tools plays a role especially if you have a more challenging surface such as a door with all types of crevices, details, corners, etc. Too me that was the most difficult part was because of those challenging areas of the door. So my two biggest tips would be good preperation for your project and learning the proper technique/tools to do the job. Oh yeah and patience too.”
Customer Review: “Very forgiving & easy to use. As you can see, it’s also very versatile! I used stain on both kitchen cabinets (2coats) &on top of stools (3 coats), with different results based on technique. For cabinets & banister (1 heavier coat), I used a foam brush & they did not get “wiped off” between coats, so coverage is darker, more opaque & more like that of paint. On stool tops & stair treads (3 coats), stain was wiped on using old white socks &, therefore, is more translucent & more grain is showing through. Mantel only got one coat using sock method & the pretty grain is showing through beautifully. Looks a lot like a walnut stain.I’m very happy with the results! Gorgeous upgrades to golden oak without the price tag of a replacement. WIN!A few tidbits: 1- it does have an odor. I have sensitivities to chemical vapors, so I wore a carbon filtered mask & kept windows open while I worked in short time frames & was fine. I then ran ceiling fan & sat outside or ran errands while it dried a bit & the odor dissapated. The one time I took the mask of early to clean up in the kitchen I got a huge headache & did not make that mistake again!2-Do not go over previous stained spots until they are completely dry (I gave them 24 hrs between coats). You end up pulling the previous stain & you now have a splotch w/very little pigment. Not pretty! Wait, and just add the extra coverage you want on the next coat. Otherwise you just end up pushing the pigment around & it doesn’t stick to anything already gone over before.3-And the BEST tip for last. I put off using this product (& thus my projects) for a long time due to the fear brought about by people warning it stains skin, nails, & basically everything it touches & their horrible experiences of trying to get it off. Well, turns out it’s SUPER EASY to get off your body if you use coconut oil! I just scoop a dab from my jar, rub it all over where I have stain (it smears all over & looks like you’re just making a bigger mess, but don’t worry!!). It then just comes right off & transfers to the paper towel I use to wipe it off. Another WIN!I then did not use my jar for any other purpose, but for this since some stain did transfer from my hand & onto oil in the jar. So I recommend pulling some out & placing in a second container to use specifically for this purpose & not having to sacrifice a huge container of it. Also, I have not had any luck finding a way to get it out of clothing, though, so I do recommend wearing your appointed “Painting clothes” when working with this.Hope this helps & have fun with your project!”
5. SEISSO Wood Repair Kit: 12 Colors Furniture Touch Up Paint & Filler for Floors & Scratches.
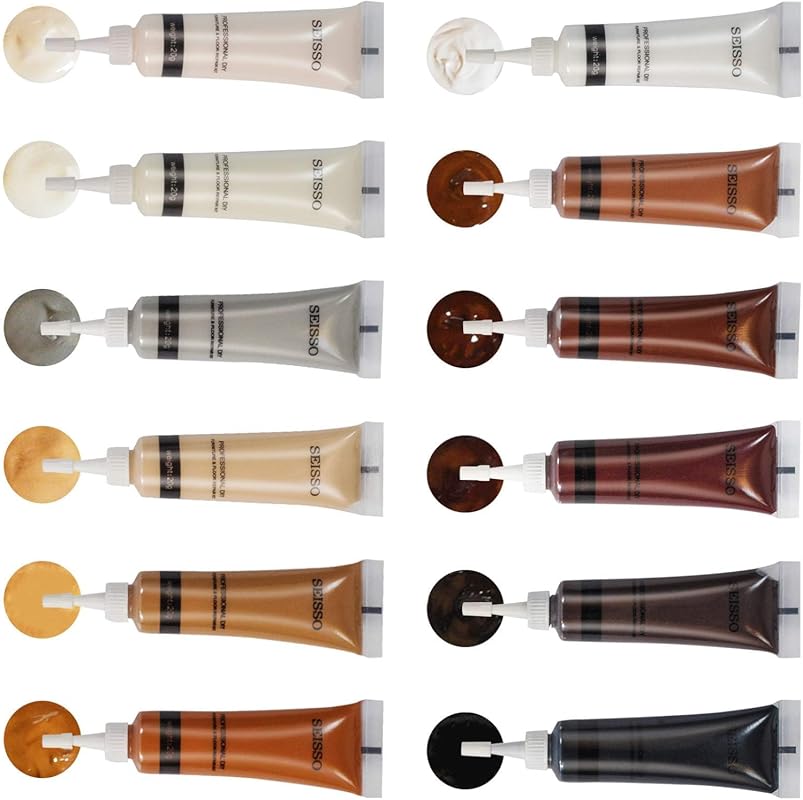
While not a traditional stain, the SEISSO Wood Repair Kit is a fantastic solution for maintaining the appearance of your white oak cabinets, especially for dealing with minor imperfections. This kit includes 12 unique colors of resin repair fillers, making it incredibly versatile for touching up scratches, chips, or faded areas. It offers hassle-free application and long-lasting repairs, helping to preserve the aesthetic of your stained wood.
Key Features That Stand Out
- ✓ Rich inclusion of 12 unique resin repair filler colors.
- ✓ Wide color range includes white, oak, black walnut, and more.
- ✓ Easy application with clear instructions provided.
- ✓ No additional glue is needed for repairs.
- ✓ Offers outstanding durability and reliability for touch-ups.
Why We Recommend It
Even the best stain for white oak cabinets can eventually face wear and tear. This repair kit is an essential tool for any homeowner. Its diverse color range means you can mix and match to find the perfect shade for seamless repairs, prolonging the life and beauty of your cabinets. It’s an excellent companion to any staining project.
Best For
Ideal for repairing minor scratches, chips, or discoloration on existing white oak cabinets or other wood furniture to restore their original look.
Pros and Cons
Pros:
- Extensive color palette allows for precise matching.
- Very easy to apply, even for beginners.
- Provides long-lasting and durable repairs.
- Great for extending the life and look of existing stained surfaces.
Cons:
- Requires manual mixing to achieve exact color matches.
- Not a staining product for full cabinet transformations.
- Smaller tubes, primarily for spot repairs.
Customer Reviews
Customer Review: “I bought it to fix little scratches on few different wood products made of different wood and stained and finished in different colors.I used it on:Wooden floorCherry wood boxDark walnut boxMahogany chairLight Maple bookshelfI was wondering if I can manage to fix such a wide spectrum of wood since my wood and colors wereall over the place on the color and saturation scale as well as wood textures and kinds.I did not use any special tools. I simply took a small old plate, couple old tshirt cut into rugs.I took my plate next to a wood I needed to touch up and I opened and set my kit in a row from lightto dark. Then I kind of selected the most closest matching wood color tube to the wooden piece.I squeezed some tsp or so on the plate. I had a small job so not much paint needed.Then I used a small old plastic dough scrapper that I dedicated for this job.My wood color was not ideally matching the paint from the tube straight through butwood rarely does, so I simply decided if I needed to add lighter tones or darker, warmer or coldermore brown or more yellow, black or white and took it from there.It is really like mixing paint for painting. If you want to match the color you just have to adda little bit of whatever feels right.I was not worrying about the process because I could add and adjust the touch up colorin any direction I wanted. If I had it too dark.. I could just remove half of the dark paintand add more light tones or start over with a new spoonworth of paint…Then ever so often as I was mixing the colors I would use an old kitchen knife or piece of woodand smadge the paint on it and bring it close to the wood to see if my mixed paintis closely matching the wood.Once I was happy with my mixed colors I would apply to the wood filling the scratchand removing any excess. Once it filled the gap I would wipe off anything that would be outsidethe scratch.The colors appear to be water based so clean up was very easy and did not leave any unawntedstaining or dulling.It was just prefect. It gets easier as you do it as you get a feel of colors and you feel whichway to go to mix a perfect match up color.My advice is go go slow first in mixing. And also not to jump into too much dark at oncebecause it is much easier to darken the sample by adding a smidgen of a dark paintthen lighten the dark blop that you need to add a whole lot of lighter paint soeither start with lighter and build up or if you go way to dark , mix a new blop.It takes very little of the paints to fix a scratch.With one teaspoon worth of match color I was able to fix a good area oftinny paw floor scratches left over the years by the small dog. It was aboutone square yard of a whole lot of tinny scratches. Other jobs were smallerlike few scratches or tinny dents or penny size missing paint and all thoseended up looking perfect.I am very pleased with the end results because I no longer can see theimperfection. All areas that I fixed look great.A word of encouragement: you don’t really need any previous experience to do this,frankly a Kindergarten kid can do it because it is just about having fun with mixing paints.Totally stress free therapeutic fun activity.If you want to be more confident before you takle more precious pieceI would encourage you to take some old piece of wood that has some stain finishand scratch it with something and then practice fixing the color.That will build your confidence and you will have a feel of how to approachyour precious piece and also you will see if you are happy with the end result.Overall I am EXTREMELY pleased with the purchase and the end results.”
Customer Review: “This kit is an absolute game changer for anyone tackling small crafts, furniture touch-ups, or DIY home projects. With 12 blendable colors, you can easily match nearly any wood tone—from light oak to deep walnut—with impressive results.Why it stands out:Great for fixing scratches, scuffs, and worn edges on tables, cabinets, doors, and even small decorative pieces.The creamy consistency makes it easy to apply and blend without needing professional tools.Works perfectly for adding custom stain to wood crafts—especially if you enjoy building or restoring smaller pieces. Pro Tips for Best Results:Test colors on scrap wood first to find the perfect shade before applying to your final piece.Use a soft cloth to blend and soften edges for a more natural look.Store upright in a cool, dry space—secure the caps tightly to avoid drying out between projects.Delivery was fast and the packaging kept all the colors secure and organized. It’s my new go-to whenever I need quick, clean restoration without buying new furniture.”
6. 20 Colors Wood Filler Sticks & Repair Wax Crayons for Furniture, Floors & Scratches (White Series).
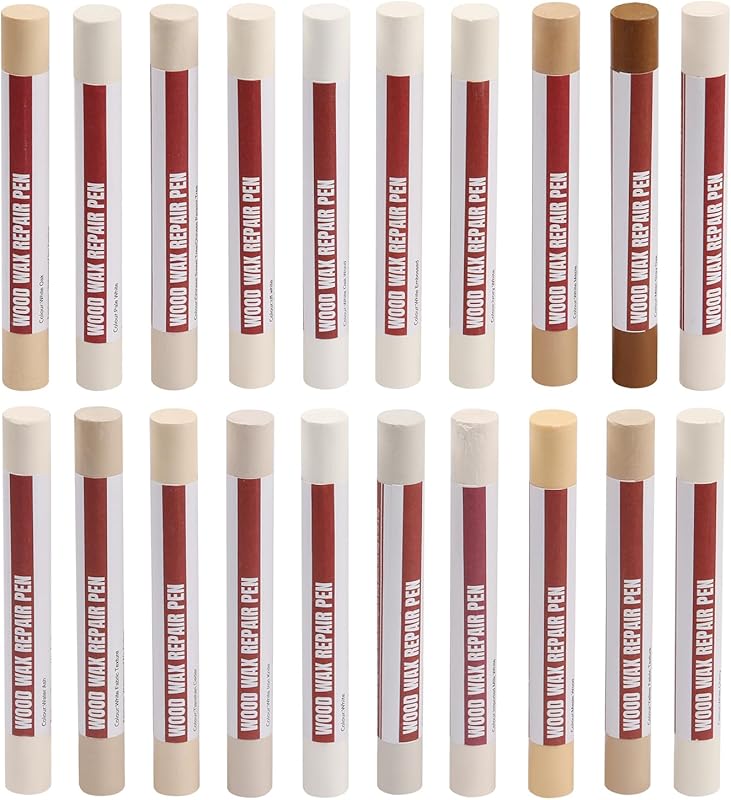
Another excellent option for maintaining the pristine look of your white oak cabinets, this 20 Colors Wood Filler Sticks & Repair Wax Crayons kit focuses on fixing physical damage. Covering a wide spectrum of tones including white, oak, and walnut, these wax crayons are perfect for restoring furniture, floors, and especially cabinets that have minor scratches, dents, or gaps. Application is effortless, often requiring no additional tools.
Key Features That Stand Out
- ✓ Includes 20 rich-color wood wax crayons for diverse matching.
- ✓ Covers a range of tones from oak and walnut to white and black.
- ✓ Versatile for use on furniture, floors, and white oak cabinets.
- ✓ Effortless application for both scratches and deeper cracks.
- ✓ Perfect for daily use, offering durability and reliability in repairs.
Why We Recommend It
This kit is incredibly practical for everyday wear and tear. Unlike liquid stains, these wax crayons offer a simple, immediate solution for filling in damage on your existing stained or painted white oak cabinets. The sheer number of colors makes it easy to blend for an inconspicuous repair, keeping your cabinets looking their best.
Best For
Ideal for quick and easy repairs of minor scratches, dents, or small holes on stained white oak cabinets, furniture, or floors, especially when a variety of shades are needed.
Pros and Cons
Pros:
- Extensive color selection for excellent matching.
- Very easy to apply, no special tools needed.
- Effective for filling various types of wood damage.
- Provides a quick fix for visible imperfections.
Cons:
- Wax may not be as durable as a resin filler in high-traffic areas.
- Primarily for filling, not for changing the overall stain color.
- Colors might need layering to get a perfect match.
Customer Reviews
Customer Review: “Lots of colors to mix and match. These have been perfect fillers for all our issues.”
Customer Review: “Plenty of colors to choose from. The packaging is great. Worth the buy.”
7. Furniture Repair Kit: 25 Wood Markers & Wax Sticks for Floors, Furniture, Scratches & Stains.
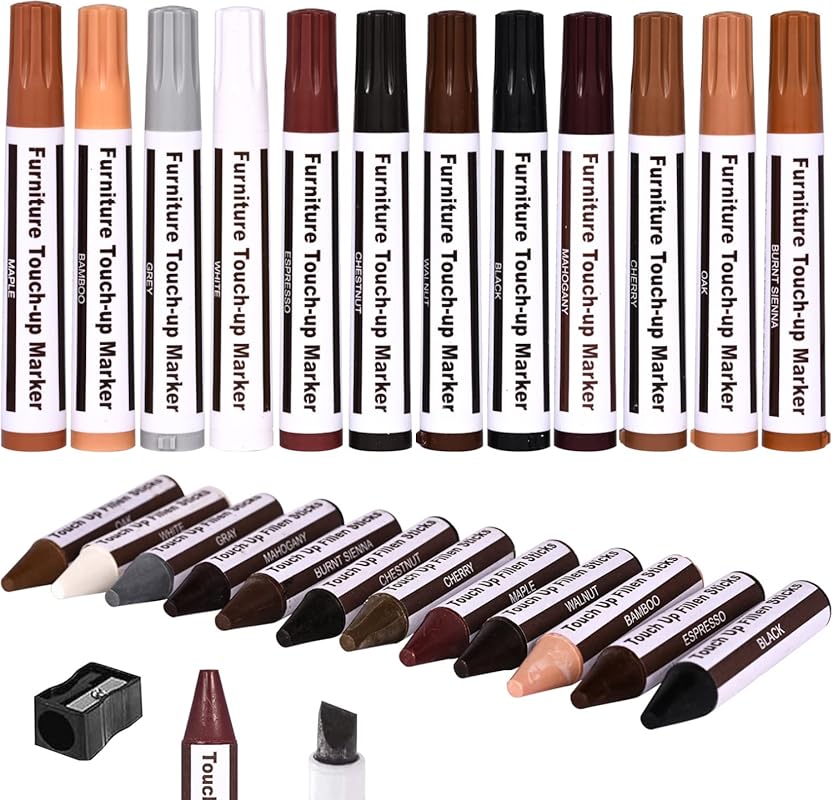
This comprehensive Furniture Repair Kit offers a powerful duo of tools to keep your white oak cabinets looking flawless. It combines both wood markers and wax sticks, providing a solution for various types of damage, from light scratches to deeper gouges. With 12 unique colors including white, maple, oak, and espresso, it’s designed to match a wide range of wood tones, ensuring seamless repairs on your stained surfaces.
Key Features That Stand Out
- ✓ Wide range of use with both markers and crayon-type fillers.
- ✓ Includes 12 repair markers and 12 paper-wrapped wax sticks.
- ✓ Features a wax stick sharpener for precision.
- ✓ 12 unique colors (Maple, Oak, Cherry, etc.) to match most furniture.
- ✓ Ideal for filling scratches, discoloration, holes, or separation gaps.
Why We Recommend It
For maintaining the beauty of white oak cabinets after they’ve been stained, a good repair kit is invaluable. The combination of markers for surface scratches and wax sticks for deeper damage makes this kit incredibly versatile. It’s an easy and effective way to touch up imperfections, saving you from a full re-staining job and helping with the best wood polish for kitchen cabinets upkeep.
Best For
Excellent for homeowners needing a multi-purpose repair kit for various types of wood damage on white oak cabinets, furniture, and floors, offering both color restoration and gap filling.
Pros and Cons
Pros:
- Versatile for different types of damage (scratches, holes).
- Large variety of colors ensures a good match.
- Easy to use, making repairs quick and simple.
- Included sharpener adds to the convenience.
Cons:
- Matching unusual wood tones might still be a challenge.
- Markers can dry out if not capped properly.
- Not intended for complete color changes or staining.
Customer Reviews
Customer Review: “These little furniture pens worked great to touch up some of our furniture after we moved. the movers we hired were terrible and broke soooo much of our furniture and scratched up almost every piece we had. these pens at least helped cover up a good bit of the damage and now i can use what’s left of them to refurbish furniture i find on curbside specials and FB Marketplace. :D”
Customer Review: “Has about every wood grain color in it except Birch. It was one I needed, but having a hard time finding one with that color. It’s a nice kit, but have yet to use it.”
8. Oriflame Wood Furniture Repair Kit: 12-Color Filler & 8-Color Markers for Scratches.

The Oriflame Wood Furniture Repair Kit is an all-in-one professional solution for addressing various imperfections on your white oak cabinets. This comprehensive kit includes 12-color fillers and 8 precision touch-up markers, designed to match 95% of common wood tones. It’s excellent for fixing scratches, chips, cracks, and discoloration on hardwood floors, laminate, and of course, your stained cabinet surfaces.
Key Features That Stand Out
- ✓ Comprehensive kit with 12-color fillers and 8 precision markers.
- ✓ Designed to match 95% of wood tones, including light, medium, and dark shades.
- ✓ Includes brushes, sponge, sanding pads, and mixing palette for convenience.
- ✓ Effective for fixing scratches, chips, cracks, holes, and discoloration.
- ✓ Easy to mix and achieve expert color matching for seamless repairs.
Why We Recommend It
This kit stands out for its completeness and professional results. The wide range of fillers and markers, along with included tools, makes it easy to blend colors and achieve nearly invisible repairs on white oak cabinets. It’s a fantastic investment for anyone serious about maintaining the appearance of their wood furniture.
Best For
Homeowners and DIYers seeking a professional-grade, all-in-one solution for extensive repairs and touch-ups on stained white oak cabinets and other wood surfaces.
Pros and Cons
Pros:
- Extremely versatile for various types of wood damage.
- Wide range of colors in both fillers and markers for excellent matching.
- Includes all necessary tools for a smooth repair process.
- Delivers professional-looking, long-lasting results.
Cons:
- Requires a bit of patience for color mixing and blending.
- Not a replacement for a full cabinet re-stain.
- Filler tubes are smaller, primarily for repair work.
Customer Reviews
Customer Review: “I am extremely happy with this wood furniture repair kit and honestly did not expect such professional-looking results from a DIY product. The kit includes a great variety of colors in both filler tubes and markers, which makes it easy to match almost any wood shade. I used it on scratches and small cracks on my dining table, kitchen cabinets, and even laminate flooring—and the results were amazing.What I loved most is how simple it is to use. The filler spreads smoothly, dries quickly, and blends perfectly when matched with the right color. The markers are also very handy for surface scratches and quick touch-ups. The included tools, sponge, sanding pads, and mixing palette make the whole process neat and controlled, even for beginners like me.After the repair dried, the damaged areas became barely noticeable. It saved me from having to call a professional or replace expensive furniture, which alone makes this product worth every penny. The quality of the materials feels premium, and everything arrived well packed.For anyone dealing with scratched tables, cracked cabinets, or worn wood surfaces, I highly recommend this kit. It’s affordable, easy to use, and delivers outstanding results. I will definitely keep this in my home for future touch-ups. A smart purchase and a real time-and-money saver!”
Customer Review: “This repair kit comes with a wide range of color options, which makes it easy to find or mix a shade that closely matches your furniture. The marker works extremely well; once you buff it out, the repaired area is barely noticeable. Unlike some waxy or chalky repair pens I’ve tried before, this actually stays put and doesn’t rub off.The liquid color fillers are also great because you can mix them to get a near-exact match. One underrated but essential part of the kit is the sponge, it’s clutch. Using it makes blending everything out much smoother and more natural, and it really helps the repair disappear.If you’ve been frustrated with wood repair pens that don’t last or look obvious, this kit is a solid upgrade.”
9. SamaN SAM-307 Interior One Step Wood Seal, Stain & Varnish, Aged Oak, Oil-Based (8 oz).
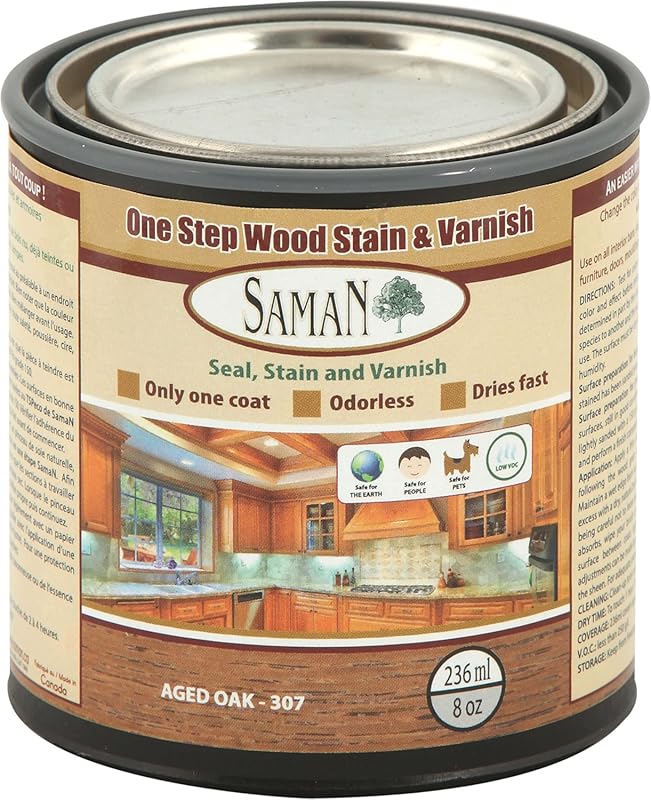
SamaN SAM-307 offers a brilliant all-in-one solution for your white oak cabinets, combining seal, stain, and varnish in a single oil-based product. This aged oak shade provides a timeless, warm look while streamlining your finishing process. For those looking to achieve a beautiful, protected finish with minimal steps, this is an excellent choice, backed by two decades of North American excellence.
Key Features That Stand Out
- ✓ One-step product: seals, stains, and varnishes simultaneously.
- ✓ Low odor formula, safe for users, pets, and the environment.
- ✓ Oil-based for rich color and durability.
- ✓ Ideal for achieving a quick makeover on interior wood projects.
- ✓ Preferred by professionals and DIYers for its convenience.
Why We Recommend It
The biggest advantage of SamaN SAM-307 is its all-in-one nature. This means fewer steps, less drying time between coats, and a faster completion of your project. For busy homeowners, getting a professional-looking finish on your white oak cabinets with just one product is a huge time-saver. The aged oak color is particularly good for creating a classic, inviting atmosphere.
Best For
Homeowners and DIYers looking for an efficient, single-product solution to stain and protect their white oak cabinets, desiring a rich, aged oak finish.
Pros and Cons
Pros:
- Significantly reduces project time with its 3-in-1 formula.
- Easy to apply and dries quickly.
- Leaves a beautiful, warm, and protected finish.
- Low odor, making it more pleasant to use indoors.
Cons:
- Mistakes are harder to correct due to the all-in-one nature.
- Limited color options compared to dedicated stains.
- Oil-based cleanup requires mineral spirits.
Customer Reviews
Customer Review: “I love this stain! goes on easy and dries quick, leaves a nice soft warm glow. Wasn’t sure if I could use it on my hard wood floors but I gave it a try. They are beautiful! and the finish is holding up great. I have had both plumbers and electricians walking on them with ho problem. I have moved furniture around without scuffing my floors. I sandaled and stained my baseboards and doors and they came out beautiful. I loved that I didn’t have to buy a stain and sealer separately. One coat covered everything. The only problem was if you get a drip brush it in quickly because it dries fast!, All you have to do is be careful and neat about applying the stain”
Customer Review: “Easy to work with and color is spot on and sooo gorgeous. I did 2 coats on this small antique dresser that I dry brushed off and I’m amazed at the results. Very happy!”
10. SamaN TEW-099-12 Interior Water Based Wood Stain, Urban Grey, 12 oz, for Furniture & Cabinets.

For a contemporary and sophisticated look, the SamaN TEW-099-12 Interior Water Based Wood Stain in Urban Grey is an excellent choice for your white oak cabinets. This water-based formula is odorless and low VOC, making it a safer and more environmentally friendly option for indoor projects. It promises no overlapping marks and no need for a wood conditioner, streamlining your staining process while delivering a beautiful, modern finish.
Key Features That Stand Out
- ✓ Water-based formula with low odor and low VOC for safety.
- ✓ No overlapping marks, ensuring an even and professional finish.
- ✓ Eliminates the need for a wood conditioner, simplifying prep.
- ✓ Protects and elevates wood’s natural beauty.
- ✓ Urban Grey shade offers a modern, sophisticated aesthetic.
Why We Recommend It
SamaN’s water-based stain is a fantastic option if you want to achieve a consistent, modern grey on your white oak cabinets without the strong fumes associated with oil-based products. The ease of application and the promise of no overlapping marks make it very forgiving for DIYers. It highlights the grain beautifully, providing a fresh, contemporary update to any space.
Best For
Homeowners seeking a modern, grey stain for white oak cabinets, prioritizing an odorless, low-VOC, and easy-to-apply water-based formula.
Pros and Cons
Pros:
- Low odor and VOC, making it safe for indoor use.
- Easy cleanup with water.
- Provides a uniform finish without overlapping marks.
- No need for pre-stain conditioner, saving time.
Cons:
- Drying time can be slightly longer than some fast-dry options.
- Might require multiple thin coats for desired depth of color.
- Color is fixed, limiting customization.
Customer Reviews
Customer Review: “**UPDATED** (SCROLL TO BOTTOM OF 1ST REVIEW) -If you are trying to match an existing stain to an area that needs repair – this is a great option. Easy to blend with other colors – OR, as in my case, with Mohawk Blendal Powder Stains – to achieve a matching color. I restore & repair antiques, and finding matching stain is just not possible without blending and mixing stains. What I loved best about trying a water based stain for the first time, is that I reduced my risk of going TOO DARK. I was able to dilute to where I could GENTLY color the repaired area, layering the stain slowly, until I achieved the right shade. The match was nearly perfect – I was so pleased with myself – but – I know all the credit goes to this product. :). I did need to use the Blendal Powder to tint – this was a group effort. :)The stain was consistent (not blotchy), I did not use a pre-stain-conditioner and I used a sponge applicator to apply. After applying, I did wipe off excess as I moved across the piece – and there was no streaking.I will be buying more shades of from this product line in the future! Highly recommend!** UPDATE **My current restoration project ran into a lot of issues with stain not penetrating the wood. No matter what grit sandpaper I progressed through, no matter what solvents I used to try to address any contamination in the wood/wood grain – it didn’t matter… nothing penetrated the wood. Switched from penetrating stain to Old Masters wiping stain and General Finishes gel stain…. no luck (the case for this chest of drawers took stain just fine). I’ve had to strip & sand these 2 drawer fronts several times, cleaning up with acetone on the last one. While trying to figure out what I was going to do – I remembered I had some SamaN Stain: Antique Walnut & Dark Walnut. At this point – I had nothing to lose, but didn’t think a water based stain was going to do any better.Well – I was wrong!!!!I did a 4 to 1 ratio (Antique walnut being the “1” part) – and using a very soft bristled stain brush – I gave it a shot. I used light strokes – feathering it out, doing one section at a time… working the next area into the previous one with very light brushing/feathering. Once the surface was completely covered – I did a few full left to right brush-overs (lightly!) and left it alone. After letting it sit a few minutes – I used a soft cloth to “buff” any excess off. I did NOT flood the surface with the stain – I kept it light but even.I could not have been MORE surprised – SamaN not only adhered – but I’m very close to a matching shade. The photo I’m attaching is after the first coat. It needs to cure 24 hrs before applying a second coat (where I’ll use a touch more of the Antique walnut – to add a touch of red tone).I sprayed a light coat of dewaxed shellac before proceeding. The stain applied WONDERFULLY over the shellac (highly recommend you always do this between coats, as it helps you control the color – and can be more easily undone if you’ve gone too dark). I’m still waiting to apply the 2nd coat – but I have no doubt this is going to be a great match.SamaN is going to be the stain I now use over all the other “high end”, bloviated oil based stains. Those days are over. 🙂 If you want a stain that you can control with light, multiple layers – this is the one of for you. Just remember not to use too heavy of a coat, use a light touch with the brush – and you night consider gently moistening the wood surface BEFORE beginning your application (my brush was also slightly damp). Use a soft, absorbent cloth to remove the excess – then DON’T MESS WITH IT. Overworking it after application will cause it to rub OFF!! If this happens to you – spray the surface with mists of water – and wipe off – and start over. At least you can actually do this without chemicals or stripper! Once it’s cured (24 hrs) – with a very gentle sanding (400-600 grit) – if you need to lighten just slightly – you can achieve that – but be very very gentle. Protect with a coat of dewaxed shellac before putting on your final finish.*In photo of project #2/chest of drawers – left one is “before”. Pic on right is after 1st coat of SamaN (no shellac yet). Slow & steady wins the race.”
Customer Review: “Color – Antique Walnut. Excellent stain – easy to work with. The box I am staining is made of scrap wood with an uneven pattern. In some areas the wood is much darker and has a red hue. I suspect parts of it might be made of entirely different kind of wood. So I was concerned it would come out “striped & spotted”. Used Minwax pre-stain to minimize the blotching effect and surely it helped a lot. But it also accentuated the unevenness in wood which was alarming. It wasn’t just the color, I could see the difference in wood pattern and density as well. And all of it showed up conspicuously after the 1st coat of stain. To even it up on the second round I stained only lighter parts with a small brush, went around a few times and then let it sit overnight. The next day did the whole procedure again – stained the whole box, then touched up lighter parts. And it came out beautiful.I was lucky to pick up a lighter shade of Walnut (antique). It allowed me to put quite a few coats on without going too dark. Antique walnut color is absolutely gorgeous; it has a lot of natural gold tones in it. And I was able to build up a darker shade by applying more stain. Love the results.Cleaning the working table with a wet paper towel was a breeze, there is no odor, no fumes, and it dries rather quickly if you wipe the stained object with a dry cloth. Definitely recommend this product.”
Complete Buying Guide for Best Stain For White Oak Cabinets
Essential Factors We Consider
When selecting the best stain for white oak cabinets, several critical factors come into play. First, consider the type of stain: oil-based, water-based, or gel stain. Oil-based stains penetrate deeply, offering rich color and durability, but they have longer drying times and require mineral spirits for cleanup. Water-based stains are low-VOC, quick-drying, and clean up with water, but may not offer the same depth of color and can raise the wood grain. Gel stains are non-drip and sit more on the surface, making them excellent for preventing blotchiness on porous woods like oak and achieving a more uniform finish, as highlighted in our review of the best gel stain for kitchen cabinets. We always recommend testing any stain on an inconspicuous area or a scrap piece of white oak to see how the color develops and to ensure you’re happy with the final look before committing to your entire project.
Budget Planning
Staining your white oak cabinets is a cost-effective way to refresh your kitchen compared to replacing them entirely. When budgeting, consider not just the price of the stain, but also associated materials like pre-stain conditioner, brushes, rags, protective gloves, and a good topcoat or best finish for cabinets. Higher quality stains might have a higher upfront cost but often offer better coverage and durability, potentially saving you money and effort in the long run. Don’t forget to factor in enough product for multiple coats if necessary, especially if you’re aiming for a darker or more opaque finish on your white oak cabinets. Repair kits, while not primary stains, are also a smart, budget-friendly investment for maintaining your cabinets’ appearance over time.
Final Thoughts
Ultimately, the best stain for white oak cabinets depends on your desired aesthetic and practical considerations. Whether you’re aiming for a light, airy finish, a rich, traditional tone, or something modern like a gray, white oak offers a beautiful canvas. Always prioritize proper surface preparation, including thorough cleaning and sanding, to ensure optimal stain absorption and an even finish. A good quality best primer for oak cabinets isn’t always needed for staining but can be crucial for painting. Taking your time, testing colors, and choosing a product that aligns with your skill level and vision will lead to stunning, long-lasting results for your kitchen.
Frequently Asked Questions
Q: Do I need to use a wood conditioner on white oak before staining?
A: White oak cabinets can be prone to blotchiness, especially with traditional oil-based stains, due to their varying porosity. While not always strictly necessary for every stain type (some water-based stains are designed not to require it), using a wood conditioner is highly recommended to achieve a more even and consistent color absorption. Always test on a scrap piece first.
Q: How many coats of stain should I apply to my white oak cabinets?
A: The number of coats depends on the specific stain and your desired color depth. Many stains, especially fast-dry options, can achieve good coverage in one coat. For a deeper, richer color, or if you’re trying to achieve a more opaque look with a lighter stain, two or even three thin coats might be necessary. Always follow the manufacturer’s instructions and allow adequate drying time between coats.
Q: Can I apply a water-based stain over an oil-based stain on white oak cabinets?
A: Generally, it’s not recommended to apply a water-based stain directly over an oil-based stain, or vice versa, without proper preparation. The finishes often aren’t compatible, leading to adhesion issues. If you’re switching stain types, you’ll likely need to completely strip the old finish and sand the wood back to its natural state before applying the new stain.
Q: How do I protect my stained white oak cabinets?
A: After staining your white oak cabinets, it’s crucial to apply a protective topcoat. This could be a polyurethane, varnish, or lacquer. The topcoat will shield the stain from wear, moisture, and UV damage, ensuring the longevity and durability of your finish. Choose a topcoat with the desired sheen (matte, satin, semi-gloss, or gloss) to complement your cabinet’s new look.
Choosing the best stain for white oak cabinets is a significant decision that impacts the overall aesthetic and longevity of your kitchen. We hope this comprehensive guide, featuring our top product reviews and expert insights, empowers you to confidently select the ideal stain for your project. Remember, preparation is key, and taking your time to achieve a beautiful, lasting finish will undoubtedly enhance your home. Ready to transform your space? Click the “Check Price on Amazon” buttons above to explore these top stains and start your cabinet renovation today!