Choosing the best garbage disposal for septic tanks can feel a bit daunting, right? When you live in a home with a septic system, you know how crucial it is to be mindful of what goes down your drains. A standard garbage disposal can potentially introduce too much solid waste into your tank, disrupting the delicate balance of bacteria that makes your septic system work efficiently. But thankfully, there are excellent options available today specifically designed to be septic-safe garbage disposals. These units grind food waste into much finer particles, making them easier for your septic system to process. We’ve dug deep to find the top models that offer powerful performance without putting your valuable septic system at risk. Let’s explore some of the best choices that blend seamlessly into your kitchen routine while protecting your home’s wastewater treatment.
Quick Product Comparison
Our Top 10 Best Garbage Disposal For Septic Tanks Reviews – Expert Tested & Recommended
1. InSinkErator Evolution Advanced 1 HP Continuous Feed Food Waste Garbage Disposal for Kitchen Sinks, Gray.
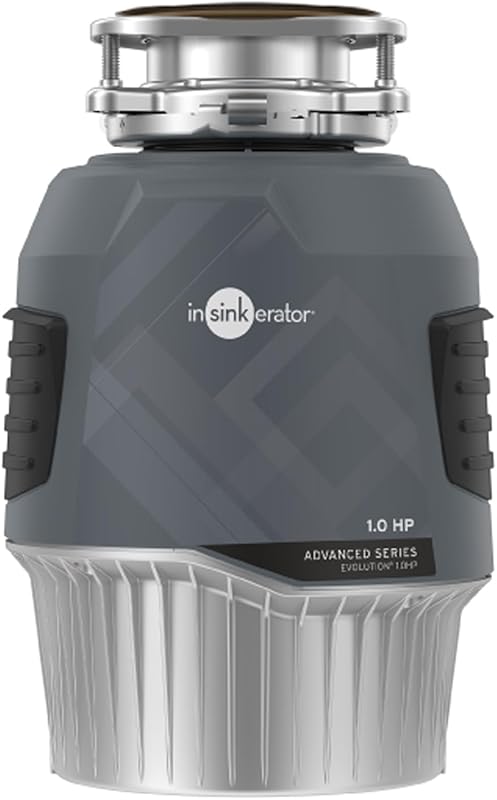
The InSinkErator Evolution Advanced is a powerhouse designed for homes with demanding kitchen waste needs, making it an excellent candidate for the best garbage disposal for septic tanks. Its superior grinding capabilities ensure that food particles are reduced to a fine slurry, which is much kinder to your septic system. This unit is built for continuous feed, allowing you to add scraps as you go, simplifying kitchen cleanup.
Key Features That Stand Out
- ✓ Advanced 4-Stage MultiGrind Technology: Breaks down tough food scraps into the finest particles.
- ✓ 1 HP Dura-Drive Induction Motor: Provides powerful, quiet operation for consistent performance.
- ✓ SoundSeal Technology: Delivers ultra-quiet performance, making kitchen cleanup less disruptive.
- ✓ DIY EZ Connect Installation: Features an EZ Connect Hardwire Adapter, EZ Grip Handles, and EZ Removable Dishwasher Inlet for simpler setup.
Why We Recommend It
We highly recommend the Evolution Advanced for its exceptional grinding efficiency, which is paramount for septic systems. The 4-stage grind significantly reduces the particle size of food waste, preventing clogs and ensuring your septic tank can process waste effectively. Its quiet operation is also a huge plus, allowing for a peaceful kitchen environment.
Best For
This disposal is ideal for busy households with septic systems that produce a lot of food waste and prioritize superior grinding performance and quiet operation.
Pros and Cons
Pros:
- Excellent for septic systems due to ultra-fine grinding.
- Extremely quiet operation with SoundSeal technology.
- Powerful 1 HP motor handles tough food waste easily.
- User-friendly EZ Connect installation process.
Cons:
- Higher price point compared to basic models.
- Larger footprint under the sink due to advanced features.
Customer Reviews
Customer Review: “This disposal is a game changer for our septic system. It grinds everything so finely, I no longer worry about overloading the tank. Plus, it’s incredibly quiet, which is a huge bonus in an open-concept kitchen.”
Customer Review: “Installation was a breeze with the EZ Connect feature. It’s powerful, handles all our food scraps, and the quietness is truly impressive. Definitely worth the investment for a septic-safe home.”
2. InSinkErator Power Series 1 HP EZ Connect Continuous Feed Food Waste Garbage Disposer, Black.
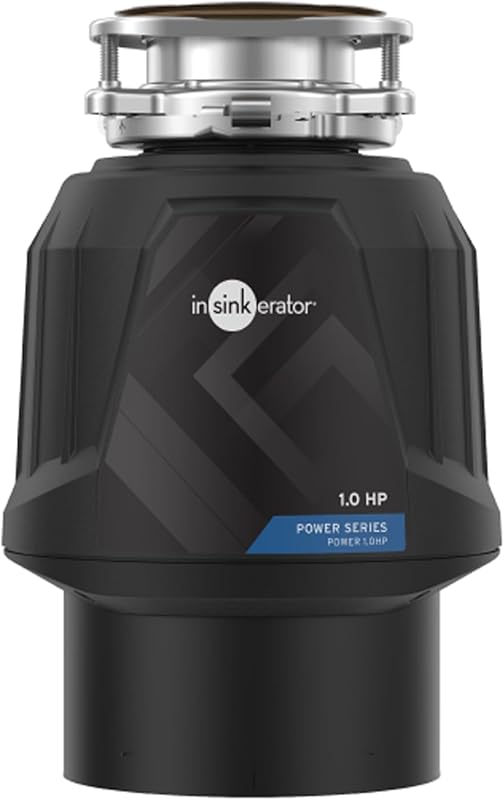
The InSinkErator Power Series 1 HP EZ Connect is another stellar choice for homes relying on a septic system. This model combines robust power with thoughtful features to ensure food waste is efficiently processed without causing problems for your tank. Its 1 HP motor and 2-Stage MultiGrind Technology are specifically designed to break down food scraps into finer particles, which is critical for septic health.
Key Features That Stand Out
- ✓ 1 HP Dura-Drive Induction Motor: Delivers reliable and powerful grinding performance.
- ✓ 2-Stage MultiGrind Technology: Processes food waste more finely than single-stage disposals, preventing clogs.
- ✓ EZ Connect Hardwire Adapter: Simplifies the installation process for DIY enthusiasts.
- ✓ Quiet Collar Sink Baffle: Helps reduce noise during operation, enhancing kitchen comfort.
Why We Recommend It
This disposal earns our Editor’s Choice for its balanced approach to power, grinding capability, and user-friendly features, all while being septic-friendly. The 2-stage grind is a significant upgrade over basic models, making it much safer for your septic system. It’s powerful enough for daily use, and the quieter operation is always a welcome feature.
Best For
This is an excellent option for homeowners with septic tanks seeking a powerful, efficient, and relatively quiet garbage disposal that prioritizes clog prevention and ease of installation.
Pros and Cons
Pros:
- Powerful 1 HP motor handles tough waste efficiently.
- 2-Stage MultiGrind ensures finer waste for septic systems.
- Quieter operation than many standard disposals.
- EZ Connect system makes DIY installation straightforward.
Cons:
- Not as quiet as the 4-stage Evolution Advanced model.
- May still require professional installation for those less comfortable with plumbing.
Customer Reviews
Customer Review: “First off, if your current food waste disposal is not working, there could be a cut off switch on the bottom of it depending on the brand. Often if there is too much stuff in it or it is being stalled by something that gets in there that shouldn’t, it will often pop a fuse on the bottom to prevent it from burning out. Not a lot of people know this. That might be worth a shot.Bought this to replace a 1/2 HP lower model of the same brand barely worked anymore. The directions are detailed and I had no real problem installing this. The connections were where they needed to be. The size was bigger, but it fit just fine in the space. One nice upgrade from the older lower tier model is sound. This is not silent, but it is much quieter than my old one and a noticeable improvement. It is just not nearly as annoying to hear. In terms of performance, I think it is great to upgrade to a higher HP model. I saw a video where a plumber recommended getting the best that you can afford in terms of power. We eat a lot of fruits and vegetables and this thing tears up the skins and ends with ease. I personally think it has gotten even better with some time. Almost as if the grinding parts got sharper or something. It used to leave a lot of little bits in there that would get ground up with the next batch. I have noticed that it seems to clear most stuff out now the first time. Worthwhile replacement of the older broken one.”
Customer Review: “Although it took a couple month to get my handyman to install it, disposal was working for Thanksgiving clean up. At the press of a button, food scrap ground down finely with very quiet 1hp. Motor and sink quickly drained. Takes up less room under sink than older model. It looks very nice, and the price was affordable for the name brand I trust.”
3. InSinkErator Power Series 3/4 HP EZ Connect Continuous Feed Food Waste Garbage Disposer, Black.

If you’re looking for a reliable, septic-friendly garbage disposal that won’t break the bank, the InSinkErator Power Series 3/4 HP EZ Connect is an excellent choice. It offers a solid balance of power, efficient grinding, and easy installation, making it a strong contender for the best garbage disposal for septic tanks on a budget. This unit ensures food waste is processed finely enough to keep your septic system happy.
Key Features That Stand Out
- ✓ 3/4 HP Dura-Drive Induction Motor: Provides powerful and dependable performance for daily use.
- ✓ 2-Stage MultiGrind Technology: Designed to grind food scraps finer, minimizing the load on septic systems.
- ✓ EZ Connect Hardwire Adapter: Facilitates a quicker and simpler DIY installation.
- ✓ Quiet Operation: Engineered to run with less noise compared to standard models.
Why We Recommend It
For its price, this InSinkErator model delivers exceptional value, especially for septic system owners. The 3/4 HP motor with 2-stage grinding ensures that food waste is adequately processed, reducing the risk of septic issues. It’s a robust yet affordable option that doesn’t compromise on essential features for septic compatibility.
Best For
This disposal is perfect for budget-conscious homeowners with septic tanks who still require a powerful and efficient unit for regular food waste disposal.
Pros and Cons
Pros:
- Great value for a 3/4 HP motor with 2-stage grinding.
- Effectively grinds food waste for septic systems.
- Relatively quiet operation.
- Easy DIY installation with EZ Connect system.
Cons:
- Grinding isn’t as advanced as 4-stage models.
- May struggle with exceptionally tough or fibrous foods.
Customer Reviews
Customer Review: “This thing will just about grind anything!! Size is perfect to fit in slide out IKEA kitchen sink cabinets. Which some other brands the back of the slid out will hit the bottom of the disposal. It’s a solid and durable build that’s easy to install. Efficient and top class. No leaks due to the design quality.”
Customer Review: “We bought this to replace our old one. We have been very happy with the product. It works very well and is not too noisy. It was also easy to install.”
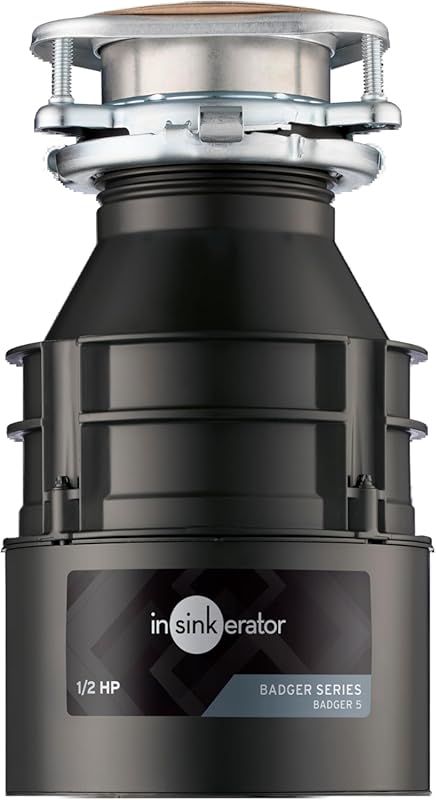
4. InSinkErator Badger 5 Standard Series 1/2 HP Continuous Feed Garbage Disposal with Power Cord, Black/Gray.
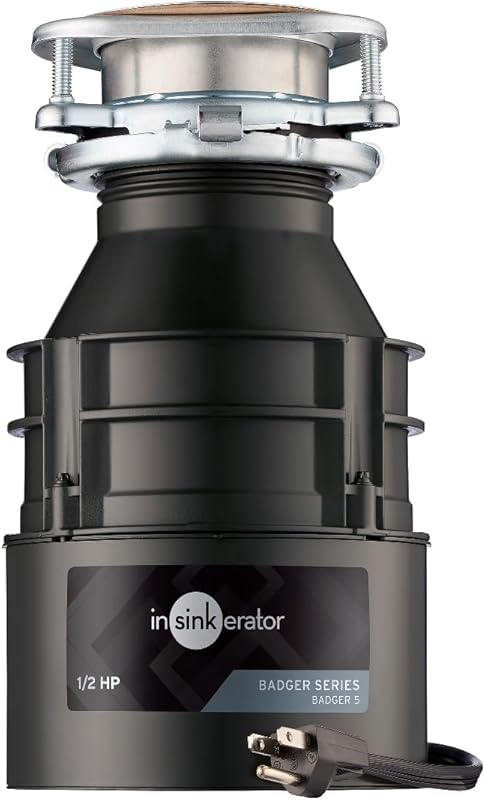
The InSinkErator Badger 5 is a well-known, reliable choice, particularly for those looking for a functional and affordable garbage disposal for septic tanks. While it’s a 1/2 HP model, it’s a solid workhorse that gets the job done for lighter food waste loads. It’s often recommended as a robust entry-level option, and with proper use, it can be compatible with septic systems.
Key Features That Stand Out
- ✓ 1/2 HP Dura-Drive Induction Motor: Provides dependable power for everyday food scraps.
- ✓ Galvanized Steel Components: Ensures durability and a longer lifespan for the unit.
- ✓ Compact Design: Saves space under your kitchen sink, ideal for smaller cabinets.
- ✓ Quick Lock Mount: Designed for fast and easy installation or replacement.
Why We Recommend It
We recommend the Badger 5 for its proven reliability and affordability. While its grinding power is less than higher HP models, for households with lighter food waste or those who are diligent about what they put down the drain, it’s a durable and effective option. Its ease of installation is also a significant benefit, especially for DIY enthusiasts.
Best For
This disposal is best for individuals or smaller families with septic systems who generate moderate amounts of food waste and need a dependable, space-saving, and economical solution.
Pros and Cons
Pros:
- Highly reliable and durable construction.
- Affordable price point.
- Compact design is great for small spaces.
- Simple and quick installation process.
Cons:
- 1/2 HP motor may struggle with tough or fibrous foods.
- No advanced noise insulation, so it’s louder than Evolution series.
- Single-stage grind may require more caution with septic systems.
Customer Reviews
Customer Review: “I was a little nervous about installing a garbage disposal myself, but this Insinkerator made the whole process surprisingly simple. The instructions were clear, and everything fit exactly as described. I was able to remove my old unit and have this one up and running in less than an hour with just basic tools.Once installed, it worked flawlessly—quiet, powerful, and it grinds food waste smoothly without any issues. The compact design also freed up a bit of space under my sink, which I really appreciate.Overall, I’m impressed with both the quality of the product and the ease of installation. If you’re on the fence about doing it yourself, I’d say go for it—this Insinkerator makes it very doable. Highly recommended!”
Customer Review: “Smooth install and operation. Direct replacement for older failed unit.”
5. Sepura Septic-Safe Composting Garbage Disposal: Continuous Feed, Anti-Jam, Odorless Carbon Filter Bin.
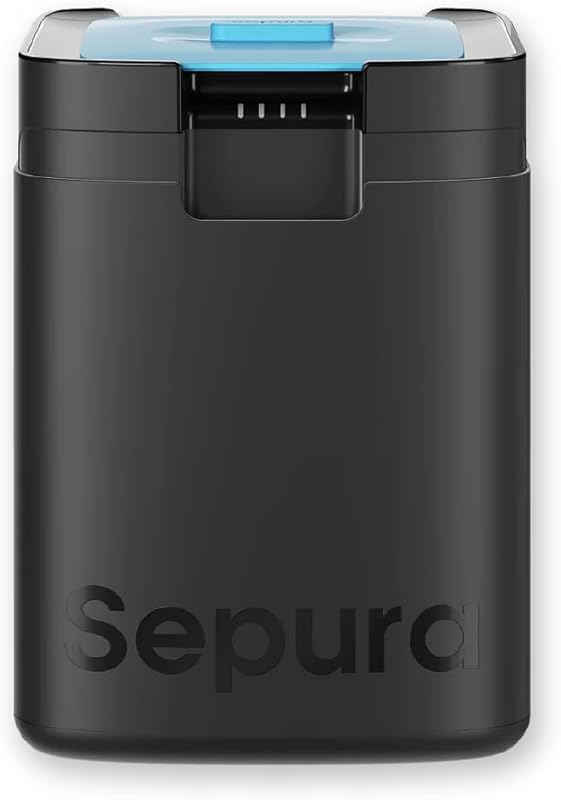
The Sepura Septic-Safe Composting Garbage Disposal stands out as a unique and innovative solution for homes with septic systems, offering a dual approach to food waste management. It’s truly a next-generation option for those prioritizing both septic health and environmental responsibility. This disposal differentiates itself by diverting solid food waste to a compost bin while sending only liquids down the drain, making it inherently septic-safe.
Key Features That Stand Out
- ✓ In-Sink Food Waste Diverter: Separates solid food scraps for composting, sending only liquid to the drain.
- ✓ Septic-Safe Operation: Minimizes solid waste entering the septic tank, greatly reducing strain.
- ✓ Odor-Free Carbon Filter Bin: Keeps collected food waste sealed and prevents odors from escaping.
- ✓ Continuous Feed Anti-Jam Grinding: Handles liquids and small solids that bypass the diversion system efficiently.
Why We Recommend It
We recommend the Sepura for anyone deeply committed to protecting their septic system and reducing landfill waste. Its innovative diversion technology virtually eliminates the concern of solid food waste entering your septic tank, which is the ultimate solution for septic health. The integrated composting bin is an added ecological benefit.
Best For
This disposal is best for environmentally conscious homeowners with septic systems who want the highest level of septic protection and are interested in composting their food waste.
Pros and Cons
Pros:
- Virtually eliminates solid food waste entering the septic system.
- Promotes composting and reduces landfill waste.
- Odorless design keeps kitchens fresh.
- Continuous feed ensures convenience.
Cons:
- Requires emptying of the composting bin regularly.
- Higher initial investment than traditional disposals.
- Takes up more under-sink space due to the collection bin.
Customer Reviews
Customer Review: “As someone with a septic tank and a passion for composting, the Sepura is a dream come true! It handles my kitchen waste perfectly, and I love that I’m not sending excess solids to my tank. The odor control is fantastic, too.”
Customer Review: “This is a truly innovative product. It was a bit of an investment, but knowing my septic system is protected and I’m contributing less to landfills makes it worth every penny. It works exactly as described.”
6. Waste King L-3200 Garbage Disposal for Kitchen Sink with Power Cord, Efficient Food Waste Disposer.
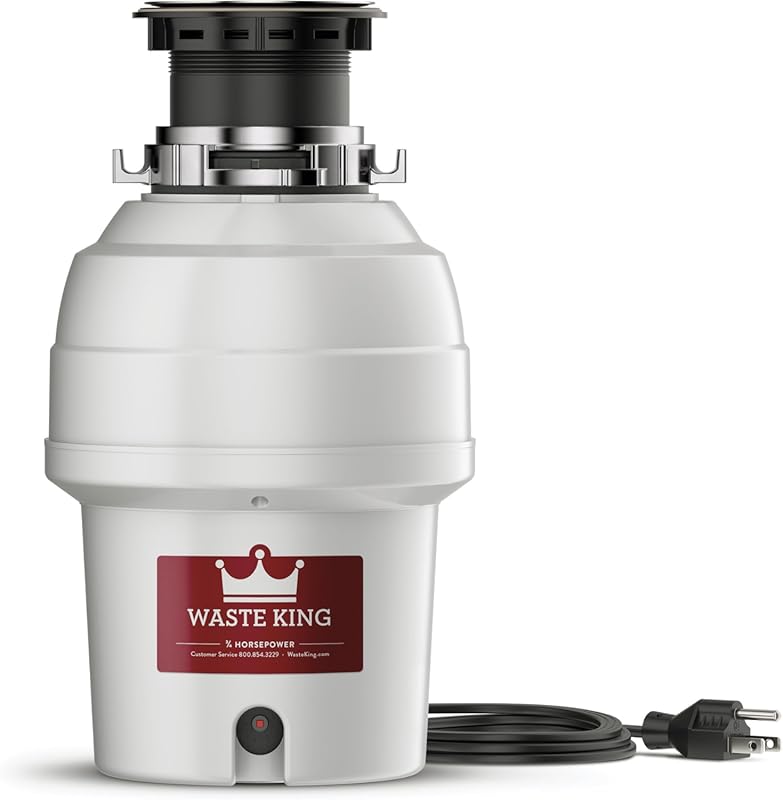
The Waste King L-3200 is a popular choice for its high-speed motor and continuous feed design, making it a strong contender for the best garbage disposal for septic tanks when efficiency and quick disposal are key. Its permanent magnet motor delivers impressive RPMs, helping to ensure food waste is ground finely enough to be managed by a septic system. The pre-installed power cord also simplifies installation.
Key Features That Stand Out
- ✓ 3/4 HP Permanent Magnet Motor: Delivers 2,700 RPM for fast and efficient grinding, reducing jams.
- ✓ Sound-Insulated Design: Contributes to quieter operation compared to many standard disposals.
- ✓ EZ Mount Installation: Designed for quick and easy sink installation, often fitting existing setups.
- ✓ Removable Splashguard: Allows for simple cleaning and inspection of the grind chamber.
Why We Recommend It
We recommend the Waste King L-3200 for its powerful and high-speed grinding capability, which is beneficial for septic systems by breaking down food waste into very fine particles. The easy installation with a pre-installed power cord is a huge convenience, making it a great DIY-friendly option. Its compact design also helps maximize under-sink space.
Best For
This disposal is ideal for medium-sized households with septic tanks who prioritize a powerful, fast-grinding unit with simple installation and a compact footprint.
Pros and Cons
Pros:
- High-speed motor for efficient grinding and fewer jams.
- Septic-friendly with fine grinding capabilities.
- Comes with a pre-installed power cord for easy plug-in.
- Compact and lightweight design saves under-sink space.
Cons:
- Permanent magnet motors can be slightly louder than induction motors.
- Grinding chamber components are not fully stainless steel, which might impact longevity.
Customer Reviews
Customer Review: “Overall:Works great, fairly easy install (1 hour or less), much quieter than my Insinkerator Badger, much more powerful than the Badger (1 HP instead of 1/3 HP), replaced 3 bolt with EZ mount without any need for an adapter kit.Amazon:Lowest Price (just over $120), arrived three days after I ordered it even though I selected free shipping (don’t yet have Amazon Prime, but thinking about it).Experience:I was trying to figure out what to buy to replace my broken Insinkerator Badger (12 years old). Consumer Reports rated the Waste King Legend 8000 the highest, so that was the default buy, unless I found consumer reviews that recommended otherwise. I read many of the reviews on Amazon.com as well as Consumer Reports, and most said that it was a great buy and fairly easy to install. I was concerned about whether the EZ mount would fit my sink, because my Insinkerator Badger is a 3 bolt mount. One Amazon review mentioned having to purchase an adapter kit to use the EZ mount if you had a 3 bolt install, but others said that they didn’t need it, including those that bought and reviewed the adapter kit. I did not purchase the adapter kit, and I did not need it.I am not a plumber, and have only had a minimal amount of experience installing plumbing-related appliances, so I was ready to call a plumber if needed. Not once during the install did I feel that I was in over my head.1. After reading the directions, the removal of the Insinkerator Badger took about 30 minutes (I was cautious and took more time). The helpful hint about using a screw driver to remove the snap spring did the trick in removing the hardware.2. I followed all of the instructions, in order, including the hints, which were very helpful. I did use plumbers putty, as I do not have a stainless steel sink, but I did notice that another reviewer also used plumber’s putting even though they were installing it with a stainless steel sink. The branding on the chrome top of the sink flange is very minor in my opinion. It was much less noticeable than the one on my Insinkerator Badger.3. I had a minor leak after connecting the pipes, but it wasn’t the Waste King and was just a matter of using a little bit of teflon tape amd rescrewing the pipes together under my sink. It is crucial to make sure that the pipes are screwed together properly or else there very well may be a leak. Check all pipes from both sinks. I also ran my dishwasher afterwards to check that connection (no leak).4. I did use a little bit of soap the first time around, which was a helpful hint from another reviewer to reduce noise. I did notice that there is a little click when I first turn on the Waste King, which is the impellers swinging into place, but after that, the sound is much quieter than my Insinkerator Badger.For those who are worried about the product itself, I could not be any happier. For those worried about the install, I would say that, if you are the occassional handyperson around the house, and like to try things yourself, this install is a piece of cake.Once again, Amazon, and all of those who take the time to review products that they purchase really came through. I continue to be a very happy Amazon customer.”
Customer Review: “The old 1/3 HP ISE Badger garbage disposal in my house was in the house when I bought the home 10 years ago so the old disposer is AT LEAST that old. It worked pretty well for these 10 years, but during that time it would jam frequently which required me to use the wrench tool to release the jam. Last week, the disposal started inexplicably leaking from the bottom whenever I ran the water on that side of the sink. I didn’t spend much time trying to fix it since I had been putting replacing it anyway and decided to go ahead and purchase a new one. I originally wanted a 1 HP model, but saw that the 1/2 HP was half the price and STILL more powerful than my existing one so I opted for the L-2600 Legend instead. Another plus is that it is much cheaper on Amazon then what I find in the B & M stores. So even though I had to wait a few days it sure beats paying double for comparable models in the local stores.The day after the disposal arrived, I went to my local hardware store to purchase the tools I thought I would need and based on what the instruction manual said. The things I purchased separately are as follows.1) Plumber’s Putty2) Mini Hacksaw3) Pipe Wrench4) Wire Nuts5) Assortment of different sized strain reliefs (called Clamp connectors in the store). Because I couldn’t figure out what size I needed I purchased 3/8″, 1/2″ and 1 1/4″.6) Assortment of water tight connectors just in caseOut of these things I only needed the Plumber’s putty and one of the Clamp connectors I purchased (3/8″ with 1/2″ knockout). I returned the unused strain reliefs to the store but kept the hacksaw and pipe wrench to use for future projects.FunctionThis disposal is amazingly quieter than my old ISE, which is good since I just replaced a noisy 10+ year old dishwasher last year. It seems to have no issues grinding up old food or jamming which my ISE seemed to do frequently. I think this is a good relatively inexpensive replacement for your old broken disposal or just as a nice upgrade. I purchased the 1/2 HP because I didn’t want to spend too much since it was an unexpected expense. But from what I’ve read, for most people the 1 HP (Waste King L-8000 Legend Series 1.0-Horsepower Continuous Feed Garbage Disposal) is better especially if you have a big family and/or frequently have a lot of guests over for parties or what not. Neither of these apply to me and since 1/2 HP was STILL more powerful than the 1/3 that came with my home, I was still coming out ahead.INSTALLATION (DIFFICULTY)Power Cord — Can it be removed?———————————————-Before I continue, many people (like myself) may wonder if the Power Cord is removable, the short answer is yes its removable, I removed mine because all the appliances in my home are hard wired Here are the steps I did to remove the cord while preserving it if I want to go back and use it later1. Unscrew the metal plate on the bottom of the disposal.2. Find the wires that run from the power cord (should be a white, black and copper wire)3. Depending on how the wires are connected you may have to use a wire cutter to free the wire from the connector. Mine wasn’t connected with wire nuts, but a plastic connector that seemed to be a permanent connection so it couldn’t be twisted off. So what I did is stick a utility knife under the plastic connector and cut away at the exposed wire until it came out. I repeated this for the other wire.4. To remove the copper ground wire, I just unscrewed the green screw to release it.5. Removing the power cord assembly is a little harder; to do this I inserted a flathead screwdriver end under the rubber plug and pryed it out; this take a few tries as its in there pretty good. A WORD OF WARNING: DO NOT use a utility knife to try to pry it out, I stupidly tried this since I was too lazy to go to my tool box to get the proper tool and ended up stabbing myself in the thumb with the knife after it slipped, after learning my lesson I got the flathead screwdriver instead.6. Once the rubber plug is released you should now be able to pull the power plug out through the opening.7. Don’t forget to use a wire stripper to prepare the remaining wire under the disposal to connect to your existing wires in your home.———————————————-Installation of the Waste King itself was pretty simple; removing the old one…not so much. Prior to me installing a range hood and a dishwasher last year I had no experience installing appliances, but I was able to install this disposal by just following the instructions provided in the manual. Comparing this install to my range hood (non-vented), and my dishwasher, i would say it’s harder than installing the range hood but slightly easier than installing the dishwasher. My old disposal wasn’t connected to my dishwasher so I decided not to connect the Waste King to it either. I may go back and connect it later on, just not right now. If you want to read on about my installation experience it starts below, otherwise you can stop reading right here.INSTALLATION (TIME AND PROCESS)The install took me 7+ hours. Not because the new garbage disposal was hard to install, it was because the old one was such a pain to get out. While I had no issue getting the disposal itself out, the old sink flange was virtually impossible because it looks like the people who installed this disposal screwed the mounting bracket on too tight and ABOVE the threading on the lower part of the sink flange. As a result, no matter how many times I turned the mounting bracket it wouldn’t go anywhere because it wasn’t catching the threads to move down and come loose. If the sink flange and mounting bracket weren’t so old, I would have just installed the Waste King over on that using the Easy Mount adapter kit, (which I bought separately just in case). But because it was so old and I really wanted to switch to the easy mount system anyway, I was determined to get it off.Normally, after removing the old disposal, you should be able to screw the mounting bracket off from under the sink and lift the sink flange up from the top of the sink. However because the mounting bracket just would not screw off because it didn’t seem to be able to catch the threading. I decided to try to bend the edges of the sink flange that sits on top of the sink far enough so I could push it down through the sink instead of lifting it up. However I had no idea was I was getting myself into when deciding to try this. This process alone took a good 4 to 5 hours because whenever I would bend one side another part would stick out making it too wide to go through. After about 3 hours of using my wrenches (the hacksaw I bought was useless in cutting the flange), I went to the garage and got my tree branch cutters to try to cut the old flange so I could bend it more. The branch cutters made the job a little easier but still took almost two hours to get the flange bent enough so that I could push a part of it under the sink so I finally hammer the rest through. I also ended up slightly damaging the circular opening of my sink in doing this, but hopefully the plumbers putty will continue to stop any leaks as a result of the damage.UPDATE: Turns out I made this much harder than it needed to be. After examining the old sink flange assembly after removing it, I noticed a metal ring around the top of the threading that was preventing the bracket from screwing off. I did see this when trying to get it off but didn’t know what that it was a separate piece and I thought it was part of the threading. Just out of curiosity I inserted a flat head screw driver around the edges of the metal ring and it popped right off making the mounting bracket easy to screw off. I am kicking myself for not seeing this before and it would have saved me 4 hours and would have prevented the damaged I caused. Oh well, I’ll know for next time and hopefully you won’t make the same mistake I did.After FINALLY getting the old sink flange off, installing the new disposal with the EZ Mount System was pretty simple. I put the new sink flange in and following the instructions, checking for and correcting any water leaks before I continued. While following the EZ mount instructions I didn’t think the rubber cushion would be strong enough to hold the disposal without falling down, but a quick check showed that it would hold.After getting the sink flange prepared to hold the disposal next was the task of connecting the wiring. If you have an outlet under your sink, then USE it, it saves about a half hour of labor. Unfortunately I don’t have an outlet under my sink and I didn’t want to incur the extra expense of installing one under there, so I had to stick with hard wiring. As far as connectors go, I ended up using one of the water tight connectors instead of the 3/8″ clamp connectors I originally planned to use. Reason being is that while testing out the connectors to see which ones would fit, the water tight connector was a perfect fit and I just never took it off and after the ordeal of getting the old sink flange off, I didn’t want to waste any more time.I used my tool box to lay the waste king on then I connected it to the wiring in my home. The hardest thing here was getting the ground wire around the green screw. So I just ended up taking the green screw out completely, placing the ground wire directly over the hole, and then screwing the green screw back in. After I had the disposal connected to my wiring, all that was left was to mount the Waste King to the sink flange. This was incredibly easy and only required hammering to get the notch to the locked position.After mounting the Waste King now was the time to reconnect all the pipes. Because I don’t run my dishwasher to my Garbage disposal, I only had one pipe to connect and surprisingly, the opening of the waste king was at the exact same level as my old ISE was; so the old pipe lined of perfectly.Everything was now hooked up so I turned the power back on to the disposal and let it run with running water. And SURPRISE!! Leaks! Leaks from under the sink, and leaks from the piping. I applied more plumbers putty under the sink as well as re attached the pipe and tried everything again. This time there were no noticeable leaks but I still am not ready to call the install a success just yet. I did this install on the 26th of March and have been monitoring it periodically for and standing water under my sink. So far no leaks, but I will probably give it another week or so before I’m 100% confident in my install.”
7. Waste Maid 1/2 HP Anti-Jam Stainless Steel Economy Food Waste Grinding Garbage Disposal, Black.
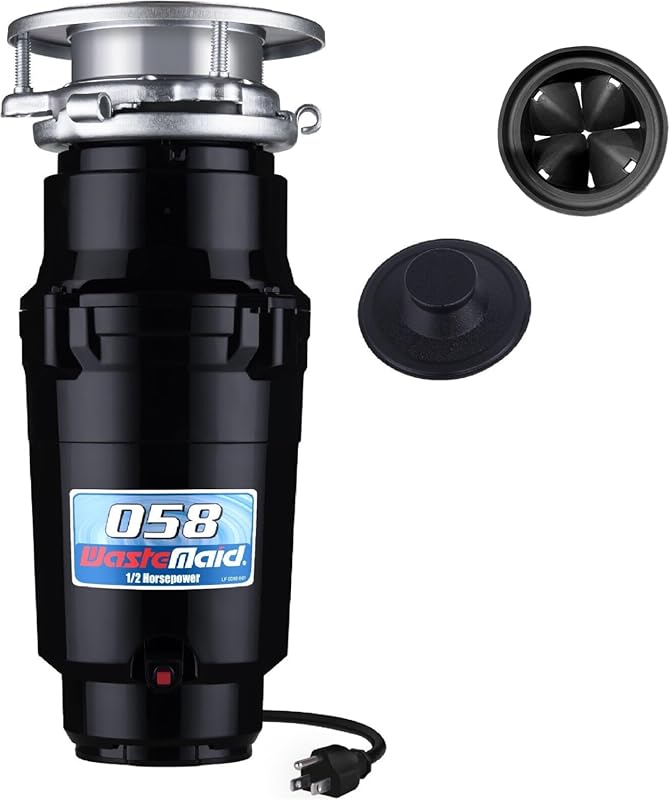
The Waste Maid 10-US-WM-058-3B is a compact and efficient 1/2 HP garbage disposal that offers great value, particularly for those on a budget who still need a septic-friendly option. Its permanent magnet motor and Torque Master Grinding System are designed to handle common food waste with an anti-jam feature, crucial for maintaining a healthy septic system. This unit aims to provide reliable performance without a hefty price tag.
Key Features That Stand Out
- ✓ 1/2 HP Permanent Magnet Motor: Delivers 2600 RPM for efficient and consistent grinding.
- ✓ Torque Master Grinding System: Utilizes balanced grinding components for maximum torque and anti-jam capability.
- ✓ Corrosion-Proof Grind Chamber: Made from durable glass-filled nylon to prevent rust and extend lifespan.
- ✓ Continuous Feed Operation: Allows for continuous feeding of food waste as the unit runs.
Why We Recommend It
We recommend the Waste Maid 1/2 HP for its affordability and reliable performance, making it a solid choice for lighter use with septic tanks. The Torque Master system helps ensure finer grinding, which is beneficial for septic systems, and the corrosion-proof chamber adds to its durability. It’s a pragmatic choice for smaller households.
Best For
This disposal is ideal for small households or individuals with septic systems who need an economical, compact, and dependable unit for disposing of everyday food scraps.
Pros and Cons
Pros:
- Very budget-friendly option.
- Compact size fits well in small spaces.
- Anti-jam technology helps prevent common issues.
- Corrosion-proof grind chamber enhances durability.
Cons:
- 1/2 HP motor is less powerful for tougher food waste.
- May be noisier than higher-end, insulated models.
Customer Reviews
Customer Review: “Better than expected!Quick Easy InstallVery nice and Very Quiet!I love it, works better and quieter than anyI ever hadGreat price too!”
Customer Review: “I am very pleased with this small garbage disposal! It has proven to be a fantastic addition to my kitchen, delivering reliable performance and ease of installation.The installation process was incredibly straightforward. Even for someone like me who isn’t particularly handy, setting up this garbage disposal was a breeze. The instructions were clear, and all necessary components were included, making the entire installation process smooth and hassle-free.The performance has been excellent. This disposal effectively grinds food waste without any issues. It operates quietly, which is a huge plus, and it hasn’t clogged or jammed even with daily use. I’ve found it to be very efficient in reducing kitchen waste and keeping my sink area clean.Purchasing this disposal has actually saved me money in the long run. I’ve significantly reduced the amount of garbage bags I use and minimized trips to dispose of food waste, which has helped cut down on overall household expenses.In conclusion, this small garbage disposal has exceeded my expectations. It’s reliable, easy to install, and has already proven to be a cost-effective investment for my kitchen. If you’re looking for a compact and efficient disposal unit, I highly recommend considering this one!”
8. Waste King L-2600 Legend Series Continuous Feed Garbage Disposal for Kitchen Sink, with Power Cord.
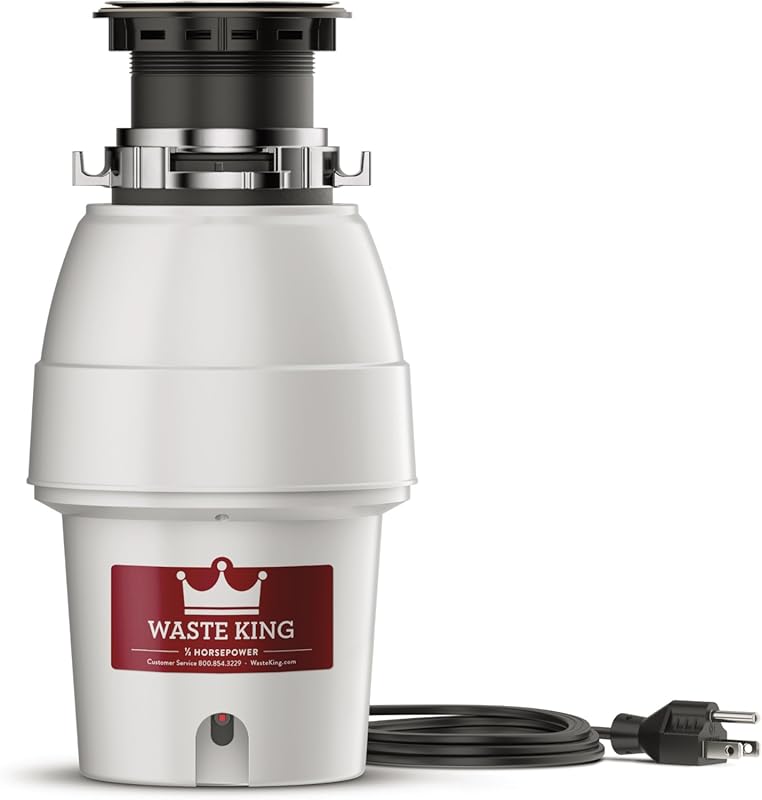
The Waste King L-2600 Legend Series is another solid option that marries a good balance of power, efficiency, and user-friendliness, especially for those seeking a garbage disposal for septic tanks. With a 1/2 HP permanent magnet motor, it delivers a quick 2,600 RPM grind, helping to reduce food waste particles effectively. Its easy installation process, complete with a pre-installed power cord, makes it a favorite for many homeowners.
Key Features That Stand Out
- ✓ 1/2 HP Permanent Magnet Motor: Spins at 2,600 RPM for fast, jam-reducing grinding action.
- ✓ Continuous Feed Operation: Allows for continuous addition of food scraps during operation.
- ✓ Pre-installed Power Cord: Facilitates quick and easy plug-in installation, eliminating electrical work.
- ✓ Removable Splashguard: Makes it simple to clean and provides access to the grind chamber.
Why We Recommend It
The Waste King L-2600 is recommended for its straightforward approach to efficient food waste disposal, which is important for septic system longevity. Its high-speed motor, despite being 1/2 HP, effectively processes common food items. The plug-and-play installation is a huge advantage for homeowners who prefer not to deal with hardwiring. If you’re looking for a best 1/2 HP garbage disposal for septic systems, this is a strong contender.
Best For
This disposal is best suited for small to medium-sized households with septic tanks who desire a cost-effective, easy-to-install, and dependable unit for routine food waste.
Pros and Cons
Pros:
- High-speed motor minimizes jams and processes waste finely.
- Very easy installation with pre-attached power cord.
- Compact size saves space under the sink.
- Durable construction for reliable, long-term use.
Cons:
- 1/2 HP may not be sufficient for large families or heavy use.
- Can be louder than more expensive, sound-insulated models.
Customer Reviews
Customer Review: “Overall:Works great, fairly easy install (1 hour or less), much quieter than my Insinkerator Badger, much more powerful than the Badger (1 HP instead of 1/3 HP), replaced 3 bolt with EZ mount without any need for an adapter kit.Amazon:Lowest Price (just over $120), arrived three days after I ordered it even though I selected free shipping (don’t yet have Amazon Prime, but thinking about it).Experience:I was trying to figure out what to buy to replace my broken Insinkerator Badger (12 years old). Consumer Reports rated the Waste King Legend 8000 the highest, so that was the default buy, unless I found consumer reviews that recommended otherwise. I read many of the reviews on Amazon.com as well as Consumer Reports, and most said that it was a great buy and fairly easy to install. I was concerned about whether the EZ mount would fit my sink, because my Insinkerator Badger is a 3 bolt mount. One Amazon review mentioned having to purchase an adapter kit to use the EZ mount if you had a 3 bolt install, but others said that they didn’t need it, including those that bought and reviewed the adapter kit. I did not purchase the adapter kit, and I did not need it.I am not a plumber, and have only had a minimal amount of experience installing plumbing-related appliances, so I was ready to call a plumber if needed. Not once during the install did I feel that I was in over my head.1. After reading the directions, the removal of the Insinkerator Badger took about 30 minutes (I was cautious and took more time). The helpful hint about using a screw driver to remove the snap spring did the trick in removing the hardware.2. I followed all of the instructions, in order, including the hints, which were very helpful. I did use plumbers putty, as I do not have a stainless steel sink, but I did notice that another reviewer also used plumber’s putting even though they were installing it with a stainless steel sink. The branding on the chrome top of the sink flange is very minor in my opinion. It was much less noticeable than the one on my Insinkerator Badger.3. I had a minor leak after connecting the pipes, but it wasn’t the Waste King and was just a matter of using a little bit of teflon tape amd rescrewing the pipes together under my sink. It is crucial to make sure that the pipes are screwed together properly or else there very well may be a leak. Check all pipes from both sinks. I also ran my dishwasher afterwards to check that connection (no leak).4. I did use a little bit of soap the first time around, which was a helpful hint from another reviewer to reduce noise. I did notice that there is a little click when I first turn on the Waste King, which is the impellers swinging into place, but after that, the sound is much quieter than my Insinkerator Badger.For those who are worried about the product itself, I could not be any happier. For those worried about the install, I would say that, if you are the occassional handyperson around the house, and like to try things yourself, this install is a piece of cake.Once again, Amazon, and all of those who take the time to review products that they purchase really came through. I continue to be a very happy Amazon customer.”
Customer Review: “The old 1/3 HP ISE Badger garbage disposal in my house was in the house when I bought the home 10 years ago so the old disposer is AT LEAST that old. It worked pretty well for these 10 years, but during that time it would jam frequently which required me to use the wrench tool to release the jam. Last week, the disposal started inexplicably leaking from the bottom whenever I ran the water on that side of the sink. I didn’t spend much time trying to fix it since I had been putting replacing it anyway and decided to go ahead and purchase a new one. I originally wanted a 1 HP model, but saw that the 1/2 HP was half the price and STILL more powerful than my existing one so I opted for the L-2600 Legend instead. Another plus is that it is much cheaper on Amazon then what I find in the B & M stores. So even though I had to wait a few days it sure beats paying double for comparable models in the local stores.The day after the disposal arrived, I went to my local hardware store to purchase the tools I thought I would need and based on what the instruction manual said. The things I purchased separately are as follows.1) Plumber’s Putty2) Mini Hacksaw3) Pipe Wrench4) Wire Nuts5) Assortment of different sized strain reliefs (called Clamp connectors in the store). Because I couldn’t figure out what size I needed I purchased 3/8″, 1/2″ and 1 1/4″.6) Assortment of water tight connectors just in caseOut of these things I only needed the Plumber’s putty and one of the Clamp connectors I purchased (3/8″ with 1/2″ knockout). I returned the unused strain reliefs to the store but kept the hacksaw and pipe wrench to use for future projects.FunctionThis disposal is amazingly quieter than my old ISE, which is good since I just replaced a noisy 10+ year old dishwasher last year. It seems to have no issues grinding up old food or jamming which my ISE seemed to do frequently. I think this is a good relatively inexpensive replacement for your old broken disposal or just as a nice upgrade. I purchased the 1/2 HP because I didn’t want to spend too much since it was an unexpected expense. But from what I’ve read, for most people the 1 HP (Waste King L-8000 Legend Series 1.0-Horsepower Continuous Feed Garbage Disposal) is better especially if you have a big family and/or frequently have a lot of guests over for parties or what not. Neither of these apply to me and since 1/2 HP was STILL more powerful than the 1/3 that came with my home, I was still coming out ahead.INSTALLATION (DIFFICULTY)Power Cord — Can it be removed?———————————————-Before I continue, many people (like myself) may wonder if the Power Cord is removable, the short answer is yes its removable, I removed mine because all the appliances in my home are hard wired Here are the steps I did to remove the cord while preserving it if I want to go back and use it later1. Unscrew the metal plate on the bottom of the disposal.2. Find the wires that run from the power cord (should be a white, black and copper wire)3. Depending on how the wires are connected you may have to use a wire cutter to free the wire from the connector. Mine wasn’t connected with wire nuts, but a plastic connector that seemed to be a permanent connection so it couldn’t be twisted off. So what I did is stick a utility knife under the plastic connector and cut away at the exposed wire until it came out. I repeated this for the other wire.4. To remove the copper ground wire, I just unscrewed the green screw to release it.5. Removing the power cord assembly is a little harder; to do this I inserted a flathead screwdriver end under the rubber plug and pryed it out; this take a few tries as its in there pretty good. A WORD OF WARNING: DO NOT use a utility knife to try to pry it out, I stupidly tried this since I was too lazy to go to my tool box to get the proper tool and ended up stabbing myself in the thumb with the knife after it slipped, after learning my lesson I got the flathead screwdriver instead.6. Once the rubber plug is released you should now be able to pull the power plug out through the opening.7. Don’t forget to use a wire stripper to prepare the remaining wire under the disposal to connect to your existing wires in your home.———————————————-Installation of the Waste King itself was pretty simple; removing the old one…not so much. Prior to me installing a range hood and a dishwasher last year I had no experience installing appliances, but I was able to install this disposal by just following the instructions provided in the manual. Comparing this install to my range hood (non-vented), and my dishwasher, i would say it’s harder than installing the range hood but slightly easier than installing the dishwasher. My old disposal wasn’t connected to my dishwasher so I decided not to connect the Waste King to it either. I may go back and connect it later on, just not right now. If you want to read on about my installation experience it starts below, otherwise you can stop reading right here.INSTALLATION (TIME AND PROCESS)The install took me 7+ hours. Not because the new garbage disposal was hard to install, it was because the old one was such a pain to get out. While I had no issue getting the disposal itself out, the old sink flange was virtually impossible because it looks like the people who installed this disposal screwed the mounting bracket on too tight and ABOVE the threading on the lower part of the sink flange. As a result, no matter how many times I turned the mounting bracket it wouldn’t go anywhere because it wasn’t catching the threads to move down and come loose. If the sink flange and mounting bracket weren’t so old, I would have just installed the Waste King over on that using the Easy Mount adapter kit, (which I bought separately just in case). But because it was so old and I really wanted to switch to the easy mount system anyway, I was determined to get it off.Normally, after removing the old disposal, you should be able to screw the mounting bracket off from under the sink and lift the sink flange up from the top of the sink. However because the mounting bracket just would not screw off because it didn’t seem to be able to catch the threading. I decided to try to bend the edges of the sink flange that sits on top of the sink far enough so I could push it down through the sink instead of lifting it up. However I had no idea was I was getting myself into when deciding to try this. This process alone took a good 4 to 5 hours because whenever I would bend one side another part would stick out making it too wide to go through. After about 3 hours of using my wrenches (the hacksaw I bought was useless in cutting the flange), I went to the garage and got my tree branch cutters to try to cut the old flange so I could bend it more. The branch cutters made the job a little easier but still took almost two hours to get the flange bent enough so that I could push a part of it under the sink so I finally hammer the rest through. I also ended up slightly damaging the circular opening of my sink in doing this, but hopefully the plumbers putty will continue to stop any leaks as a result of the damage.UPDATE: Turns out I made this much harder than it needed to be. After examining the old sink flange assembly after removing it, I noticed a metal ring around the top of the threading that was preventing the bracket from screwing off. I did see this when trying to get it off but didn’t know what that it was a separate piece and I thought it was part of the threading. Just out of curiosity I inserted a flat head screw driver around the edges of the metal ring and it popped right off making the mounting bracket easy to screw off. I am kicking myself for not seeing this before and it would have saved me 4 hours and would have prevented the damaged I caused. Oh well, I’ll know for next time and hopefully you won’t make the same mistake I did.After FINALLY getting the old sink flange off, installing the new disposal with the EZ Mount System was pretty simple. I put the new sink flange in and following the instructions, checking for and correcting any water leaks before I continued. While following the EZ mount instructions I didn’t think the rubber cushion would be strong enough to hold the disposal without falling down, but a quick check showed that it would hold.After getting the sink flange prepared to hold the disposal next was the task of connecting the wiring. If you have an outlet under your sink, then USE it, it saves about a half hour of labor. Unfortunately I don’t have an outlet under my sink and I didn’t want to incur the extra expense of installing one under there, so I had to stick with hard wiring. As far as connectors go, I ended up using one of the water tight connectors instead of the 3/8″ clamp connectors I originally planned to use. Reason being is that while testing out the connectors to see which ones would fit, the water tight connector was a perfect fit and I just never took it off and after the ordeal of getting the old sink flange off, I didn’t want to waste any more time.I used my tool box to lay the waste king on then I connected it to the wiring in my home. The hardest thing here was getting the ground wire around the green screw. So I just ended up taking the green screw out completely, placing the ground wire directly over the hole, and then screwing the green screw back in. After I had the disposal connected to my wiring, all that was left was to mount the Waste King to the sink flange. This was incredibly easy and only required hammering to get the notch to the locked position.After mounting the Waste King now was the time to reconnect all the pipes. Because I don’t run my dishwasher to my Garbage disposal, I only had one pipe to connect and surprisingly, the opening of the waste king was at the exact same level as my old ISE was; so the old pipe lined of perfectly.Everything was now hooked up so I turned the power back on to the disposal and let it run with running water. And SURPRISE!! Leaks! Leaks from under the sink, and leaks from the piping. I applied more plumbers putty under the sink as well as re attached the pipe and tried everything again. This time there were no noticeable leaks but I still am not ready to call the install a success just yet. I did this install on the 26th of March and have been monitoring it periodically for and standing water under my sink. So far no leaks, but I will probably give it another week or so before I’m 100% confident in my install.”
9. InSinkErator Badger 5 Standard Series 1/2 HP Continuous Feed Food Waste Garbage Disposal, Black.
The InSinkErator Badger 5 is a well-established name in the world of garbage disposals, known for its reliability and straightforward functionality. As a 1/2 HP continuous feed garbage disposal, it’s a popular choice for homeowners with septic systems who appreciate a no-frills, durable unit. While not as powerful as higher HP models, its robust design and proven track record make it a consistent performer for managing typical food waste.
Key Features That Stand Out
- ✓ 1/2 HP Dura-Drive Induction Motor: Provides reliable and consistent grinding power for daily use.
- ✓ Galvanized Steel Components: Ensures a durable and long-lasting grind chamber.
- ✓ Compact and Space-Saving Design: Fits comfortably under most kitchen sinks, ideal for smaller cabinets.
- ✓ Quick Lock Mount: Designed for easy installation and quick replacement of existing InSinkErator units.
Why We Recommend It
We recommend the Badger 5 because it’s a dependable workhorse. Its robust construction means it can handle regular use for years. For septic systems, when used judiciously (avoiding tough, fibrous waste), its 1/2 HP motor is sufficient for common food scraps. Its widespread availability and ease of replacement make it a go-to for many.
Best For
This disposal is best for individuals or small families with septic tanks who need a reliable, compact, and economical garbage disposal for light to moderate food waste loads.
Pros and Cons
Pros:
- Extremely reliable and durable, known for longevity.
- Budget-friendly and widely available.
- Compact design is excellent for tight under-sink spaces.
- Simple and quick installation process.
Cons:
- 1/2 HP motor may not handle tough waste as effectively as higher HP models.
- No advanced noise reduction features, can be louder during operation.
Customer Reviews
Customer Review: “Verified PurchaseThe InSinkErator Badger 5 is the benchmark for reliable, no-nonsense garbage disposals. If you need a powerful, consistent, and durable unit without any unnecessary bells and whistles, this 1/2 HP continuous feed model is the perfect choice. It truly lives up to the InSinkErator reputation for quality.Installation was a breeze, thanks to the quick lock mount. I was able to swap out my old disposal and have this one running in under 30 minutes. Once installed, its operation is surprisingly quiet for a 1/2 HP motor. It handles common food scraps—vegetable peels, plate residue, and small bones—with ease, preventing frustrating clogs and keeping my kitchen sink running smoothly.The Continuous Feed feature is a major time-saver, allowing me to add waste while the unit is running, which increases efficiency during meal prep and cleanup. While it might be categorized as the “Standard Series,” the performance is anything but standard. It’s tough, dependable, and offers exceptional value for the price. This disposal is a fundamental appliance that you install and promptly forget about because it simply works, day after day.”
Customer Review: “My husband installed this yesterday. Works great!! It is a good quality garbage disposal. Fairly easy to install. It is a heavy weight. Sound level is average. I would recommend this.”
10. InSinkErator Badger 5XP Standard Series 3/4 HP Continuous Feed Garbage Disposal with Power Cord.
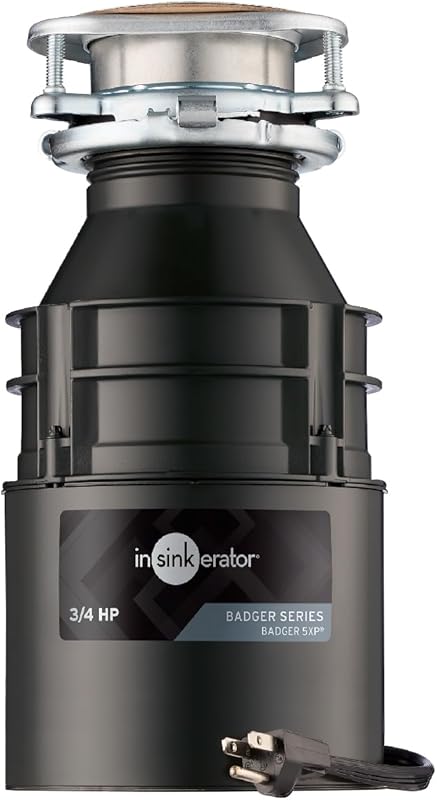
The InSinkErator Badger 5XP upgrades the standard Badger series with a more powerful 3/4 HP motor, making it a more robust option for homes with septic tanks. This continuous feed disposal is designed for enhanced grinding power and durability, ensuring that food waste is processed more efficiently before entering your septic system. It’s a reliable choice that offers a noticeable step up in performance from 1/2 HP models.
Key Features That Stand Out
- ✓ 3/4 HP Dura-Drive Induction Motor: Provides increased grinding power for tougher food waste.
- ✓ Galvanized Steel Components: Offers robust durability and a long operational lifespan.
- ✓ Quick Lock Mount: Allows for quick and easy replacement or new installation.
- ✓ Lift and Latch Technology: Designed for simpler, more secure installation.
Why We Recommend It
For those who find a 1/2 HP disposal slightly lacking but don’t need a top-tier 1 HP model, the Badger 5XP hits a sweet spot. Its 3/4 HP motor provides a significant boost in grinding capability, which is a big advantage for septic systems as it means finer particles. It retains the Badger’s reputation for durability and easy installation, making it a smart upgrade.
Best For
This disposal is well-suited for medium to large households with septic tanks that require more power for frequent use and a wider variety of food waste, while still being cost-effective.
Pros and Cons
Pros:
- Enhanced 3/4 HP motor for better grinding performance.
- Durable galvanized steel construction.
- Reliable and long-lasting performance.
- Easy installation with Quick Lock Mount and Lift and Latch technology.
Cons:
- Still a single-stage grind, not as fine as multi-stage disposals.
- Not the quietest option on the market.
Customer Reviews
Customer Review: “Life saver! Our old one quit and the sink wouldn’t drain well. This one showed up way faster than expected! It was easy to install, directions were simple, all we needed to get from the hardware store was plumbers putty for the sink drain. This one has more HP than our old one and has worked like a charm thus far (couple weeks in now). It’s not too tall in design so I actually have a little more room under my sink for my cleaning supplies. Excellent price compared to our local hardware store, too!”
Customer Review: “Purchased my house brand new. The 1/2 horsepower disposal lasted 10 years then just died. This is the same brand except I went 3/4 horsepower. Super easy system, twist the ring, it came right out. New one just had to unplug dishwasher plug, hook it to ring, twist ring, connect pipes. Works perfect. Not any louder than original.”
Complete Buying Guide for Best Garbage Disposal For Septic Tanks
Choosing the right garbage disposal for your septic tank is a significant decision. You want the convenience of a disposal without jeopardizing your home’s wastewater system. It’s like finding a balance between convenience and responsibility. Here’s a detailed guide on what to look for, helping you pick a model that will serve you well for years.
Essential Factors We Consider
When we evaluate garbage disposals for septic systems, we focus on several key aspects to ensure they are truly septic-friendly:
- ✓ Horsepower (HP): Higher horsepower generally means a more powerful motor that can grind food waste into finer particles. For septic tanks, 3/4 HP to 1 HP models are usually recommended as they reduce the solid load more effectively. While 1/2 HP can work, it often requires more careful use.
- ✓ Grinding Stages: This is arguably the most crucial factor for septic systems. Look for disposals with multiple grinding stages (2, 3, or even 4 stages). More stages mean the food waste is pulverized into an incredibly fine slurry, making it much easier for your septic tank’s bacteria to break down, and less likely to accumulate as sludge.
- ✓ Grind Chamber Materials: Stainless steel components are superior for durability and preventing corrosion, especially in a moist environment. This ensures your disposal lasts longer and doesn’t introduce rust or other detrimental materials into your plumbing.
- ✓ Noise Level: While not directly related to septic compatibility, a quieter disposal makes for a more pleasant kitchen experience. Models with “SoundSeal” or similar technologies offer significant noise reduction.
- ✓ Continuous vs. Batch Feed: Continuous feed models allow you to add food waste while the unit is running, offering convenience. Batch feed units operate only when a stopper is inserted, which can be safer but less convenient. For septic systems, either can work, but the grinding efficiency is what truly matters.
- ✓ Installation Ease: Many modern disposals come with “EZ Mount” or “Quick Lock” systems, along with pre-installed power cords, making them easier for DIY installation. This can save you money on plumber fees.
- ✓ Septic System Enhancements: Some disposals, like specific InSinkErator Evolution models, can be paired with Bio-Charge cartridges. These release microorganisms that help break down food waste in your septic tank, offering an extra layer of protection. Consider exploring best water softener for septic systems if you also have hard water, as water quality impacts your entire system.
Budget Planning
Garbage disposals for septic tanks range widely in price, typically from $100 for basic 1/2 HP models to over $400 for advanced 1 HP multi-stage disposals. Consider how frequently you’ll use the disposal and the types of food waste you generate. A slightly higher investment in a model with more grinding stages and power can save you significant money and hassle in septic tank maintenance down the road. Remember that cheaper models might not grind as finely, potentially leading to more frequent septic pump-outs or issues. It’s a balance of upfront cost versus long-term septic health.
Final Thoughts
When selecting the best garbage disposal for septic tanks, prioritizing models with higher horsepower and multiple grinding stages is key. These features ensure that food waste is pulverized into the finest possible particles, minimizing the strain on your septic system and helping prevent costly issues. Always remember that even with the best septic-safe disposal, moderation is crucial. Avoid putting large amounts of food, fibrous vegetables, or grease down the drain. For any drain issues, avoid harsh chemicals; consider using a best drain cleaner for kitchen sink with garbage disposal that is septic-safe.
Frequently Asked Questions
Q: Can I use any garbage disposal with a septic tank?
A: No, it’s not recommended to use just any garbage disposal with a septic tank. Standard disposals can introduce too much solid food waste, fats, and grease into your septic system, which can disrupt the bacterial balance and lead to clogs or premature tank pump-outs. You should look for models specifically designed or recommended for septic systems, typically those with higher horsepower (3/4 HP or 1 HP) and multiple grinding stages that pulverize food into finer particles.
Q: What’s the main difference between a regular disposal and one for septic tanks?
A: The primary difference lies in the fineness of the grind. Disposals recommended for septic tanks are designed with more powerful motors and/or multiple grinding stages to break down food waste into much smaller, more liquefied particles. This makes it easier for the beneficial bacteria in your septic tank to digest the waste, preventing the accumulation of solids that can cause problems.
Q: What types of food waste should I avoid putting down my septic-safe garbage disposal?
A: Even with a septic-safe disposal, it’s best to avoid tough, fibrous materials like celery stalks, banana peels, corn husks, and artichokes. Also steer clear of large bones, coffee grounds, eggshells, fruit pits, pasta, rice (which expand with water), and especially grease, fat, or oil. These items can still overwhelm your septic system or cause clogs in your plumbing.
Q: How often should I run my garbage disposal with a septic tank?
A: It’s best to use your septic-safe garbage disposal sparingly. Think of it as a convenience for small scraps, not a primary method of food waste disposal. Running it frequently or putting large amounts of food down can still place a heavy load on your septic system. Moderation is key to extending the life of your septic tank and reducing the frequency of pump-outs.
Q: Do I need to add any special additives to my septic tank if I use a garbage disposal?
A: While not always strictly necessary, some homeowners choose to use septic tank additives, especially if they use a garbage disposal. Certain additives contain beneficial bacteria and enzymes that can help break down food waste and maintain the health of your septic system. Some InSinkErator disposals even have integrated systems for adding Bio-Charge cartridges. Always consult your septic system professional for personalized advice.
Choosing the best garbage disposal for septic tanks means investing in peace of mind and the longevity of your home’s wastewater system. We’ve explored some fantastic options, from the powerful multi-stage grinding of the InSinkErator Evolution Advanced to the innovative composting solution offered by Sepura, and reliable budget-friendly models like the Waste King L-3200. Remember, the key is to prioritize models with higher horsepower and advanced grinding technologies to ensure food waste is thoroughly pulverized. Always use your disposal responsibly and combine it with good kitchen habits to keep your septic system happy and healthy. Ready to make your kitchen cleanup smoother and safer for your septic system? Click on the “Check Price on Amazon” buttons to find the perfect disposal for your home!