If you’re looking for a fun and simple way to enjoy winter, making snow ice cream is a delightful option! With just a few ingredients you probably have on hand, you can whip up a sweet treat that captures the essence of snowy days. It’s easy, quick, and a nostalgic way to savor the season—dig in and enjoy some fluffy, frosty goodness!
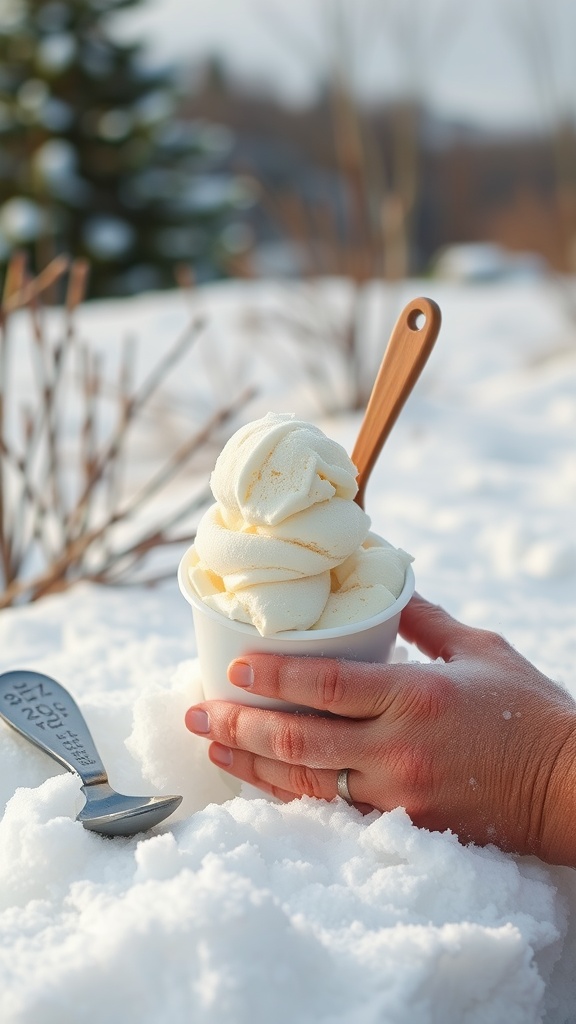
Classic Vanilla Snow Ice Cream

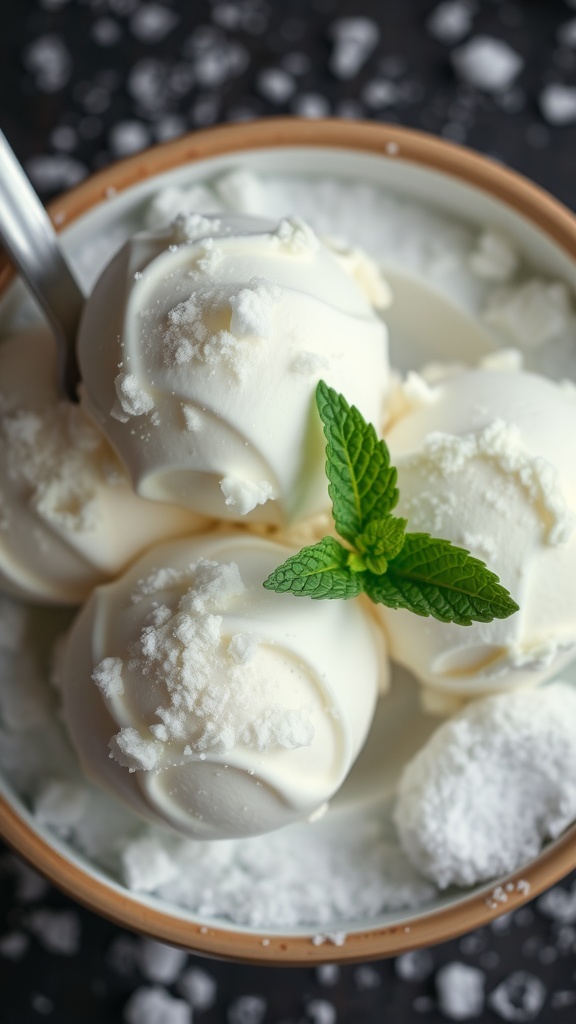
Classic Vanilla Snow Ice Cream is a delightful treat that captures the essence of winter in every bite. It’s creamy, sweet, and has a lovely vanilla flavor that makes it a go-to dessert for chilly days. Making this simple recipe is a fun way to enjoy fresh snow while creating a delicious snack for everyone.
This recipe is incredibly easy to whip up, requiring just a few basic ingredients. The result is a fluffy, snow-like dessert that feels light and refreshing. Whether you’re enjoying it on its own or topping it with fresh fruits, this snow ice cream is sure to bring smiles all around.
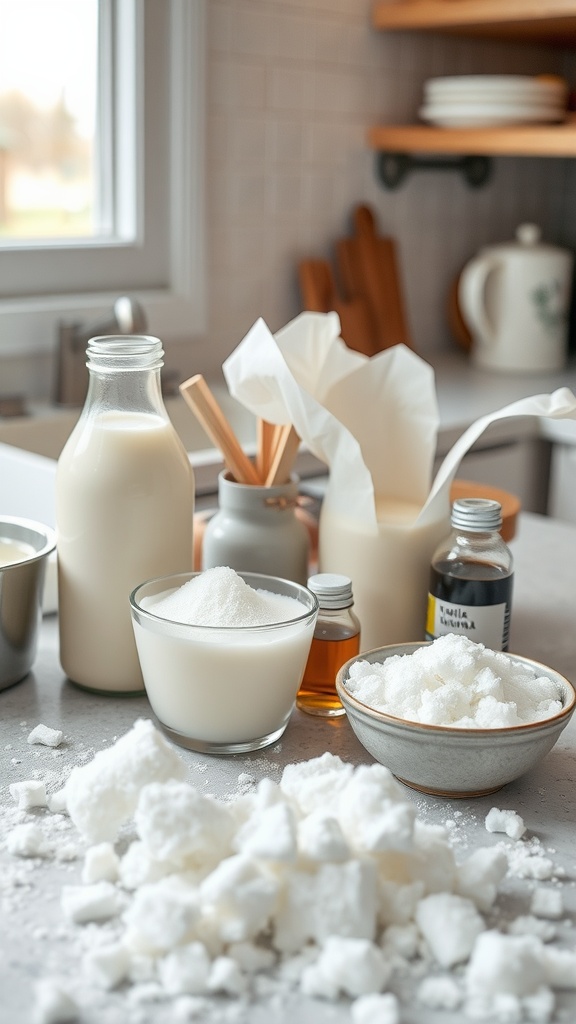
Ingredients
- 8 cups clean, fresh snow
- 1 cup milk
- 1/2 cup granulated sugar
- 1 teaspoon vanilla extract
- A pinch of salt
Instructions
- Gather the Snow: Collect 8 cups of clean, freshly fallen snow in a large bowl.
- Mix the Base: In a separate bowl, whisk together the milk, sugar, vanilla extract, and salt until the sugar is dissolved.
- Combine: Slowly pour the milk mixture over the snow and gently stir until well blended. Be careful not to compact the snow too much!
- Scoop and Serve: Once mixed, scoop the snow ice cream into bowls and serve immediately. You can also top it with fresh berries or other toppings of your choice.
Essential Ingredients for Snow Ice Cream
Snow ice cream is a delightful treat that captures the whimsy of winter. It combines the freshness of real snow with the creamy sweetness of a simple ice cream mix, creating a dessert that’s both fun to make and delicious to eat. With just a few basic ingredients, you can whip up this frosty dessert in no time, making it a perfect activity for kids and adults alike during snowy days.
The key to snow ice cream is using freshly fallen, clean snow. This dessert boasts a light and fluffy texture, reminiscent of traditional ice cream but with a unique twist. The flavor can be customized with various extracts and sweeteners, allowing you to experiment and find your favorite combination.
Ingredients
- 8 cups of clean, fresh snow
- 1 cup of milk (whole or heavy cream for extra creaminess)
- 1/2 cup granulated sugar (adjust for sweetness)
- 1 teaspoon vanilla extract (or any flavor you prefer)
Instructions
- Gather the Snow: Using a clean bowl, collect about 8 cups of fresh snow. Make sure it hasn’t been contaminated.
- Mix the Ingredients: In a separate bowl, whisk together milk, sugar, and vanilla extract until the sugar is dissolved.
- Combine: Slowly pour the milk mixture over the snow, folding it gently until you reach a soft-serve ice cream-like consistency.
- Serve: Scoop the snow ice cream into bowls and enjoy immediately, adding toppings like chocolate syrup or sprinkles if desired.
Kid-Friendly Snow Ice Cream Recipes

Snow ice cream is a delightful treat that kids will love! It’s a fun and simple way to enjoy a winter wonderland with a sweet twist. The creamy texture, combined with the subtle sweetness, makes it a treat that feels like a snowy day adventure.
Making snow ice cream is easy and kids can help out in the kitchen, adding their favorite flavors. Whether you prefer it vanilla or want to mix in some chocolate syrup, the options are endless. It’s a perfect way to bring smiles on chilly days!
Ingredients
- 8 cups clean, fresh snow
- 1 cup milk (whole or condensed)
- 1/2 cup granulated sugar
- 1 teaspoon vanilla extract
- Optional toppings: chocolate syrup, sprinkles, or fruit
Instructions
- Gather the snow: Make sure to collect clean snow from an area away from roads and pollution.
- Mix the base: In a large bowl, combine milk, sugar, and vanilla. Stir until the sugar is dissolved.
- Add the snow: Gradually add the snow to the milk mixture, folding gently until you reach your desired consistency.
- Serve immediately: Scoop the snow ice cream into bowls and add your favorite toppings. Enjoy your homemade winter treat!
Choosing the Right Flavorings

Snow ice cream is a delightful treat that captures the essence of winter in a bowl. It’s creamy, sweet, and incredibly simple to whip up, making it a favorite for families looking to enjoy a unique dessert. Whether you’re a fan of classic flavors or adventurous combinations, the options are endless!
When it comes to flavorings, you can start with the basics like vanilla or chocolate. But don’t be afraid to get creative! Think about using fruit extracts, syrups, or even spices like cinnamon for a twist. Combine different elements to create a flavor that suits your taste. Here’s a basic recipe to get you started:
Ingredients
- 8 cups fresh snow (or shaved ice)
- 1 cup milk (whole or condensed)
- 1/2 cup granulated sugar
- 1 teaspoon vanilla extract (or any flavoring of your choice)
Instructions
- Gather fresh snow in a large bowl, making sure it’s clean and free of debris.
- In a separate bowl, mix together the milk, sugar, and vanilla extract until the sugar is dissolved.
- Pour the milk mixture over the snow, stirring gently until combined.
- Scoop the snow ice cream into bowls and serve immediately. Enjoy your homemade winter treat!
Vegan Options for Snow Ice Cream
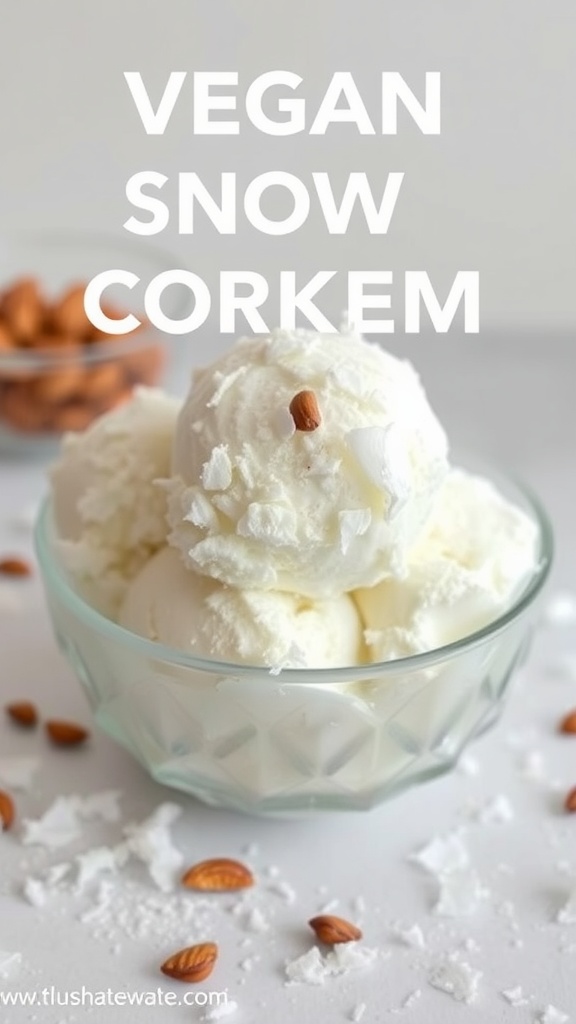
Snow ice cream is a delightful treat that captures the essence of winter with its light, fluffy texture and sweet flavor. It’s simple to make and perfect for enjoying on a snowy day, especially when you want a delicious yet guilt-free dessert. The recipe is not only easy but also allows for creativity with flavors and toppings.
For a vegan version, you can replace traditional dairy ingredients with plant-based alternatives. Using coconut milk or almond milk adds a rich creaminess, while maple syrup or agave nectar can sweeten the mix naturally. This way, you can enjoy a unique spin on a classic winter treat that everyone, including those who prefer vegan options, will love!
Ingredients
- 8 cups clean, fresh snow
- 1 cup coconut milk (or almond milk)
- 1/2 cup maple syrup or agave nectar
- 1 teaspoon vanilla extract
- Pinch of salt
- Optional toppings: shredded coconut, nuts, or fresh fruit
Instructions
- Gather the Snow: Collect fresh snow in a clean bowl, ensuring it’s free from any debris.
- Mix the Base: In another bowl, whisk together the coconut milk, maple syrup, vanilla extract, and a pinch of salt until well combined.
- Combine: Gradually pour the coconut mixture over the snow, stirring gently to combine without overmixing.
- Scoop and Serve: Once mixed, scoop the snow ice cream into bowls and add your favorite toppings.
- Enjoy: Serve immediately for the best fluffy texture!
Mixing Techniques for Creamy Consistency

Snow ice cream is a delightful treat that captures the essence of winter in every bite. With a sweet and creamy texture, it combines the freshness of snow with the rich flavors of your favorite sweeteners and dairy. This recipe is not only simple to whip up but also an enjoyable way to engage with family or friends during snow days.
The key to achieving a truly creamy consistency lies in the mixing techniques used during preparation. Properly blending the ingredients ensures that the final product is smooth and not icy. By incorporating the right amount of milk or cream and sweeteners, you can create a delightful dessert that feels luxurious and satisfying.
Ingredients
- 8 cups freshly fallen snow
- 1 cup whole milk or heavy cream
- 1/2 cup granulated sugar
- 1 teaspoon vanilla extract
Instructions
- Gather the Snow: Collect 8 cups of clean, freshly fallen snow in a large bowl. Make sure it’s fluffy and not packed down.
- Mix the Liquid Ingredients: In a separate bowl, combine the whole milk or heavy cream with the granulated sugar and vanilla extract. Stir well until the sugar is fully dissolved.
- Combine: Gradually pour the milk mixture over the snow, gently folding it in. Use a spatula to mix carefully, ensuring you maintain the light texture of the snow.
- Serve: Once it’s well mixed and creamy, serve immediately in bowls or cones. Enjoy your homemade snow ice cream!
Gathering Fresh Snow for Ice Cream
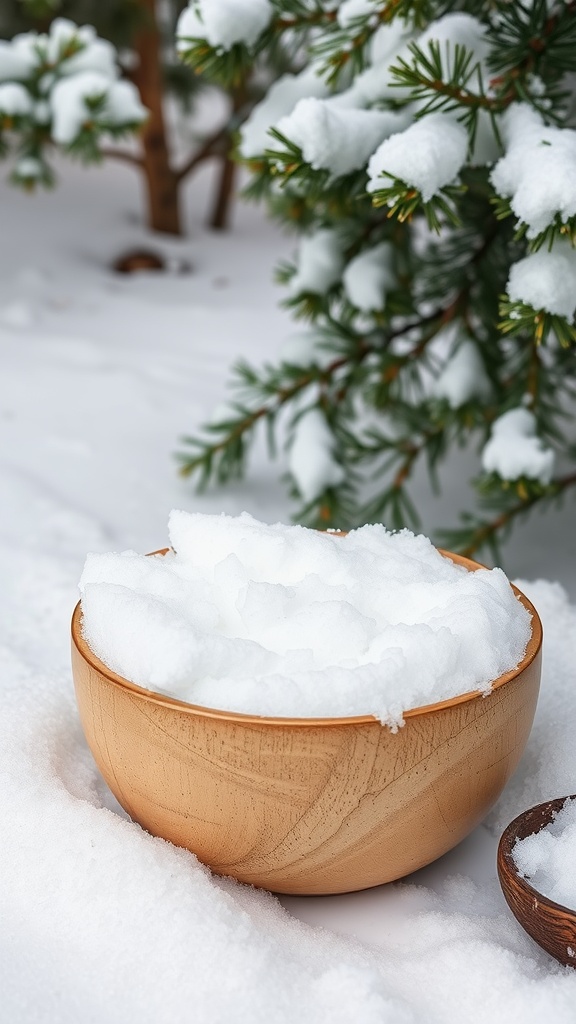
Making snow ice cream is a delightful winter treat that captures the essence of cold, fluffy snow mixed with sweet flavors. It’s not only a fun activity but also a simple way to create a unique dessert that tastes like a winter wonderland. The light, airy texture and subtly sweet taste make this treat a hit for both kids and adults alike.
Gathering the right kind of snow is essential for the best results. Look for fresh, clean, and fluffy snow, avoiding any that has been contaminated by dirt or debris. The snow should be light and powdery, as this allows the mixture to achieve that classic ice cream consistency. Once you’ve collected your snow, you can mix it with a few simple ingredients to whip up a delicious batch of snow ice cream.
Ingredients
- 8 cups of fresh, clean snow
- 1 cup of milk or cream
- 1/2 cup of sugar
- 1 teaspoon of vanilla extract
Instructions
- Gather fresh snow into a large bowl, ensuring it is uncontaminated.
- In a separate bowl, whisk together the milk or cream, sugar, and vanilla extract until the sugar is dissolved.
- Pour the milk mixture over the snow gradually, stirring gently until it reaches your desired consistency.
- Serve immediately for the best texture, and enjoy your homemade snow ice cream!
Toppings to Elevate Your Snow Ice Cream

Snow ice cream is a delightful winter treat that captures the essence of snowy days in your bowl. With its fluffy texture and sweet taste, it’s incredibly simple to whip up using just a few ingredients. The natural snow base gives it a unique flavor that combines the joy of winter with the sweetness of homemade ice cream.
To take your snow ice cream to the next level, be sure to experiment with various toppings. Classic choices include colorful sprinkles, chocolate syrup, and fluffy marshmallows. You can also add fresh fruit, crushed nuts, or even a drizzle of caramel for an extra burst of flavor. No matter how you choose to top it, the result will be a fun and tasty dessert perfect for sharing with family and friends.
Ingredients
- 8 cups clean, freshly fallen snow
- 1 cup milk
- 1/2 cup sugar
- 1 teaspoon vanilla extract
- Sprinkles, chocolate syrup, and marshmallows for topping
Instructions
- Gather the Snow: Collect fresh snow in a large bowl, making sure it’s clean and not packed down.
- Mix Ingredients: In a separate bowl, combine the milk, sugar, and vanilla extract. Stir until the sugar is dissolved.
- Combine: Pour the milk mixture over the snow and gently mix until well combined, being careful not to overmix.
- Serve: Scoop the snow ice cream into bowls and top with your favorite toppings like sprinkles, chocolate syrup, or marshmallows. Enjoy immediately!
Serving Suggestions for Snow Ice Cream
Snow ice cream is a delightful treat that captures the essence of winter in every scoop. With its creamy texture and sweet flavor, it’s a fun and simple dessert that anyone can whip up when the snow falls. This recipe uses fresh snow, making it a unique and refreshing option for those chilly days.
For serving, you can get creative! Drizzle some chocolate syrup or caramel over the top for a sweet twist. Fresh fruits like strawberries or blueberries add a pop of color and flavor. If you want a little crunch, sprinkle some crushed cookies or nuts on top. Snow ice cream is versatile, so feel free to customize it to your taste!
Ingredients
- 8 cups fresh snow
- 1 cup milk
- 1/2 cup granulated sugar
- 1 teaspoon vanilla extract
- Optional toppings: chocolate syrup, fresh fruit, crushed cookies, or nuts
Instructions
- Gather fresh snow in a large bowl, making sure it’s clean and dry.
- In a separate bowl, mix together the milk, sugar, and vanilla extract until the sugar is dissolved.
- Slowly pour the milk mixture over the snow, gently folding it in to combine.
- Serve immediately in bowls, adding any desired toppings like syrup or fruit.
- Enjoy your fresh snow ice cream!
Safety Tips for Snow Collection

Snow ice cream is a delightful treat that captures the essence of winter in every bite. Its creamy texture and sweet flavor make it a fun and simple dessert to whip up with just a few ingredients. Plus, it’s a great way to enjoy the fresh, fluffy snow right from your backyard!
However, before you dive into making this frosty dessert, it’s crucial to ensure that the snow you collect is safe for consumption. Here are some important safety tips to consider while gathering your snow.
First, always collect snow from a clean area away from roads, vehicles, and pets to avoid contamination. Freshly fallen snow is ideal, as it hasn’t had time to pick up pollutants from the ground. Additionally, avoid snow that has been packed down or yellowed, as it may not be safe to eat. When in doubt, it’s best to err on the side of caution and look for a pristine patch of snow. Now that you’re ready to safely gather your snow, here’s a simple recipe to create your own snow ice cream!
Ingredients
- 8 cups clean, fresh snow
- 1 cup milk (any kind)
- 1/2 cup granulated sugar
- 1 teaspoon vanilla extract
Instructions
- In a large mixing bowl, combine the milk, sugar, and vanilla extract. Stir until the sugar dissolves completely.
- Gradually add the fresh snow to the mixture, stirring gently until you achieve a creamy consistency. Adjust the amount of snow based on your preferred texture.
- Scoop the snow ice cream into bowls or cones, and enjoy immediately for the best flavor and texture!
Chocolate Snow Ice Cream Delight
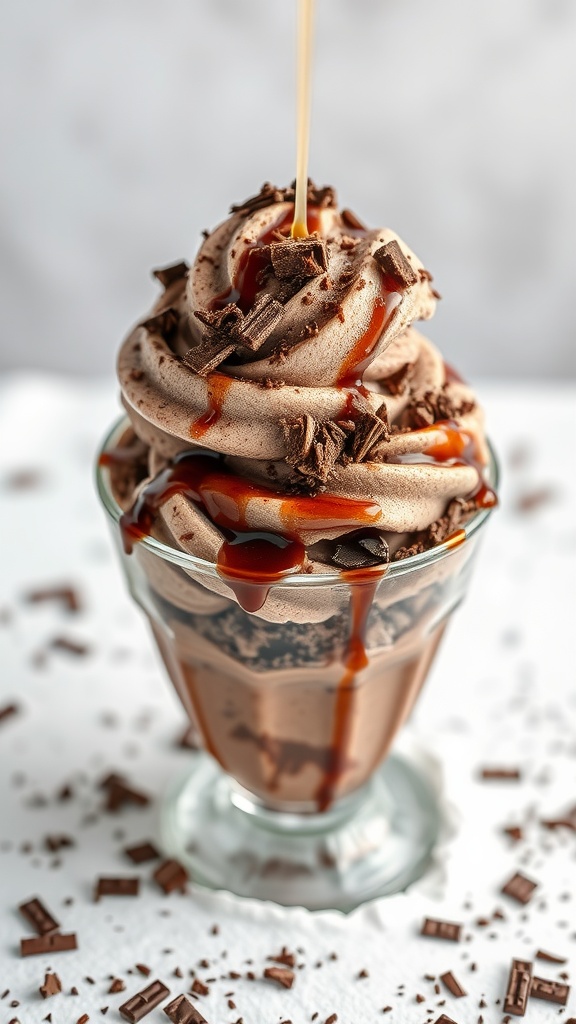
Chocolate snow ice cream is a delightful treat that brings a taste of winter magic right into your kitchen. It combines the fluffy texture of snow with the rich, creamy goodness of chocolate ice cream. The result is a dessert that’s light yet indulgent, making it perfect for both kids and adults alike.
What’s great about this recipe is how easy it is to whip up! With just a handful of ingredients, you can create a deliciously unique dessert that’s as fun to make as it is to eat. It’s a wonderful way to enjoy the snowy season without the chill!
Ingredients
- 4 cups clean, fresh snow
- 1/2 cup chocolate syrup
- 1/2 cup sweetened condensed milk
- 1 teaspoon vanilla extract
- Chopped chocolate or chocolate chips for topping
Instructions
- Gather all your ingredients and make sure to use fresh, clean snow. If you can, gather the snow after a light snowfall for a fluffier texture.
- In a large bowl, combine the chocolate syrup, sweetened condensed milk, and vanilla extract. Stir until well mixed.
- Gradually add the snow to the chocolate mixture, folding gently to combine. Be careful not to pack the snow too tightly; you want to keep that light, airy texture.
- Once fully combined, serve immediately in bowls or cups. Top with chopped chocolate or chocolate chips for an extra treat.
- Enjoy your chocolate snow ice cream right away for the best experience!
Experimenting with Seasonal Flavors
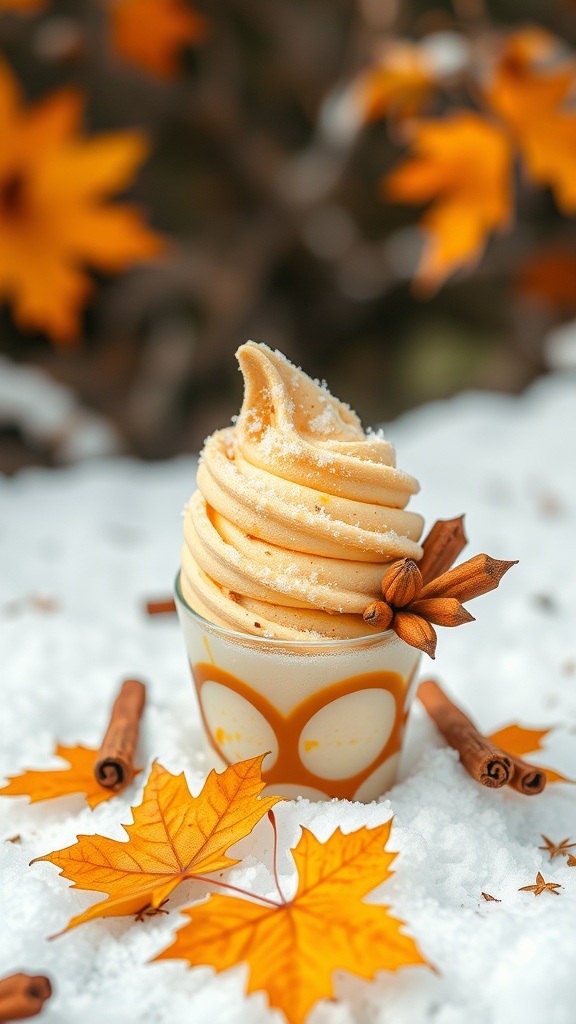
Snow ice cream is a delightful and simple treat that captures the essence of winter. It blends the freshness of snow with sweet flavors, resulting in a creamy dessert that’s both fun to make and enjoy. With just a few ingredients, you can create a dish that’s perfect for snowy days and a unique way to embrace the season.
This recipe allows you to experiment with various seasonal flavors, like vanilla, chocolate, or even pumpkin spice. It’s a playful activity for the whole family, turning a simple bowl of snow into a delicious dessert. Whether you’re looking for a nostalgic childhood treat or a new winter tradition, snow ice cream is a delightful way to celebrate the season.
Ingredients
- 8 cups clean, fresh snow
- 1 cup milk
- 1/2 cup granulated sugar
- 1 teaspoon vanilla extract
- Optional: flavored syrups or spices for extra taste
Instructions
- Gather Snow: Collect fresh snow in a large bowl, making sure it’s clean and fluffy.
- Mix Ingredients: In a separate bowl, combine milk, sugar, and vanilla extract. Stir until the sugar dissolves.
- Combine: Gradually pour the milk mixture over the snow, folding it gently to avoid melting the snow.
- Adjust Flavor: Taste your snow ice cream and adjust sweetness or add flavored syrups if desired.
- Serve: Scoop into bowls and enjoy immediately, adding toppings like sprinkles or chocolate syrup if you like!
Fruity Variations for Snow Ice Cream

Snow ice cream is a delightful treat that’s as simple as it is refreshing. With just a few ingredients, you can whip up this frozen dessert in no time. The natural sweetness of snow combined with your favorite fruity flavors creates a light and fluffy dessert perfect for any winter day.
To take your snow ice cream to the next level, consider adding fresh fruits or fruit syrups. Strawberries, bananas, and raspberries not only enhance the flavor but also add a splash of color and a fun texture. You can mix and match according to your taste, making each batch unique!
Ingredients
- 8 cups fresh, clean snow
- 1 cup milk (or almond milk for a dairy-free option)
- 1/2 cup granulated sugar
- 1 teaspoon vanilla extract
- 1 cup chopped fresh fruit (strawberries, bananas, raspberries, etc.)
Instructions
- Gather the snow: Collect fresh, clean snow in a large bowl. Be sure to avoid yellow snow!
- Mix the base: In a separate bowl, combine the milk, sugar, and vanilla extract. Stir until the sugar dissolves completely.
- Combine: Gradually pour the milk mixture over the snow, folding gently with a spatula until the snow is evenly coated.
- Add fruit: Gently fold in your chopped fresh fruits until they are evenly distributed throughout the snow mix.
- Serve: Scoop the snow ice cream into bowls and enjoy immediately for the best texture!
Storage Tips for Leftover Snow Ice Cream
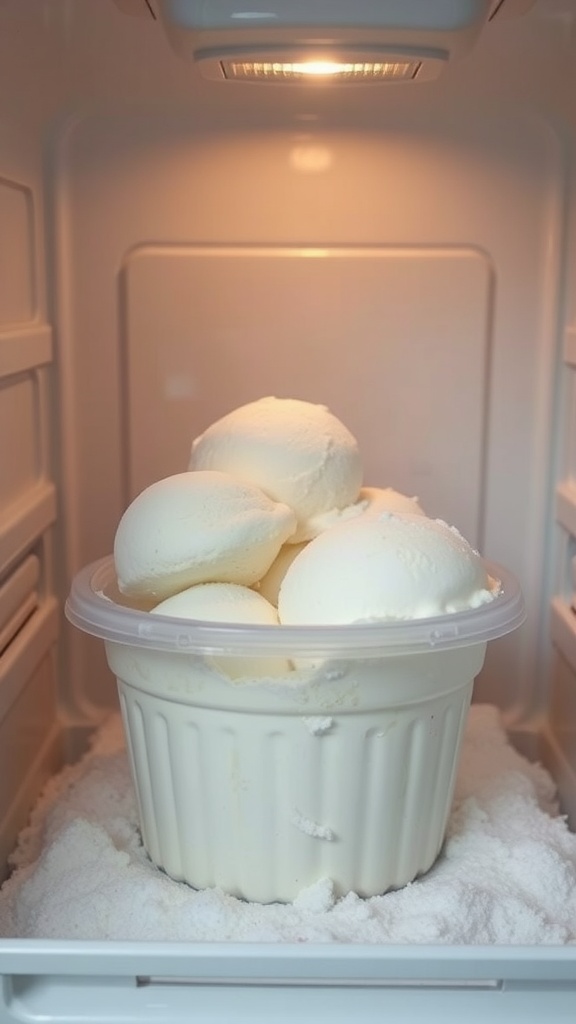
Snow ice cream is a delightful treat that’s as simple to make as it is delicious. With just a few ingredients, you can whip up a sweet, creamy dessert that showcases the unique flavor of snow. The texture is fluffy and light, making it a fun and nostalgic treat for both kids and adults alike.
When you find yourself with leftovers, proper storage is key to keeping your snow ice cream tasting fresh. To store it, place the ice cream in an airtight container, making sure to pack it tightly to minimize air exposure. You can also cover the top with a layer of plastic wrap before sealing the lid to help prevent freezer burn. When you’re ready to enjoy it again, let it sit at room temperature for a few minutes to soften before serving.
Ingredients
- 8 cups fresh, clean snow
- 1 cup milk or cream
- 1/2 cup granulated sugar
- 1 teaspoon vanilla extract
Instructions
- In a large bowl, combine the sugar, milk or cream, and vanilla extract, stirring until the sugar is dissolved.
- Add the fresh snow to the bowl, folding it gently into the liquid mixture until well combined.
- Scoop the ice cream into bowls or an airtight container for storage.
- Enjoy immediately or freeze for later use!
Incorporating Natural Sweeteners
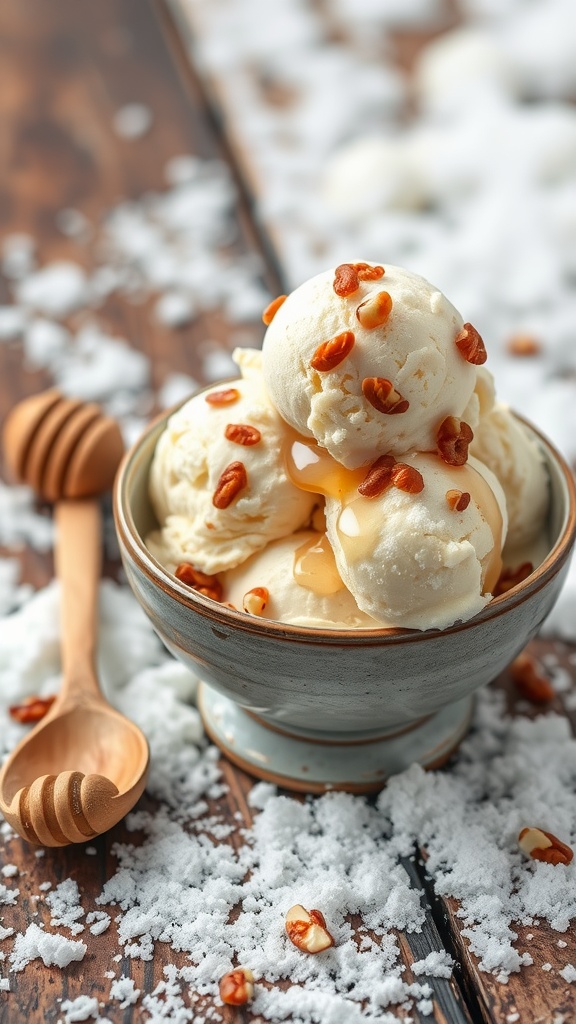
Snow ice cream is a delightful treat that captures the essence of winter in a bowl. With its fluffy, snow-like texture, it offers a refreshing taste that’s both sweet and satisfying. The simplicity of the recipe makes it accessible to anyone, whether you’re a seasoned chef or just looking for a fun activity with the kids.
One of the best aspects of making snow ice cream is the opportunity to incorporate natural sweeteners. Instead of using refined sugar, you can opt for honey, maple syrup, or agave nectar to enhance the flavor profile while keeping it wholesome. Each sweetener adds its own unique twist, allowing you to customize your snow ice cream to your liking.
Ingredients
- 8 cups fresh, clean snow
- 1 cup milk (any type)
- 1/2 cup honey, maple syrup, or agave nectar
- 1 teaspoon vanilla extract
- A pinch of salt
- Chopped nuts or fruit for topping (optional)
Instructions
- Gather the Snow: Collect fresh snow in a large bowl. Make sure it’s clean and free from debris.
- Mix the Base: In another bowl, whisk together the milk, sweetener of your choice, vanilla extract, and a pinch of salt until well combined.
- Combine: Gradually pour the milk mixture over the snow, folding it gently to maintain the fluffy texture.
- Scoop and Serve: Once combined, scoop the snow ice cream into bowls. Top with nuts or fruit if desired.
- Enjoy Immediately: Snow ice cream is best enjoyed fresh, so dig in right away!
Snow Ice Cream for Winter Celebrations

Snow ice cream is a delightful winter treat that’s as fun to make as it is to eat. With its light, fluffy texture and sweet flavor, it brings a taste of childhood nostalgia to any winter celebration. Plus, it’s super easy to whip up with just a few ingredients!
This recipe is a fantastic way to enjoy fresh, fluffy snow. Whether you’re hosting a cozy gathering or just looking for a sweet way to enjoy winter, snow ice cream is sure to impress. The taste is a perfect blend of creamy and sweet, making it a unique addition to your winter festivities.
Ingredients
- 8 cups of fresh, clean snow
- 1 cup of milk
- 1 cup of granulated sugar
- 1 teaspoon vanilla extract
- Optional: food coloring or flavored syrups for a twist
Instructions
- Gather the Snow: Collect fresh, clean snow and place it in a large bowl.
- Mix the Base: In a separate bowl, combine the milk, sugar, and vanilla extract until well mixed.
- Combine: Slowly pour the liquid mixture over the snow, gently folding it in until you achieve the desired consistency.
- Flavor It Up: If you’d like, add food coloring or flavored syrups to give your snow ice cream a fun twist.
- Serve: Scoop into bowls and enjoy immediately. For a festive touch, garnish with sprinkles or berries!
Using Snow Ice Cream in Creative Desserts

Snow ice cream is a delightful treat that captures the essence of winter. Made with fresh, clean snow, sugar, and a splash of vanilla, it offers a light and refreshing taste that’s reminiscent of fluffy clouds. It’s incredibly easy to whip up, making it a fun activity for kids and adults alike on a snowy day.
Once you’ve mastered the basic snow ice cream recipe, the possibilities for creative desserts are endless. Imagine layering it in a parfait with whipped cream and fresh fruit or using it as a topping for warm brownies. You can even mix in colorful sprinkles or chocolate chips to give it a playful twist. The lightness of the snow ice cream complements richer desserts beautifully, adding a unique texture that’s fun to explore!
Ingredients
- 8 cups fresh, clean snow
- 1 cup whole milk
- 1 cup granulated sugar
- 1 teaspoon vanilla extract
- Optional toppings: whipped cream, fruit, chocolate syrup, sprinkles
Instructions
- Gather Fresh Snow: Collect 8 cups of clean snow in a large bowl. Make sure it’s fresh and not yellow or dirty.
- Mix Ingredients: In a separate bowl, combine the milk, sugar, and vanilla extract. Stir until the sugar is fully dissolved.
- Combine: Gradually pour the milk mixture over the snow, folding it gently until you reach your desired consistency.
- Serve: Scoop the snow ice cream into bowls or glasses and top with your favorite toppings like whipped cream, fruit, or chocolate syrup.
- Enjoy: Serve immediately for the best texture and flavor!
Creating Snow Ice Cream Sundaes

Snow ice cream is a delightful treat that captures the essence of winter in a deliciously fun way. It’s a simple recipe that transforms freshly fallen snow into a creamy, sweet dessert that’s perfect for sharing with friends and family.
This recipe is not only easy to make, but it also allows for creativity with toppings. You can choose from a variety of flavors and textures, making each sundae unique and enjoyable. Whether you prefer fruity syrups, crunchy nuts, or fluffy whipped cream, snow ice cream sundae is a delightful way to embrace winter.
Ingredients
- 4 cups fresh, clean snow
- 1/2 cup milk (or non-dairy alternative)
- 1/2 cup granulated sugar
- 1 teaspoon vanilla extract
- 2 tablespoons chocolate syrup (optional)
- Whipped cream for topping
- Cherries for garnish
- Crushed cookies or nuts (optional)
Instructions
- Gather the Snow: Collect fresh, clean snow in a large bowl. Ensure it’s free from any debris or dirt.
- Make the Base: In a separate bowl, mix together the milk, sugar, and vanilla extract until the sugar is dissolved.
- Combine: Slowly pour the milk mixture over the snow, gently folding it in until well combined but still fluffy.
- Serve: Scoop the snow ice cream into serving bowls and swirl in chocolate syrup if desired.
- Add Toppings: Top with whipped cream, cherries, and any additional toppings you like.
Sustainable Practices for Snow Ice Cream Making
Snow ice cream is a delightful treat that combines the pure taste of fresh snow with sweet ingredients like vanilla and sugar. It’s not only a simple recipe to whip up, but it also captures the essence of winter in every bite. Whether you’re having fun with the kids or enjoying a snowy day, this recipe is a joyful way to savor the season.
When making snow ice cream, it’s essential to consider sustainable practices to enjoy this treat responsibly. Using clean, fresh snow is crucial, so always gather snow from a safe area away from potential contaminants. Additionally, opting for organic ingredients and minimizing waste can enhance your experience and support eco-friendly habits.
Ingredients
- 8 cups of freshly fallen snow
- 1 cup of milk (or a dairy-free alternative)
- 1/2 cup of granulated sugar
- 1 teaspoon of vanilla extract
- A pinch of salt
Instructions
- In a large mixing bowl, combine the milk, sugar, vanilla extract, and salt. Stir until the sugar is fully dissolved.
- Gradually add the snow to the mixture, folding it in gently until you achieve a creamy consistency.
- Serve immediately in bowls or cones, and enjoy your homemade snow ice cream!
Celebrating Snow Days with Ice Cream

Snow days are the perfect excuse to indulge in a little fun, and what better way to celebrate than by making snow ice cream? This simple treat captures the essence of winter, combining the fresh, fluffy texture of snow with delicious sweet flavors. It’s creamy, cool, and a delightful way to bring joy to a chilly day.
Making snow ice cream is super easy and requires just a few ingredients. It’s a playful activity that the whole family can enjoy together. Plus, you can customize it with your favorite flavors and toppings for a unique twist!
Ingredients
- 8 cups of fresh, clean snow
- 1 cup of milk (whole or condensed)
- 1/2 cup of granulated sugar
- 1 teaspoon of vanilla extract
- Optional: food coloring, chocolate syrup, or sprinkles for topping
Instructions
- Gather the Snow: Use a clean bowl to collect 8 cups of fresh, clean snow. Make sure it’s light and fluffy.
- Mix the Base: In another bowl, whisk together the milk, sugar, and vanilla extract until the sugar dissolves.
- Combine: Gradually pour the milk mixture over the snow, and stir gently to combine. Be careful not to pack the snow down too much.
- Serve: Scoop the snow ice cream into bowls or cones. Add any optional toppings like chocolate syrup or sprinkles.
- Enjoy: Dig in and savor the wintery goodness!
Adapting Snow Ice Cream for Dietary Needs

Snow ice cream is a delightful winter treat that captures the essence of snowy days. With its light and fluffy texture, it offers a refreshing taste that can transport you back to childhood memories of playing outside in the snow. The best part? It’s incredibly easy to make, requiring only a few simple ingredients.
When adapting this recipe for various dietary needs, there are plenty of options to ensure everyone can enjoy it. For those who are lactose intolerant, consider using almond milk or coconut milk instead of traditional dairy. If you’re cutting back on sugar, a natural sweetener like honey or maple syrup can replace granulated sugar. There are even ways to make it vegan-friendly by simply substituting non-dairy milk and avoiding any animal-derived ingredients. Snow ice cream is versatile, and with a few tweaks, everyone can indulge in this seasonal delight!
Ingredients
- 8 cups of clean, fresh snow
- 1 cup milk or non-dairy milk
- 1/2 cup granulated sugar or sweetener of choice
- 1 teaspoon vanilla extract
- Optional: fruit, chocolate syrup, or sprinkles for topping
Instructions
- Collect fresh snow in a large bowl, making sure it’s clean and free from debris.
- In another bowl, combine milk, sugar, and vanilla extract. Stir well until the sugar dissolves.
- Slowly pour the milk mixture over the snow, folding it gently until combined. Be careful not to overmix, as you want to maintain the fluffy texture.
- If desired, add toppings like fruit or syrup for added flavor.
- Serve immediately and enjoy your snowy treat!
Cultural Variations of Ice Cream with Snow

Snow ice cream is a delightful treat that combines the fluffiness of freshly fallen snow with the sweetness of flavored milk or cream. This simple and fun recipe is a favorite for kids and adults alike, especially during winter months when snow is plentiful. The taste is refreshing, with a creamy texture that melts in your mouth, making it a unique twist on traditional ice cream.
Making snow ice cream is easy and requires just a few ingredients. You don’t need an ice cream maker or special equipment, just some snow, milk, sugar, and vanilla extract. It’s a great way to enjoy a winter day, and you can customize it with your favorite flavors or toppings, making it a versatile dessert for everyone.
Ingredients
- 8 cups of clean, fresh snow
- 1 cup of milk (whole or any preferred type)
- 1/2 cup of granulated sugar
- 1 teaspoon of vanilla extract
- Optional toppings: chocolate syrup, sprinkles, or fruit
Instructions
- Gather the Snow: Collect clean snow in a large bowl, ensuring it’s not packed too tightly.
- Mix the Base: In a separate bowl, combine milk, sugar, and vanilla extract. Stir until the sugar is dissolved.
- Combine: Pour the milk mixture over the snow and gently fold it in until combined. Adjust the sweetness to your liking.
- Serve: Scoop the snow ice cream into bowls and add your favorite toppings. Enjoy it immediately!
Snow Ice Cream for a Summer Twist

Snow ice cream is a delightful treat that combines the charm of winter with the brightness of summer flavors. It’s simple to make and offers a refreshing way to cool down on hot days. The sweetness of the ice cream blends perfectly with the fluffy texture of snow, creating a light and airy dessert that’s both fun and tasty.
This recipe allows you to get creative with your favorite flavors, making it a hit for both kids and adults alike. You can whip it up in just a few minutes, making it an easy go-to for summer gatherings or a sweet surprise during playtime. Here’s how you can make your own snow ice cream:
Ingredients
- 4 cups clean, fresh snow
- 1 cup sweetened condensed milk
- 1 teaspoon vanilla extract
- 1/4 cup of your favorite fruit puree (like strawberry or mango)
- Optional toppings: sprinkles, chocolate chips, or fresh fruit
Instructions
- Gather the Snow: Collect fresh, clean snow in a large bowl or container. Make sure it’s fluffy and not packed down.
- Mix the Base: In another bowl, combine the sweetened condensed milk, vanilla extract, and fruit puree. Stir until well mixed.
- Combine: Gradually fold the snow into the milk mixture, being careful not to pack it down. Aim for a light and fluffy consistency.
- Serve: Spoon the snow ice cream into bowls and add your favorite toppings for an extra twist.
- Enjoy: Dig in immediately for the best texture, and savor the sweet, cool bliss!
Pairing Snow Ice Cream with Hot Drinks

Snow ice cream is a delightful treat that merges the chill of winter with the sweetness of a classic dessert. It’s light, fluffy, and incredibly easy to make, requiring just a few simple ingredients. The taste is reminiscent of vanilla ice cream but with a refreshing twist, making it a fun addition to any cozy winter gathering.
Pairing this snowy dessert with hot drinks elevates the experience. Imagine spooning a scoop of snow ice cream into a warm cup of hot chocolate or coffee—the contrast between the cold and hot adds an exciting dynamic. The creaminess of the snow ice cream blends beautifully with the rich flavors of your favorite warm beverages, creating a comforting delight perfect for cold days.
Ingredients
- 8 cups of freshly fallen snow
- 1 cup of whole milk
- 1/2 cup of granulated sugar
- 1 teaspoon of vanilla extract
- Pinch of salt
Instructions
- Prepare the Snow: Gather 8 cups of clean, fresh snow in a large bowl.
- Mix Ingredients: In another bowl, whisk together milk, sugar, vanilla extract, and salt until completely combined.
- Combine: Slowly pour the milk mixture over the snow, gently folding until the snow is evenly coated and the mixture resembles ice cream.
- Scoop and Serve: Scoop the snow ice cream into bowls and serve immediately, preferably alongside a steaming cup of hot chocolate or coffee.