If you’re looking to bake some delicious sourdough bread at home, you’ve come to the right place! This simple recipe will walk you through the process of creating a beautiful loaf with that irresistible crust and chewy interior. Let’s dive in and get your kitchen smelling like a bakery!
Autolyse Technique Explained
The autolyse technique is a crucial step in creating sourdough bread that helps enhance flavor and texture. By mixing flour and water and allowing it to rest before adding salt and starter, you develop gluten more effectively, resulting in a dough that is easier to handle and shapes beautifully. This method also allows the flour to fully absorb water, which contributes to a more flavorful bread.
Using this technique not only simplifies the kneading process but also leads to a lighter, airier crumb. It’s a straightforward step that can elevate your baking game, making your sourdough not just good, but delightful.
Ingredients
- 500 grams all-purpose flour
- 350 grams water (room temperature)
- 10 grams salt
- 100 grams active sourdough starter
Instructions
- Mix Flour and Water: In a large bowl, combine the flour and water. Stir gently until no dry flour remains. Cover the bowl with a damp cloth and let it rest for 30 minutes to 1 hour.
- Add Salt and Starter: After the dough has rested, sprinkle the salt on top and add the sourdough starter. Mix well until fully incorporated.
- Knead the Dough: Turn the dough onto a floured surface and knead for about 5-10 minutes until it’s smooth and elastic.
- Bulk Fermentation: Place the dough back in the bowl, cover it, and let it rise at room temperature for 3-4 hours, stretching and folding it every 30 minutes.
- Shape and Final Proof: Turn the dough out onto a floured surface, shape it into a round loaf, and let it rise for another hour before baking.
Creating a Perfect Sourdough Starter
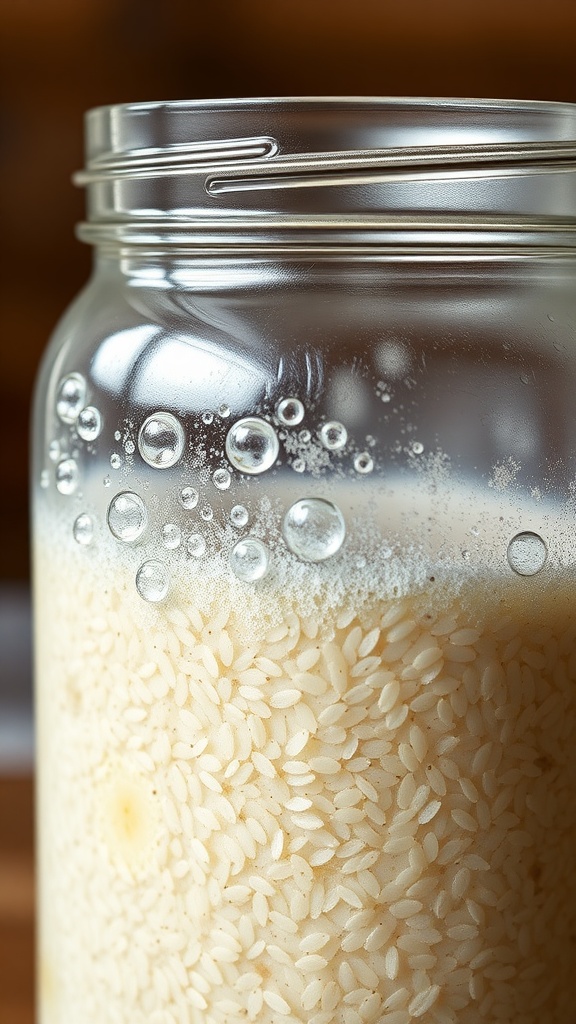
A sourdough starter is the foundation of a great sourdough bread recipe. It’s a simple mix of flour and water that, over time, develops wild yeast and bacteria. The result is a tangy, flavorful bread that has a delightful chew and crust. Making a sourdough starter is not only rewarding but also an enjoyable process that brings a little magic to your baking.
Starting your sourdough journey is easier than you might think. All you need is some flour, water, and a bit of patience. In just a few days, you’ll create a bubbly, active starter that’s ready to leaven your bread. Once you master this step, you’ll find yourself excited to bake your own loaves!
Ingredients
- 1 cup all-purpose flour
- 1/2 cup water (room temperature)
- 1 tablespoon whole grain flour (optional, for added flavor)
Instructions
- Mix the Ingredients: In a clean jar, combine 1 cup of all-purpose flour and 1/2 cup of room temperature water. Stir until there are no dry clumps.
- Let it Sit: Cover the jar loosely with a lid or cloth and let it sit at room temperature for 24 hours.
- Feed the Starter: After 24 hours, you should see some bubbles. Discard half of the mixture and add another 1 cup of flour and 1/2 cup of water. Mix well and let sit for another 24 hours.
- Repeat Feeding: Continue this feeding process every 24 hours for about 5-7 days. You’ll notice the starter becoming more bubbly and doubling in size.
- Ready to Use: Once your starter is bubbly and has a pleasant sour smell, it’s ready to use in your sourdough bread recipe!
Understanding Sourdough Fermentation
Sourdough bread has a unique flavor and texture that comes from the natural fermentation process. This recipe allows you to create a loaf that is crusty on the outside and soft on the inside. The tangy taste of sourdough is a result of wild yeast and lactic acid bacteria working together, making it a delight for any bread lover.
While it may seem intimidating, making sourdough bread at home is quite simple. With just a few ingredients and some patience, you can enjoy the warm, savory aroma of freshly baked bread right from your oven. Let’s get started!
Ingredients
- 3 cups all-purpose flour
- 1 1/2 cups warm water
- 1 cup active sourdough starter
- 1 teaspoon salt
Instructions
- Mix the Dough: In a large bowl, combine the flour and salt. In a separate bowl, mix the warm water and sourdough starter until well blended. Gradually add the wet ingredients to the dry ingredients, stirring until a shaggy dough forms.
- Autolyse: Cover the bowl with a damp cloth and let it rest for about 30 minutes. This helps the flour absorb the water and encourages gluten development.
- Knead the Dough: After resting, knead the dough on a floured surface for about 10 minutes until it becomes smooth and elastic. Place it back in the bowl, cover, and let it rise for about 4-6 hours, until doubled in size.
- Shape the Loaf: Once risen, gently deflate the dough and shape it into a round loaf. Let it rest for another 30 minutes.
- Preheat the Oven: Preheat your oven to 450°F (232°C). If using a Dutch oven, place it inside the oven to heat.
- Bake: Carefully transfer the dough to the preheated Dutch oven or a baking sheet. Bake for 30-35 minutes until golden brown and hollow-sounding when tapped.
- Cool: Let the bread cool on a wire rack for at least 30 minutes before slicing. Enjoy your homemade sourdough bread!
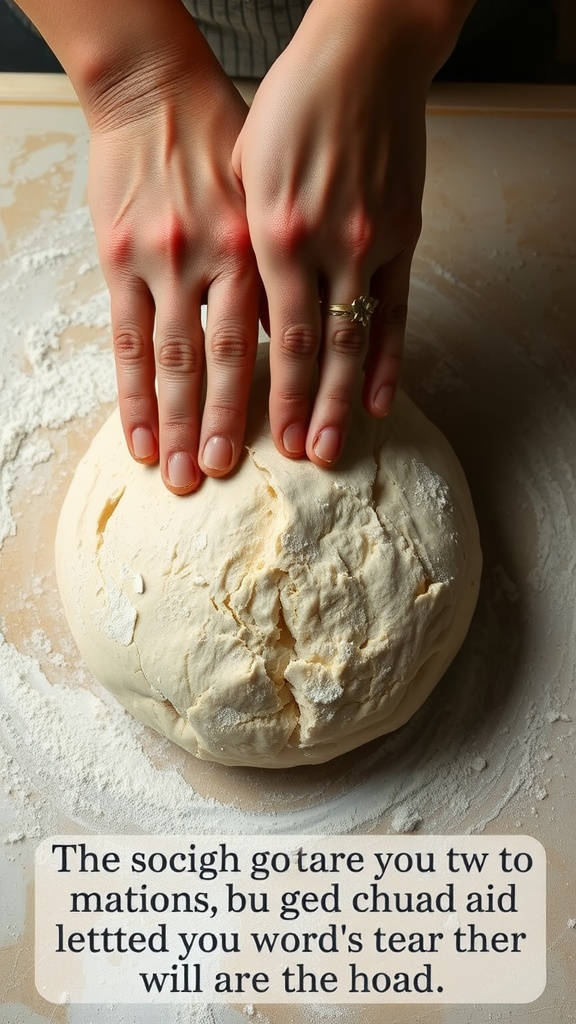
Kneading Techniques for Sourdough

Sourdough bread is a delightful combination of tangy flavor and a chewy crust. With its unique fermentation process, it offers a taste that’s both rustic and sophisticated. Though it may seem daunting, making sourdough at home can be quite approachable, especially once you get the hang of kneading.
The kneading process is essential for developing gluten, which gives sourdough its structure. By using various kneading techniques, you can achieve the perfect dough consistency, leading to a loaf that’s airy and full of flavor. Let’s dive into the ingredients and instructions for a classic sourdough bread recipe!
Ingredients
- 3 cups bread flour
- 1 cup all-purpose flour
- 1 1/2 cups water, at room temperature
- 1 cup active sourdough starter
- 1 1/2 teaspoons salt
Instructions
- Mix Ingredients: In a large bowl, combine the bread flour, all-purpose flour, and salt. In another bowl, mix the water with the active sourdough starter until well blended. Gradually add this mixture to the flour, stirring until a shaggy dough forms.
- Knead the Dough: Transfer the dough to a lightly floured surface. Using the heel of your hand, push the dough away from you, then fold it back over itself. Rotate the dough a quarter turn and repeat. Continue kneading for about 8-10 minutes until the dough is smooth and elastic.
- Bulk Fermentation: Place the kneaded dough in a lightly greased bowl. Cover it with a damp cloth and let it rise at room temperature until it has doubled in size, about 4-6 hours.
- Shape the Dough: Turn the risen dough onto a lightly floured surface. Gently deflate it and shape it into a round loaf. Let it rest for about 15 minutes before final shaping.
- Final Rise: Place the shaped loaf in a floured proofing basket. Cover and let it rise for another 2-3 hours until it has nearly doubled.
- Bake the Bread: Preheat your oven to 450°F (230°C). Carefully transfer the loaf to a baking stone or a baking sheet lined with parchment paper. Bake for 30-35 minutes until the crust is golden brown and the loaf sounds hollow when tapped.
Choosing the Right Flour for Sourdough
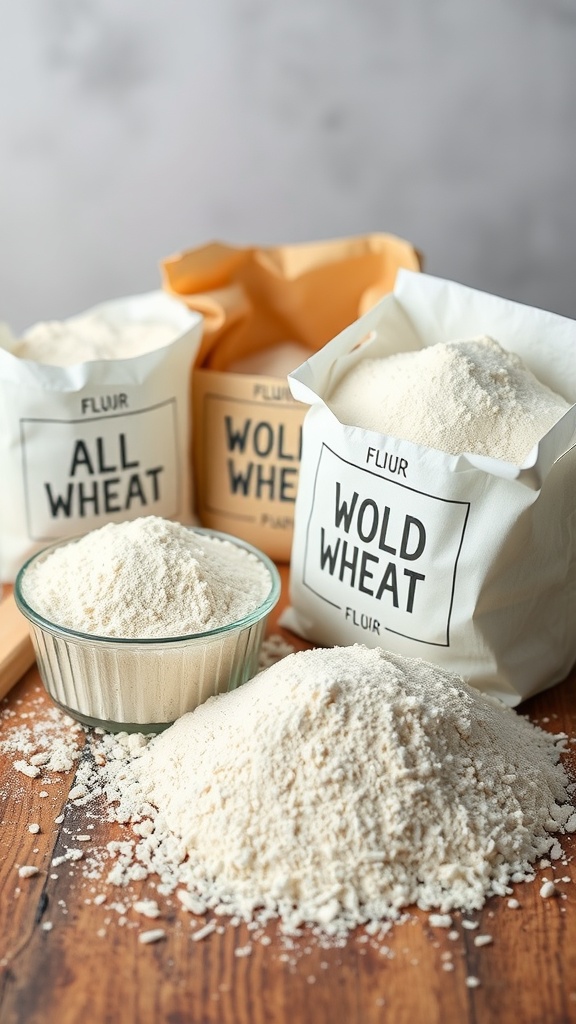
When it comes to sourdough bread, the type of flour you use plays a significant role in the flavor and texture of your loaf. Different flours bring their unique characteristics to the dough, impacting everything from rise to crust development. Whether you prefer a light, airy crumb or a denser texture, understanding flour types can help you achieve your desired outcome.
For a basic sourdough bread, many bakers opt for all-purpose flour due to its versatility. However, whole wheat flour can add a nutty flavor and enhance nutritional value. Mixing different flours can also offer a balance of taste and texture. Experimenting with various flours allows you to personalize your sourdough, making the baking process even more enjoyable.
Ingredients
- 3 cups all-purpose flour
- 1 cup whole wheat flour
- 1 1/2 cups water, lukewarm
- 1 cup active sourdough starter
- 2 teaspoons salt
Instructions
- Mix the Dough: In a large bowl, combine the all-purpose flour, whole wheat flour, and salt. Add the active sourdough starter and lukewarm water, mixing until a shaggy dough forms.
- Autolyse: Let the dough rest for 30 minutes. This helps the flour absorb the water and begins gluten development.
- Knead: Turn the dough onto a floured surface and knead for about 10 minutes until it becomes smooth and elastic.
- First Rise: Place the dough in a greased bowl, cover it with a damp cloth, and let it rise for 4-6 hours, or until doubled in size.
- Shape the Dough: Gently deflate the dough and shape it into a round loaf. Place it in a floured proofing basket.
- Second Rise: Cover and let it rise for another 1-2 hours.
- Bake: Preheat your oven to 450°F (230°C). Place a Dutch oven inside to heat up. Carefully transfer the dough into the hot Dutch oven, cover, and bake for 30 minutes. Remove the lid and bake for an additional 15 minutes until golden brown.
Essential Tools for Sourdough Baking
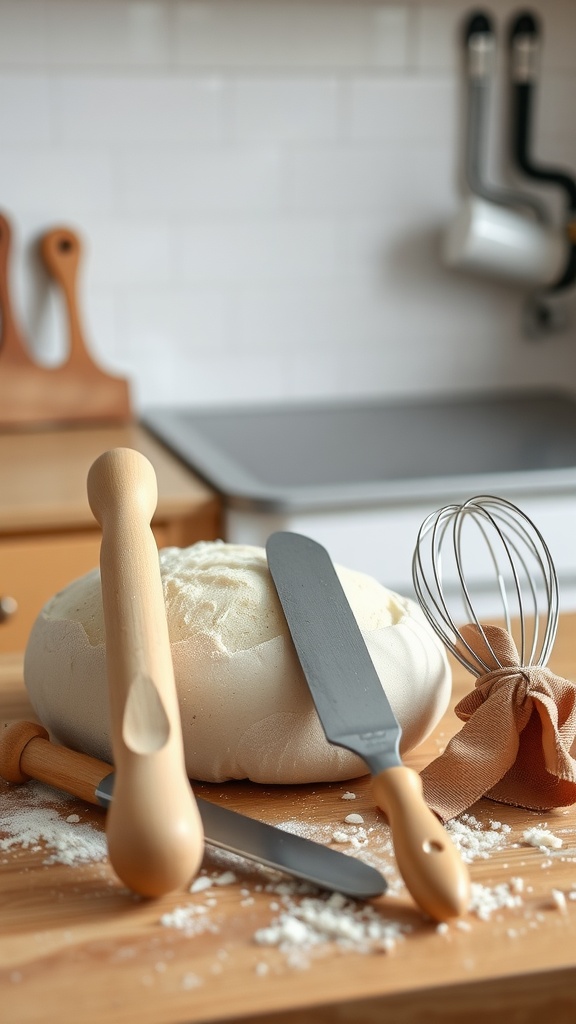
Making sourdough bread is a delightful journey that brings together simplicity and rich flavors. The tangy taste of sourdough is achieved through natural fermentation, giving it a unique character that’s hard to resist. While it may seem a bit daunting at first, with the right tools and a little patience, you can create a loaf that’s crisp on the outside and soft on the inside.
To ensure your sourdough baking goes smoothly, having the right tools is essential. You’ll need a sturdy mixing bowl, a bench scraper for cutting and shaping your dough, and a good quality bread knife for slicing. A digital kitchen scale is also helpful for precise measurements. These tools not only make the process easier but also enhance your overall baking experience.
Ingredients
- 500 grams bread flour
- 350 grams water
- 100 grams active sourdough starter
- 10 grams salt
Instructions
- Mix the Dough: In a large bowl, combine the bread flour and water. Mix until no dry flour remains. Let it rest for 30 minutes to an hour (autolyse).
- Add Starter and Salt: Add the active sourdough starter and salt to the dough. Mix until fully incorporated.
- Bulk Fermentation: Cover the bowl with a damp cloth and let it rise at room temperature for 4 to 6 hours, folding the dough every 30 minutes to develop gluten.
- Shape the Dough: Once the dough has doubled in size, turn it out onto a floured surface. Shape it into a round or oval loaf and let it rest for 30 minutes.
- Final Proof: Place the shaped dough in a well-floured proofing basket and cover it. Let it proof for another 2 to 4 hours at room temperature, or overnight in the fridge for a more complex flavor.
- Bake: Preheat your oven to 450°F (232°C). Carefully transfer the dough to a baking stone or a Dutch oven and bake for 30 to 40 minutes. Let it cool before slicing.
Bulk Fermentation Process
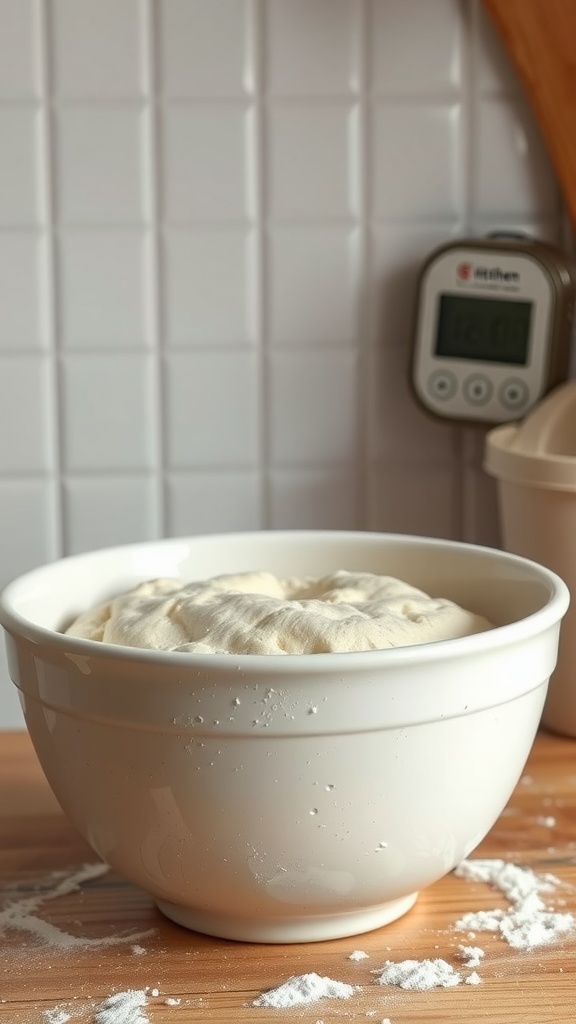
The bulk fermentation process is a crucial step in making sourdough bread. It’s the phase where the dough begins to rise and develop flavor. During this time, the natural yeast and bacteria present in the starter work their magic, creating a delightful tanginess and a chewy texture. It can seem a bit daunting at first, but once you get the hang of it, you’ll appreciate how simple and rewarding it is.
To start, combine your ingredients and gently mix them until they come together. After that, cover your bowl and let the dough rest. This period usually lasts between 4 to 6 hours, depending on the ambient temperature and your desired flavor. During this time, it’s helpful to perform a series of stretch and folds every 30 minutes. This technique helps develop gluten strength and captures air, resulting in a light, airy loaf. By the end of this phase, your dough should have doubled in size and feel soft and pliable, ready for shaping!
Ingredients
- 500g bread flour
- 350g water
- 100g active sourdough starter
- 10g salt
Instructions
- Mix Ingredients: In a large bowl, combine the bread flour and water. Mix until no dry flour remains. Let it rest for about 30 minutes.
- Add Starter and Salt: Add the active sourdough starter and salt to the dough. Mix well until everything is incorporated.
- Bulk Fermentation: Cover the bowl with a lid or a damp cloth and let it rest at room temperature for 4 to 6 hours. During this time, perform stretch and folds every 30 minutes.
- Check for Readiness: The dough is ready when it has doubled in size and has a soft, airy feel.
- Proceed to Shaping: Once the bulk fermentation is complete, transfer your dough to a floured surface for shaping.
Stretch and Fold Method
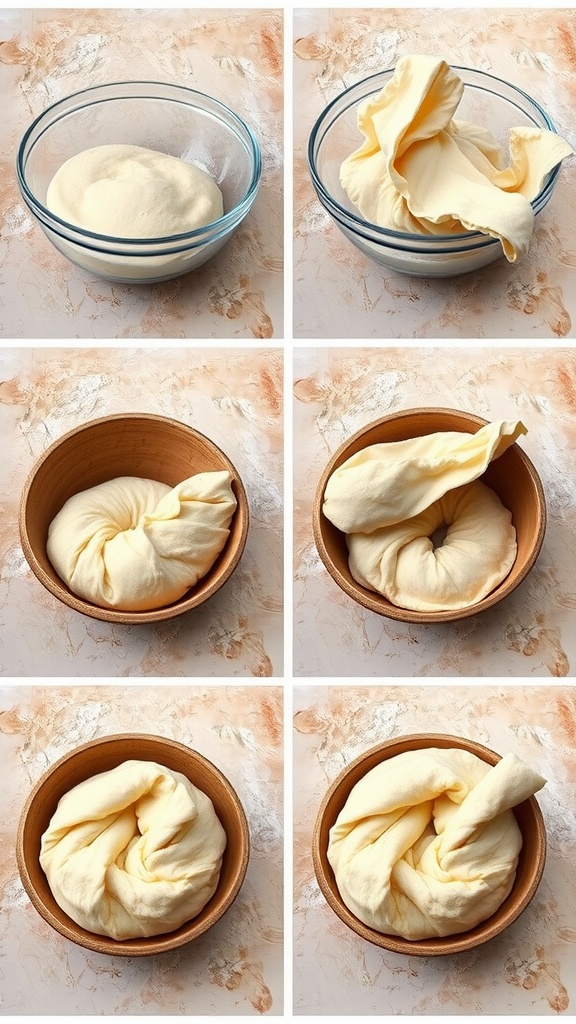
The stretch and fold method is a gentle technique used in sourdough bread making that helps develop gluten without the need for intensive kneading. This process not only strengthens the dough but also incorporates air, which contributes to the bread’s airy texture and delicious flavor. It’s a simple technique that can be mastered with just a little practice, making it perfect for both beginners and seasoned bakers.
As you stretch and fold the dough, you’ll notice it becoming smoother and more elastic. This gradual development leads to a crusty exterior and a chewy interior, characteristic of a great sourdough loaf. Plus, it allows for a more hands-off approach, giving you time to relax or prepare your favorite toppings while the dough does its thing. Here’s a simple recipe to get you started:
Ingredients
- 500 grams all-purpose flour
- 350 grams water, at room temperature
- 100 grams active sourdough starter
- 10 grams salt
Instructions
- Mix the Dough: In a large mixing bowl, combine the flour and water. Mix until there are no dry bits. Let it rest for about 30 minutes.
- Add Starter and Salt: Add the sourdough starter and salt to the dough. Mix thoroughly until well incorporated.
- Stretch and Fold: Over the next two hours, perform stretch and folds every 30 minutes. To do this, wet your hand, grab one side of the dough, stretch it up, and fold it over itself. Rotate the bowl and repeat until you’ve stretched and folded all sides.
- Bulk Fermentation: Let the dough rise at room temperature until it has doubled in size, which typically takes 4-6 hours.
- Shape and Final Rise: After bulk fermentation, gently shape the dough and let it rest for another 30 minutes. Then, shape it again and place it in a floured proofing basket.
- Preheat and Bake: Preheat your oven to 450°F (232°C) with a Dutch oven inside. Once preheated, transfer the dough to the pot, cover, and bake for 30 minutes. Remove the lid and bake for an additional 15-20 minutes until golden brown.
- Cool: Let the bread cool on a wire rack before slicing.
Understanding Oven Spring
Sourdough bread is a delightful treat that combines a unique tangy flavor with a hearty texture. The natural fermentation process creates a complex taste profile that many find irresistible. This recipe is approachable for both beginners and experienced bakers, making it a great choice for anyone looking to delve into the world of sourdough.
One crucial aspect of baking sourdough is achieving a good oven spring. This refers to the dough’s ability to rise significantly in the oven during the initial baking phase. A well-developed starter and proper dough handling can lead to that beautiful, airy interior and a crispy crust that we all crave.
Ingredients
- 3 cups all-purpose flour
- 1 1/4 cups warm water
- 1/2 cup active sourdough starter
- 1 teaspoon salt
Instructions
- Mix the Dough: In a large bowl, combine the flour and salt. In another bowl, mix warm water and sourdough starter until well combined. Pour the wet ingredients into the flour mixture and stir until it forms a shaggy dough.
- Autolyse: Let the dough rest for about 30 minutes to an hour. This step helps develop the gluten and improves the texture of the bread.
- Fold and Rise: Gently stretch and fold the dough in the bowl several times. Cover with a damp cloth and let it rise at room temperature for 4-6 hours, or until it has doubled in size.
- Shape the Dough: Turn the dough onto a floured surface and shape it into a round loaf. Place it seam-side down in a floured proofing basket. Let it rise again for about 1-2 hours.
- Preheat the Oven: About 30 minutes before baking, preheat your oven to 450°F (230°C) with a Dutch oven inside.
- Bake: Carefully transfer the dough to the hot Dutch oven, cover it, and bake for 30 minutes. Remove the lid, then bake for an additional 15-20 minutes until golden brown.
- Cool: Let the bread cool on a wire rack before slicing. Enjoy your homemade sourdough bread!
Proofing Techniques for Sourdough
Making sourdough bread is a rewarding experience that brings a delightful taste to your kitchen. The subtle tang of fermented dough pairs perfectly with a crispy crust and a soft, airy interior. While it might seem complex, the process is straightforward with a little patience and practice.
One of the key aspects of sourdough baking is proofing, which allows the dough to rise and develop flavor. There are a few techniques you can use to ensure your bread turns out just right. Whether you let it rise in a warm spot or opt for a cold proof in the fridge, each method offers unique benefits. Experiment and see what works best for your schedule and taste preferences!
Ingredients
- 3 cups bread flour
- 1 cup water
- 1/2 cup active sourdough starter
- 1 teaspoon salt
Instructions
- Mix the Ingredients: In a large bowl, combine the bread flour and water. Stir until no dry flour remains. Add the sourdough starter and salt, mixing until fully incorporated.
- Bulk Fermentation: Cover the bowl with a damp cloth and let it sit at room temperature for about 4-6 hours, or until the dough has doubled in size.
- Shape the Dough: Turn the dough onto a lightly floured surface and shape it into a round loaf. Let it rest for 30 minutes.
- Final Proof: Place the dough in a proofing basket or a bowl lined with a floured cloth. Cover it and let it proof for another 2-4 hours at room temperature, or overnight in the fridge for a cold proof.
- Bake: Preheat your oven to 450°F (230°C). Transfer the dough onto a baking surface, score the top, and bake for 30-35 minutes until golden brown.
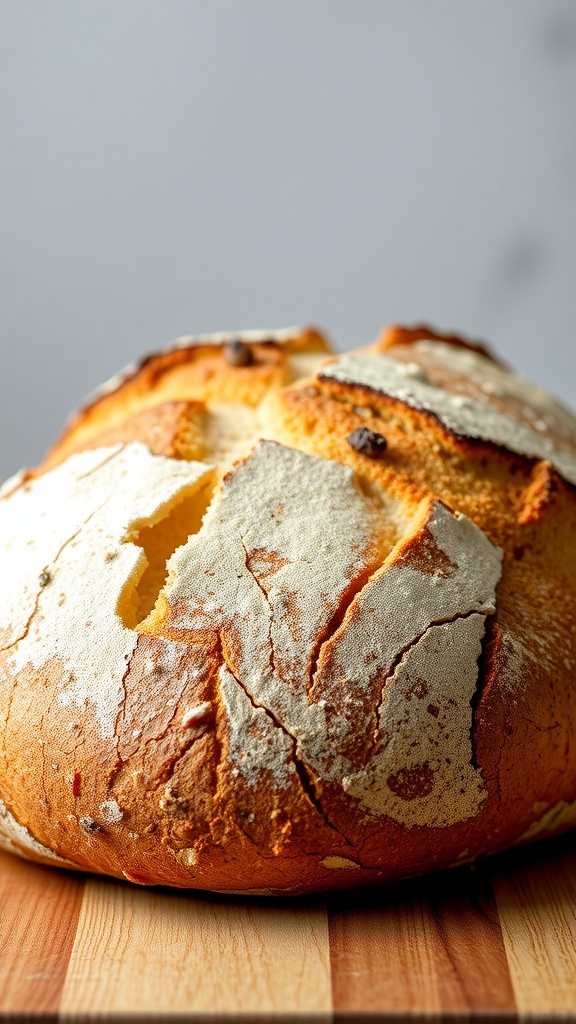
Scoring Sourdough for Baking

Sourdough bread has a distinct flavor that balances tanginess and sweetness, making it a favorite among bread lovers. The process of making sourdough can be incredibly rewarding, as you watch the dough transform into a beautifully crusty loaf. Scoring the bread before baking is not only about aesthetics; it also serves a practical purpose in allowing the bread to expand properly in the oven.
When you score sourdough, you create an outlet for steam, which helps the bread develop a crispy crust while ensuring the interior is soft and airy. The cuts can be made in various patterns, allowing you to express your creativity. Whether you choose a simple slash or a more intricate design, your sourdough will look as good as it tastes. Here’s a straightforward recipe to get you started on your sourdough journey!
Ingredients
- 3 cups all-purpose flour
- 1 cup sourdough starter (fed and bubbly)
- 1 cup water (at room temperature)
- 1 teaspoon salt
Instructions
- Mix the Dough: In a large bowl, combine the flour and salt. Add the sourdough starter and water. Mix until a shaggy dough forms.
- Autolyse: Let the mixture rest for 30 minutes. This helps the flour absorb water and improves the dough’s structure.
- Knead the Dough: Knead the dough in the bowl or on a floured surface for about 5-10 minutes until smooth and elastic.
- First Rise: Place the dough in a lightly oiled bowl, cover with a damp cloth, and let it rise in a warm place for about 4-6 hours or until doubled in size.
- Shape and Second Rise: Gently deflate the dough, shape it into a round loaf, and place it on a floured surface. Cover and let it rise for another 1-2 hours.
- Preheat the Oven: About 30 minutes before baking, preheat your oven to 450°F (230°C) and place a Dutch oven inside.
- Score the Dough: Once the dough has risen, carefully transfer it to a parchment-lined surface and use a sharp knife or lame to score the top.
- Bake: Place the dough (with parchment) into the hot Dutch oven, cover, and bake for 30 minutes. Remove the lid and bake for an additional 15-20 minutes until golden brown.
- Cool: Let the bread cool on a wire rack before slicing.
Shaping Your Sourdough Loaf
Shaping your sourdough loaf is a delightful part of the baking process. It’s where you transform your dough into a beautiful, round or oval shape that will rise and bake into a tasty bread. The flavor of this sourdough is rich with a slightly tangy taste, perfect for sandwiches or simply enjoyed with butter. Plus, the process is quite straightforward, making it accessible for bakers of all levels.
To shape your loaf effectively, start by gently handling the dough after it has risen. You want to preserve the air bubbles while creating surface tension. This tension helps the loaf maintain its shape during the final rise and baking. With a little practice, you’ll soon find your own rhythm and method that works best for you.
Ingredients
- 500g bread flour
- 350g water
- 100g active sourdough starter
- 10g salt
Instructions
- Mix the Ingredients: In a large bowl, combine the flour and salt. In a separate bowl, mix the water with the sourdough starter. Gradually add the wet mixture to the dry, stirring until a shaggy dough forms.
- Autolyse: Let the dough rest for about 30 minutes to allow the flour to absorb the water.
- Knead: After the autolyse, knead the dough on a floured surface for about 10 minutes until it becomes smooth and elastic.
- First Rise: Place the dough in a lightly greased bowl, cover with a damp cloth, and let it rise at room temperature for 4-6 hours, or until doubled in size.
- Shape the Loaf: Once the dough has risen, gently turn it out onto a floured surface. Shape it into a round or oval loaf by folding the edges into the center, then flip it over and use your hands to create tension on the surface.
- Second Rise: Place the shaped loaf into a proofing basket, seam side up. Cover it and let it rise for another 2-3 hours, or overnight in the fridge.
- Bake: Preheat your oven to 450°F (230°C). Once heated, carefully transfer the loaf to a baking stone or a sheet pan. Bake for 30-40 minutes until golden brown. Enjoy your freshly baked sourdough!
Baking Sourdough in a Dutch Oven

Baking sourdough in a Dutch oven is a delightful way to achieve that crusty exterior and soft, airy interior that makes sourdough so special. The heavy pot mimics the conditions of a professional steam oven, trapping moisture and allowing the bread to rise beautifully. With a few simple steps, you can create a loaf that not only tastes amazing but also fills your kitchen with the warm, comforting aroma of freshly baked bread.
This method is straightforward and suitable for both beginners and seasoned bakers. Using a Dutch oven allows for even heat distribution and creates the perfect environment for your dough to develop that signature crust. Plus, the process is quite forgiving, making it an enjoyable baking adventure.
Ingredients
- 3 cups all-purpose flour
- 1 1/2 cups warm water
- 1/2 cup active sourdough starter
- 1 teaspoon salt
- 1 tablespoon sugar (optional)
Instructions
- Mix the Dough: In a large bowl, combine the flour, warm water, sourdough starter, and salt. Mix until a shaggy dough forms. If using, stir in the sugar for a slight sweetness.
- First Rise: Cover the bowl with a damp cloth and let it sit at room temperature for about 8-12 hours, or until the dough has doubled in size.
- Shape the Dough: After the first rise, turn the dough onto a floured surface and gently shape it into a round loaf. Let it rest for 30 minutes.
- Preheat the Dutch Oven: About 30 minutes before baking, place your Dutch oven (with the lid) in the oven and preheat to 450°F (230°C).
- Bake the Bread: Carefully remove the hot Dutch oven, place the dough inside, cover with the lid, and bake for 30 minutes. Remove the lid and bake for an additional 15-20 minutes, or until the crust is golden brown.
- Cool: Once baked, transfer the bread to a wire rack to cool completely before slicing. Enjoy your homemade sourdough!
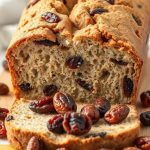
Flavor Variations in Sourdough
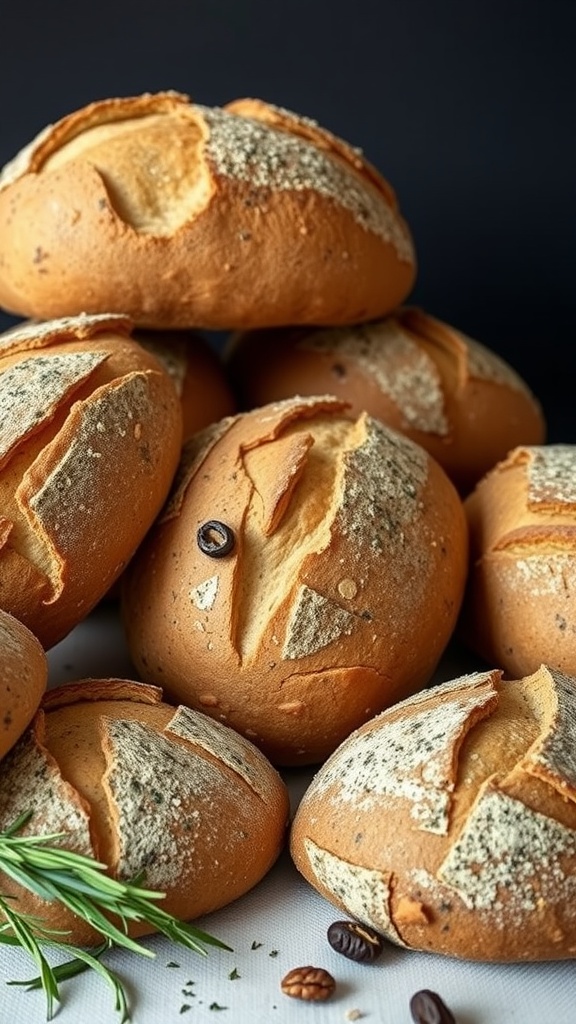
Sourdough bread is a delight not only for its chewy crust and airy texture but also for its potential to be customized with various flavors. The tangy taste from the fermentation process provides a perfect base for incorporating different ingredients that can elevate your loaf to new heights. Whether you prefer herbs, spices, or even sweet additions, there’s a flavor variation for everyone.
Experimenting with different flavors can turn a simple sourdough loaf into a signature bread that reflects your personal taste. Adding ingredients like rosemary, olives, or even nuts can create a savory experience. On the sweeter side, incorporating honey, dried fruits, or chocolate chips can satisfy your cravings. With just a few tweaks, making sourdough with unique flavors is an enjoyable journey.
Ingredients
- 4 cups bread flour
- 1 1/2 cups warm water
- 1 cup sourdough starter (active and bubbly)
- 2 teaspoons salt
- 1/4 cup chopped fresh rosemary (for a herby flavor)
- 1/2 cup chopped olives (for a Mediterranean twist)
- 1/2 cup dried cranberries (for a sweet touch)
- 1/4 cup chopped walnuts (for added crunch)
Instructions
- Mix the Dough: In a large bowl, combine the bread flour and salt. In a separate bowl, mix the warm water with the sourdough starter. Gradually add the wet ingredients to the dry ingredients until a shaggy dough forms.
- Incorporate Flavors: Once the dough starts to come together, add your chosen flavor additions (like rosemary, olives, or cranberries) and knead gently until evenly distributed.
- First Rise: Cover the bowl with a damp cloth and let it rise in a warm spot for 4-8 hours, or until it has doubled in size.
- Shape the Loaf: Turn the dough onto a floured surface and shape it into a round loaf. Let it rest for 30 minutes.
- Second Rise: Place the loaf on a parchment-lined baking sheet, cover it, and let it rise for another 1-2 hours until puffy.
- Bake: Preheat your oven to 450°F (230°C). Slash the top of the loaf for ventilation and bake for 30-35 minutes until golden brown. Let cool before slicing.
Cooling Your Sourdough Bread
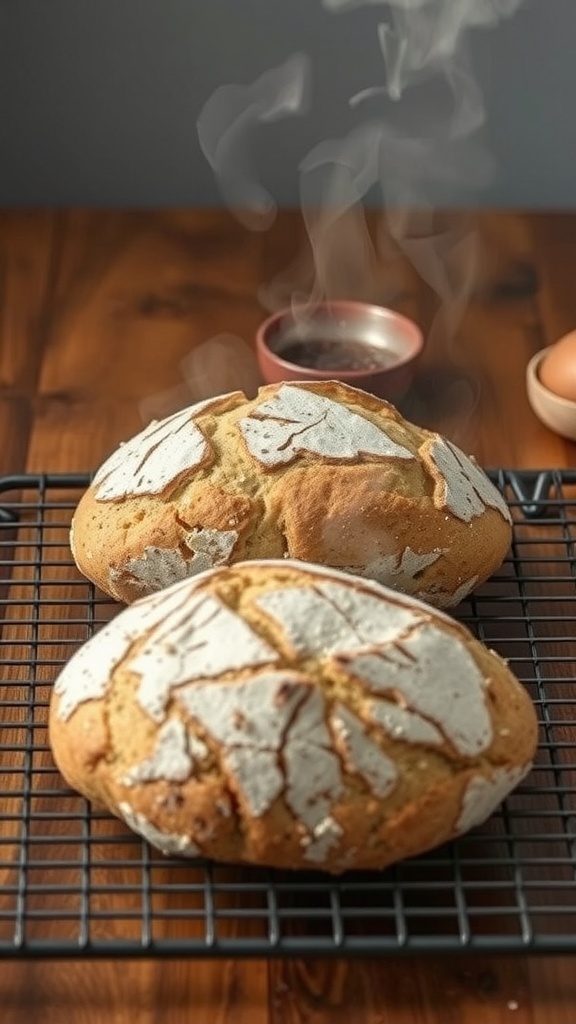
After that long wait for your sourdough bread to bake, it’s important to give it the right cooling treatment. Cooling is not just about letting the bread sit; it’s about enhancing the flavor and texture. When sourdough cools, the steam inside escapes, allowing the crust to crisp up while the crumb remains soft and airy. The waiting game may be tough, but it is essential to avoid a gummy interior.
To cool your sourdough properly, place your loaves on a wire rack. This allows air to circulate around them, ensuring even cooling. Aim for at least an hour before slicing, if you can resist! For those eager to enjoy a warm slice, just know that the flavor will deepen and the texture will improve as it cools. Now, let’s dive into making your own sourdough bread!
Ingredients
- 500g bread flour
- 350g water, room temperature
- 100g active sourdough starter
- 10g salt
Instructions
- Mix the Dough: In a large bowl, combine the bread flour and water. Stir until there are no dry bits left. Cover and let it rest for about 30 minutes.
- Add Starter and Salt: After the resting period, add the active sourdough starter and salt. Mix until fully incorporated.
- Bulk Fermentation: Cover the bowl and let the dough rise at room temperature for 4-6 hours, stretching and folding it every 30 minutes during the first two hours.
- Shape the Loaf: Once fermented, gently turn the dough onto a floured surface. Shape it into a round loaf and let it rest for 30 minutes.
- Final Shaping and Proofing: Shape the loaf again and place it into a floured proofing basket. Cover and let it rise for another 1-2 hours.
- Bake: Preheat your oven to 450°F (230°C) with a Dutch oven inside. Once hot, carefully place the loaf into the Dutch oven, cover, and bake for 30 minutes. Remove the lid and bake for an additional 15-20 minutes until golden brown.
- Cool: Transfer the bread to a wire rack and cool for at least one hour before slicing.
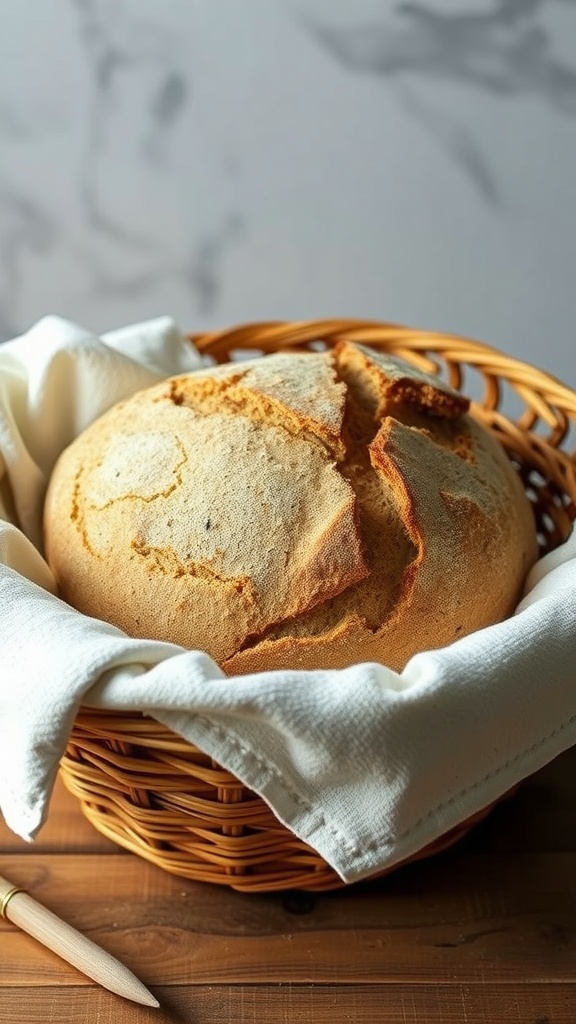
Storing Sourdough Bread Correctly
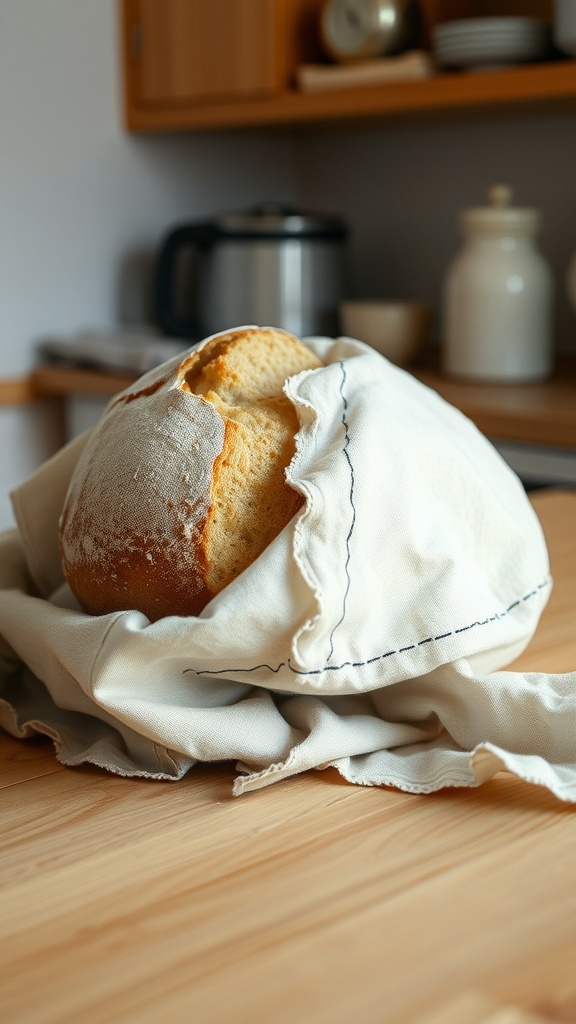
Sourdough bread is loved for its tangy flavor and chewy texture. The crust is crispy, while the interior is soft and airy, making it a delightful addition to any meal. While making sourdough may require a bit of patience, the results are definitely worth the effort.
To keep your freshly baked sourdough bread tasting its best, proper storage is key. Avoid plastic bags, as they can make the crust soggy. Instead, opt for a clean kitchen towel or a paper bag. This method allows the bread to breathe while still maintaining its crusty exterior. For longer storage, consider slicing the bread and freezing individual pieces, which can be toasted right from the freezer.
Ingredients
- 3 1/4 cups all-purpose flour
- 1 1/2 cups warm water
- 1/2 cup sourdough starter, active and bubbly
- 1 tablespoon salt
Instructions
- Mix the Dough: In a large bowl, combine the flour and salt. In another bowl, mix the warm water with the sourdough starter until well combined. Gradually add the wet ingredients to the dry, stirring until a shaggy dough forms.
- Autolyse: Let the dough rest for 30 minutes. This allows the flour to absorb the water and helps develop gluten.
- Knead: Turn the dough onto a floured surface and knead for about 10 minutes until smooth. Place the dough in a greased bowl, cover, and let it rise for about 4-6 hours until doubled in size.
- Shape: Turn the dough out onto a floured surface, shape it into a round loaf, and let it rest for 30 minutes. Then, shape it again and place it in a floured proofing basket for another 2 hours.
- Bake: Preheat the oven to 450°F (232°C). Place a Dutch oven inside to heat. Once hot, carefully transfer the dough into the pot, cover, and bake for 30 minutes. Remove the lid and bake for an additional 15-20 minutes until golden brown.
Sourdough Bread Toasting Techniques
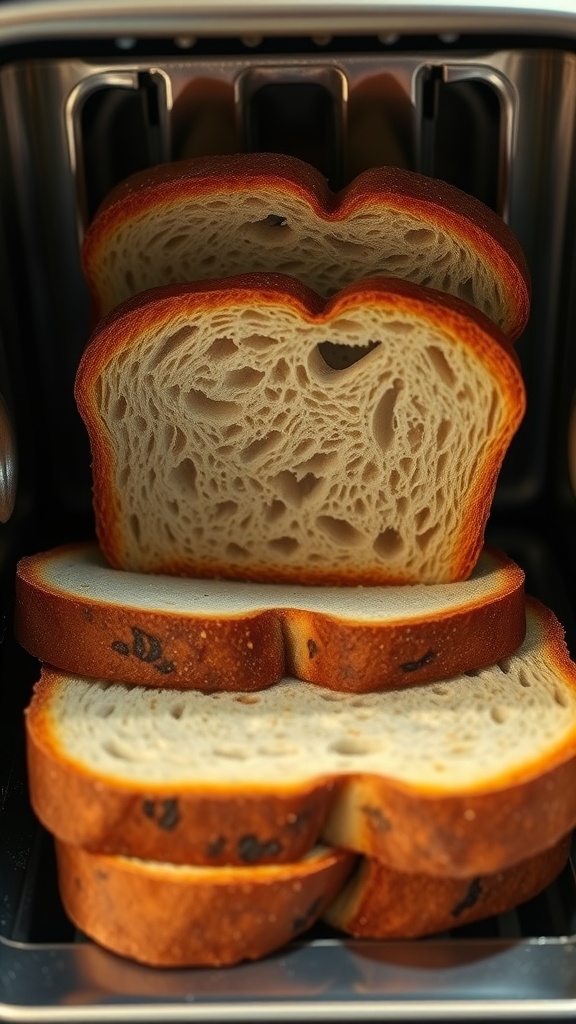
Sourdough bread is not just a delicious staple; it’s a canvas for endless flavor combinations. With its tangy taste and crispy crust, toasted sourdough brings out the best in both sweet and savory toppings. Plus, it’s relatively simple to make at home, allowing you to enjoy fresh bread straight from your oven.
When toasting sourdough, the key is to achieve that perfect golden brown color while preserving its chewy texture. Whether you’re preparing breakfast, brunch, or a snack, mastering the toasting technique can elevate your meal.
Ingredients
- 1 loaf of sourdough bread, sliced
- 1 tablespoon olive oil or melted butter (optional)
- Toppings of your choice (e.g., avocado, cheese, spreads)
Instructions
- Preheat your toaster or oven to the desired temperature.
- If you like, brush each slice lightly with olive oil or melted butter for added flavor.
- Place the slices in the toaster or on a baking sheet if using an oven.
- Toast until golden brown, about 3-5 minutes in a toaster or 6-8 minutes in the oven, keeping an eye to prevent burning.
- Remove and top with your favorite ingredients. Serve warm and enjoy!
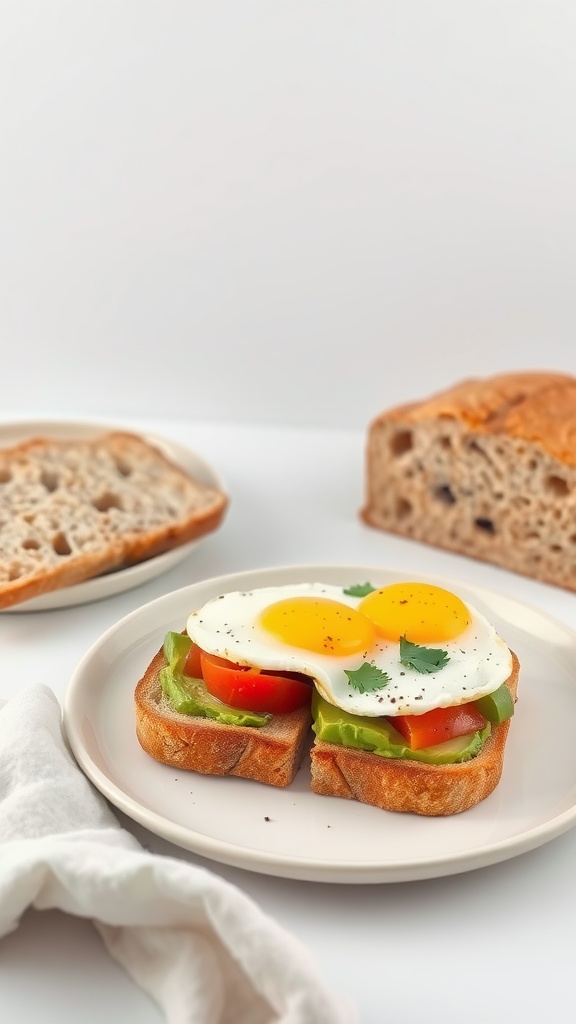
Pairing Sourdough with Spreads

Sourdough bread is not just a kitchen staple; it’s a canvas for flavor. Its tangy taste and chewy texture make it a delightful base for various spreads, whether savory or sweet. The rustic crust and airy interior enhance whatever you choose to top it with, making each bite an experience.
From creamy cheeses to fruity jams, the combinations are endless. You can enjoy it toasted with butter or slathered with your favorite spread. Pairing sourdough with spreads is simple and allows you to get creative in the kitchen.
Ingredients
- 1 loaf of sourdough bread
- 4 tablespoons unsalted butter, softened
- 1 cup cream cheese, softened
- 1/2 cup fruit jam (like strawberry or raspberry)
- 1/2 cup fruit preserves (like blueberry or grape)
- 1/2 cup sliced cheese (like cheddar or Swiss)
Instructions
- Prepare the Bread: Slice the sourdough loaf into even pieces. You’ll want about half an inch thick for the ideal spread.
- Spread the Butter: Take a piece of sourdough and spread a generous amount of softened butter on it.
- Add the Cheese: Place a slice of cheese on top of the buttered bread for a rich, creamy addition.
- Top with Jam or Preserves: For a sweet touch, add a spoonful of your favorite jam or preserves on another slice of bread. Mix and match flavors for a fun tasting experience.
- Serve: Arrange the slices on a platter and enjoy with friends or family, making it a delightful snack or breakfast option.
Using Sourdough Discard Creatively
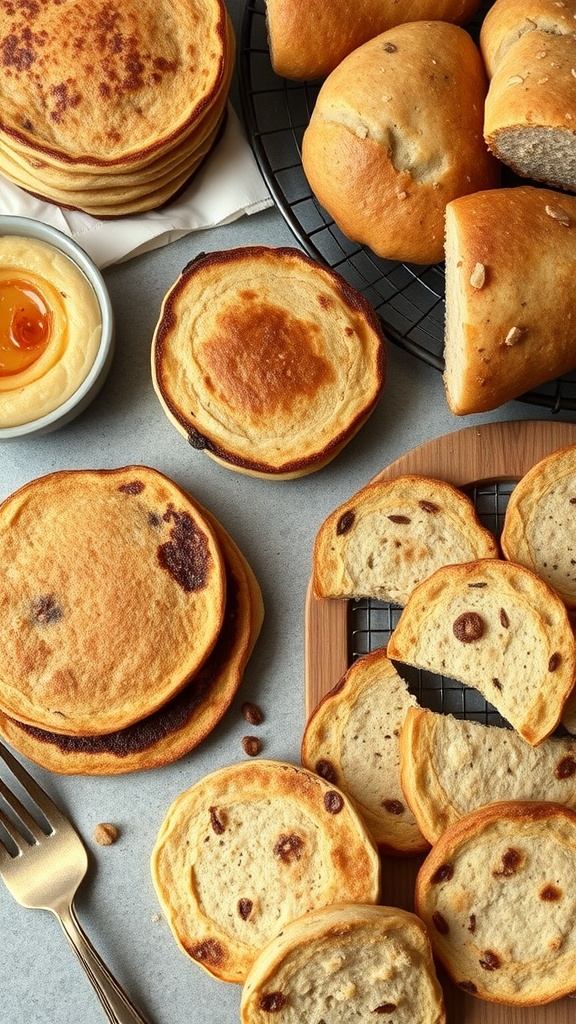
Using sourdough discard in your baking isn’t just a smart way to reduce waste; it also adds a delightful tang and unique flavor to your recipes. This sourdough discard recipe transforms simple ingredients into soft, fluffy pancakes or rolls that are perfect for breakfast or as a snack. They have a subtle sourness that pairs beautifully with sweet toppings like jam or honey.
What makes this recipe enjoyable is not only its simplicity but also how versatile it is. You can customize the flavors by adding fruits, nuts, or chocolate chips. Plus, you get to whip up a delicious dish from something that might otherwise go unused!
Ingredients
- 1 cup sourdough discard
- 1 cup all-purpose flour
- 1 tablespoon sugar
- 1 teaspoon baking powder
- 1/2 teaspoon baking soda
- 1/2 teaspoon salt
- 1 large egg
- 1/4 cup milk (or more for desired consistency)
- 2 tablespoons melted butter or oil
Instructions
- Combine Dry Ingredients: In a mixing bowl, whisk together the flour, sugar, baking powder, baking soda, and salt.
- Add Wet Ingredients: In another bowl, mix the sourdough discard, egg, milk, and melted butter. Stir until combined.
- Mix Together: Pour the wet ingredients into the dry ingredients and mix until just combined. If the batter is too thick, add a bit more milk to reach your desired consistency.
- Cook: Heat a non-stick skillet over medium heat and lightly grease it. Pour 1/4 cup of batter for each pancake or roll. Cook until bubbles form on the surface, then flip and cook until golden brown on the other side.
- Serve: Enjoy warm with your favorite toppings, like syrup or fresh fruit!
Sourdough Bread in Different Cultures
Sourdough bread is not just a recipe; it’s a cultural staple in many regions around the world. The tangy flavor and chewy texture come from the wild yeast and bacteria that ferment the dough, giving it a unique taste that varies based on local ingredients and techniques. Making sourdough can be straightforward, especially with a little practice, and it’s a rewarding process that connects you to centuries of baking tradition.
In countries like France, sourdough is often a crusty baguette, while in Germany, it might be a denser rye bread. Each culture has its own twist, but the essence remains the same: a simple mix of flour, water, and salt, nurtured over time. Baking sourdough at home allows you to explore these cultural variations while adding your personal touch.
Ingredients
- 3 cups all-purpose flour
- 1 cup whole wheat flour
- 1 1/2 cups warm water
- 1 cup active sourdough starter
- 2 teaspoons salt
Instructions
- Mix the Dough: In a large bowl, combine the all-purpose flour, whole wheat flour, and salt. Add the warm water and sourdough starter. Mix until a shaggy dough forms.
- Autolyse: Let the dough rest for about 30 minutes. This allows the flour to fully hydrate and develop gluten.
- Knead: Turn the dough onto a floured surface and knead it for about 10 minutes until smooth and elastic. You can also stretch and fold the dough instead of traditional kneading.
- First Rise: Place the dough in a greased bowl, cover it with a damp cloth, and let it rise for about 4-6 hours at room temperature, or until doubled in size.
- Shape: Gently deflate the dough and shape it into a round loaf. Place it seam side down in a well-floured proofing basket.
- Second Rise: Cover the loaf and let it rise for another 1-2 hours at room temperature or in the fridge overnight for a more developed flavor.
- Bake: Preheat your oven to 450°F (232°C). Carefully transfer the loaf to a baking sheet or a preheated Dutch oven. Bake for 30-40 minutes until the crust is golden brown and the loaf sounds hollow when tapped on the bottom.
- Cool: Let the bread cool completely on a wire rack before slicing. Enjoy your homemade sourdough with butter, cheese, or just on its own!
Common Sourdough Baking Mistakes
Sourdough bread has a unique tangy flavor and a chewy, crusty texture that’s hard to resist. While it may seem like a challenging recipe, the process is quite simple once you get the hang of it. With a little patience and practice, you’ll be on your way to baking delicious loaves that are perfect for sandwiches or enjoying with butter.
However, many home bakers face common pitfalls when making sourdough. Understanding these mistakes can help you achieve better results. It’s all about mastering the dough, fermentation, and baking techniques.
Ingredients
- 3 cups all-purpose flour
- 1 cup sourdough starter, active and bubbly
- 1 1/2 teaspoons salt
- 1 1/4 cups water, room temperature
- Extra flour for dusting
Instructions
- Mix the Dough: In a large mixing bowl, combine the flour and salt. Add the active sourdough starter and water. Stir until the dough comes together.
- Autolyse: Let the mixture rest for about 30 minutes. This will help develop gluten.
- Knead: Turn the dough onto a floured surface and knead for about 8-10 minutes until smooth and elastic.
- First Rise: Place the dough in a greased bowl, cover it, and let it rise for about 4 hours at room temperature, or until it has doubled in size.
- Shape: Gently turn the dough onto a floured surface, shape it into a round loaf, and let it rest for 30 minutes.
- Second Rise: Place the dough into a proofing basket or bowl and let it rise for another 2 hours.
- Bake: Preheat your oven to 450°F (232°C). Place a Dutch oven inside to heat up. Once ready, carefully transfer the dough into the pot, cover it, and bake for 30 minutes. Remove the lid and bake for an additional 15-20 minutes until golden brown.
- Cool: Let the bread cool on a wire rack before slicing.
Sourdough Bread for Beginners
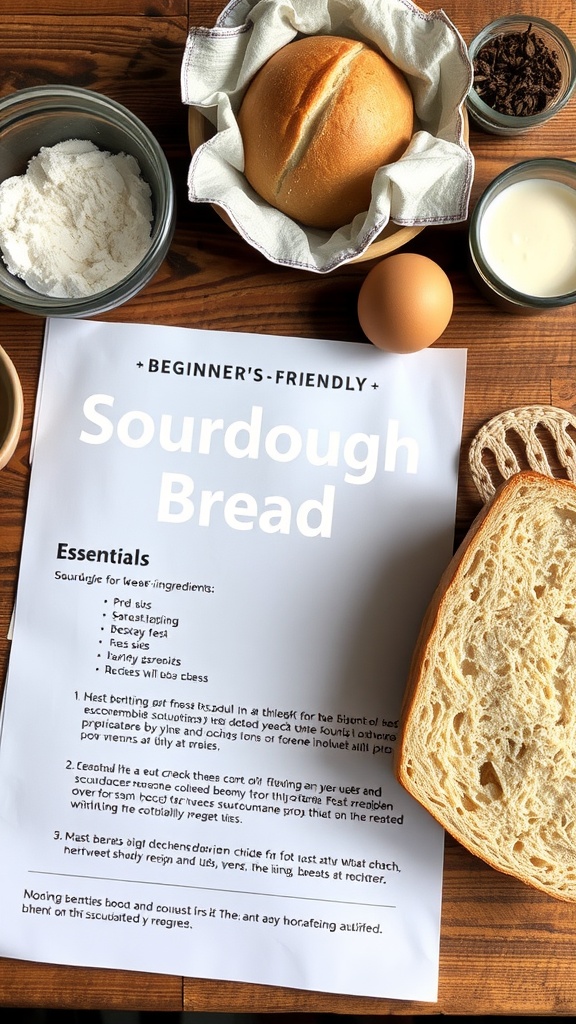
Sourdough bread is a delightful blend of tangy flavor and chewy texture, making it a favorite among home bakers. This recipe is designed for beginners, offering a simple approach to creating your own sourdough starter and bread. With just a few ingredients and some patience, you can enjoy fresh, homemade sourdough that’s perfect for sandwiches or as a side with your meals.
The key to this recipe is the natural fermentation process that gives sourdough its unique taste. It may take a bit of time, but the hands-on steps are straightforward and rewarding. Here’s how to make your own sourdough bread:
Ingredients
- 1 cup sourdough starter
- 1 1/2 cups warm water
- 4 cups bread flour
- 2 teaspoons salt
Instructions
- Combine the starter and warm water in a large bowl, mixing until it’s well blended.
- Add the flour and salt, stirring until a shaggy dough forms.
- Knead the dough on a floured surface for about 10 minutes until smooth and elastic.
- Place the dough in a lightly oiled bowl, cover it, and let it rise in a warm area for about 4-6 hours or until it doubles in size.
- Shape the dough into a round loaf and place it on a floured surface. Let it rest for another hour.
- Preheat your oven to 450°F (232°C). If you have a Dutch oven, place it inside to heat up.
- Once the dough has risen, carefully transfer it into the hot Dutch oven, cover it, and bake for 30 minutes. Then, remove the lid and bake for an additional 15-20 minutes until golden brown.
- Allow the bread to cool on a wire rack before slicing. Enjoy your homemade sourdough!
The Science Behind Sourdough
Sourdough bread is not just a treat for your taste buds; it’s a delightful blend of art and science. The unique tangy flavor comes from the natural fermentation process, where wild yeast and beneficial bacteria work together to transform simple ingredients into a delicious loaf. This process takes a bit more time compared to regular bread-making, but the deep flavors and varied textures make it worth the wait.
Making sourdough can be simple once you get the hang of it. With just flour, water, and salt, you can create a starter that will become the backbone of your bread. The joy of sourdough lies in its versatility; you can experiment with different flours and hydration levels to achieve your desired crust and crumb. Let’s dive into the recipe that brings this beautiful bread to life!
Ingredients
- 3 cups all-purpose flour
- 1 cup whole wheat flour
- 1 1/2 cups water, at room temperature
- 1 cup active sourdough starter
- 2 teaspoons salt
Instructions
- Mix the Dough: In a large bowl, combine all-purpose flour, whole wheat flour, and water. Stir until no dry bits remain. Cover and let it rest for 30 minutes.
- Add Sourdough Starter and Salt: After resting, add the active sourdough starter and salt to the dough mixture. Mix until well incorporated.
- Bulk Fermentation: Cover the bowl with a damp cloth and let it sit at room temperature for 4-6 hours, performing stretch and fold every 30 minutes for the first 2 hours.
- Shape the Dough: Once it has risen well, turn the dough onto a lightly floured surface. Shape it into a round loaf and let it rest for 30 minutes.
- Final Proof: After resting, shape the dough again and place it in a floured proofing basket. Cover and let it rise for another 2-4 hours until puffed up.
- Bake the Bread: Preheat your oven to 450°F (230°C) with a Dutch oven inside. Once heated, carefully place the dough into the Dutch oven, cover, and bake for 30 minutes. Remove the lid and bake for another 15-20 minutes until golden brown.
- Cool and Enjoy: Let the bread cool on a wire rack for at least an hour before slicing. Enjoy the delightful aromas and flavors of your homemade sourdough!
Enjoying Sourdough Bread with Recipes
Sourdough bread is a delightful blend of tangy flavor and chewy texture, making it a favorite among many. With its crusty exterior and soft, airy interior, it’s not only delicious but also surprisingly simple to make. The process allows the natural fermentation to develop unique flavors, giving every loaf its own character.
This versatile bread pairs excellently with various toppings, whether you enjoy it toasted with butter or as a base for open-faced sandwiches. The possibilities are endless!
Ingredients
- 1 cup sourdough starter
- 1 1/2 cups warm water
- 4 cups bread flour
- 1 tablespoon salt
- 1 tablespoon olive oil
Instructions
- Mix the Dough: In a large bowl, combine the sourdough starter and warm water. Stir in the bread flour until a shaggy dough forms.
- Knead the Dough: Turn the dough onto a floured surface and knead for about 10 minutes until smooth. Add the salt and olive oil towards the end of kneading.
- First Rise: Place the dough in a lightly greased bowl, cover it with a damp cloth, and let it rise at room temperature for 4-6 hours, or until doubled in size.
- Shape the Loaf: Gently deflate the dough and shape it into a round loaf. Place it in a proofing basket or a bowl lined with a floured cloth.
- Second Rise: Cover the dough again and let it rise for another 1-2 hours.
- Bake the Bread: Preheat your oven to 450°F (230°C). Place a Dutch oven inside to heat. Carefully transfer the dough to the hot Dutch oven, cover, and bake for 30 minutes. Remove the lid and bake for an additional 15-20 minutes until golden brown.
- Cool: Let the bread cool on a wire rack before slicing.
Sourdough Bread as a Culinary Experience

Sourdough bread offers a unique blend of tangy flavor and chewy texture that many bread lovers crave. Its distinct taste comes from the natural fermentation process, which adds depth and complexity to each bite. While the method may seem daunting, making sourdough at home is quite accessible, especially with a little patience and practice.
The joy of baking sourdough lies not only in its deliciousness but also in the experience itself. Kneading the dough and watching it rise can be incredibly rewarding. Plus, there’s nothing quite like the aroma of freshly baked sourdough filling your kitchen. Gather your ingredients, and let’s dive into this simple yet delightful recipe!
Ingredients
- 3 cups all-purpose flour
- 1 cup whole wheat flour
- 1 1/2 cups water, lukewarm
- 1 cup active sourdough starter
- 1 1/2 teaspoons salt
Instructions
- Mix the Dough: In a large bowl, combine the all-purpose flour, whole wheat flour, and salt. In a separate bowl, mix the lukewarm water with the active sourdough starter until well blended. Gradually add the wet ingredients to the dry ingredients, stirring until combined.
- Knead and Rest: Turn the dough out onto a floured surface and knead for about 10 minutes until smooth. Place the dough in a lightly greased bowl, cover with a damp cloth, and let it rest for 4-6 hours, or until it doubles in size.
- Shape the Dough: After resting, gently deflate the dough and turn it out onto a floured surface. Shape it into a round loaf by folding the edges toward the center and creating tension on the surface.
- Final Rise: Transfer the shaped dough to a well-floured proofing basket or bowl. Cover it with a cloth and let it rise for another 2-3 hours.
- Bake: Preheat your oven to 450°F (230°C). Place a Dutch oven inside to heat. Once hot, carefully remove the Dutch oven, place the dough inside (you can score the top for a decorative touch), cover, and bake for 30 minutes. Remove the lid and bake for an additional 15-20 minutes until golden brown.
- Cool and Enjoy: Let the bread cool on a wire rack before slicing. Enjoy it fresh, or use it to make delicious sandwiches!